10
STEP 1 - WALL PREPARATION
1. The following slides explain how to identify and mark the drilling points on the wall. ad notam provides different mounting
combinations. Verify your own
shop drawing page 6 (Wall View Legend)
to identify your wall mounting option. The
column Art. Description provides the description of the selected items necessary for your wall preparation.
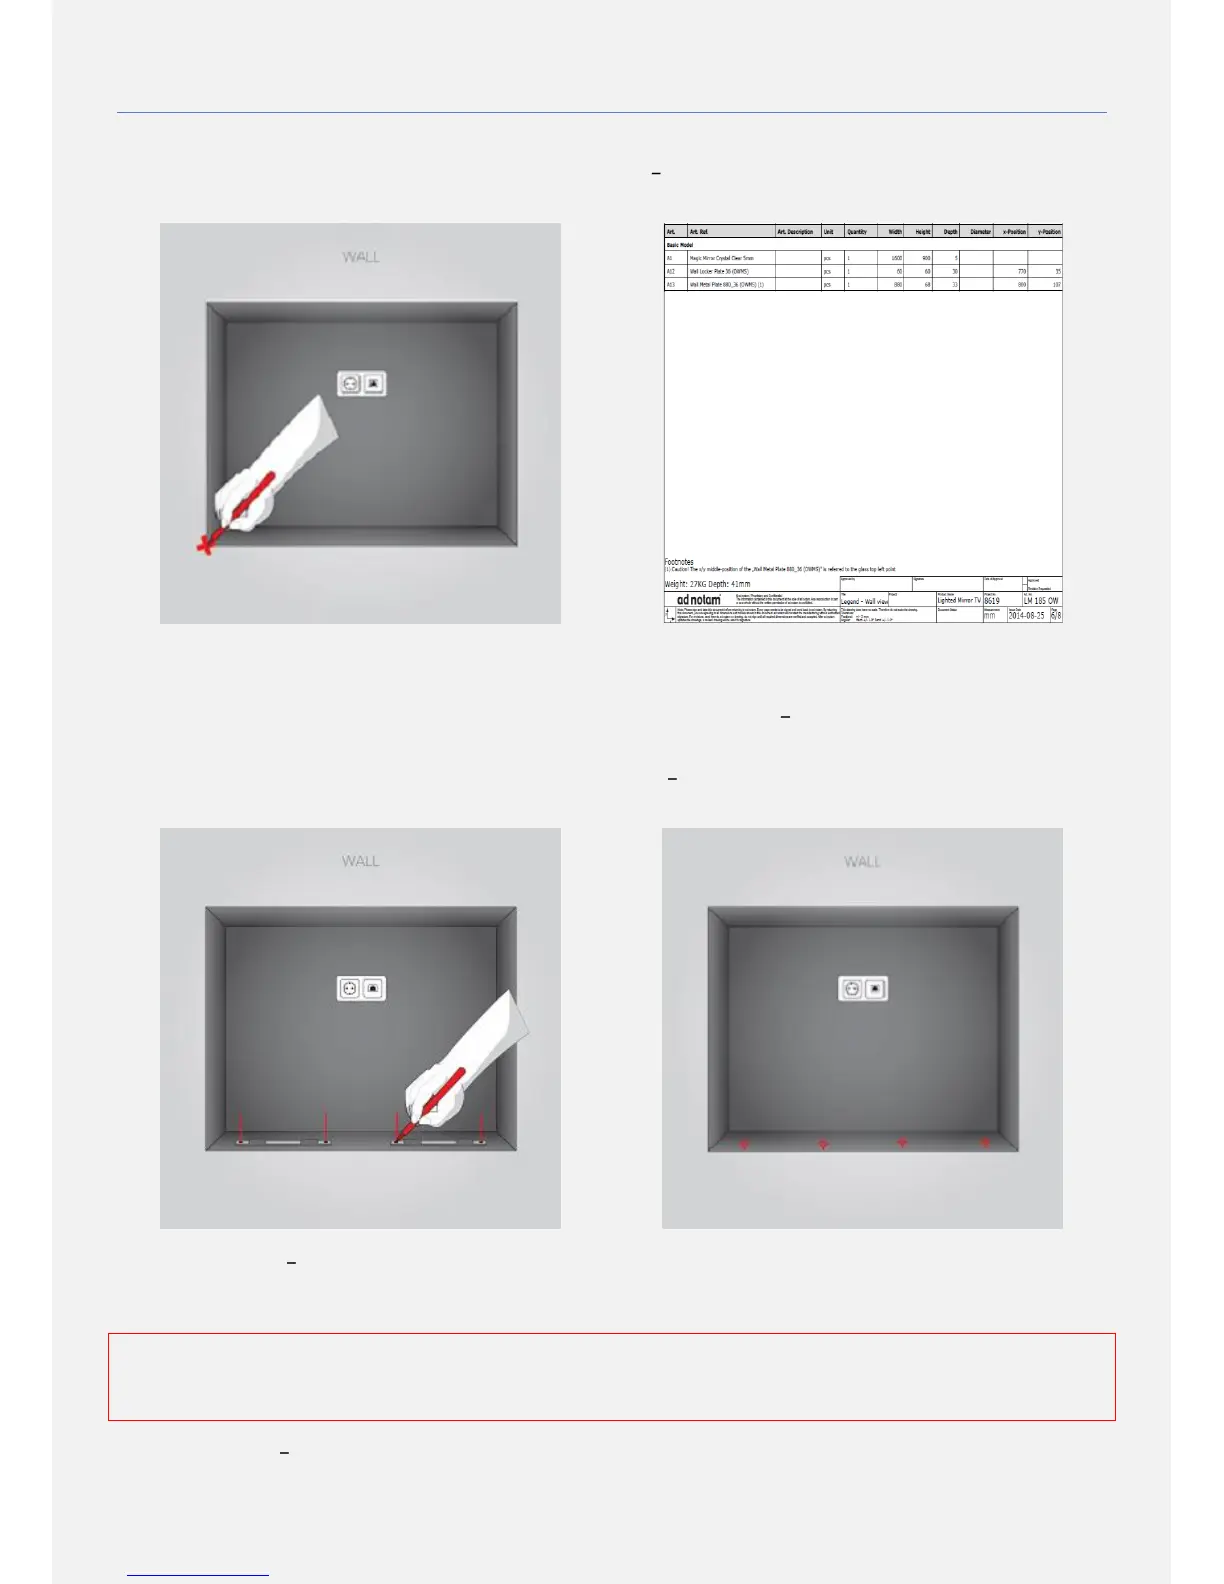
2. Reference point. Identify your ad notam position on the wall and identify the bottom left corner of the crystal. Mark this
point with the pencil.
3. Reference point (Point 0) is used in the ad notam
shop drawing Wall View Legend (Page 6)
. The items reference
coordinates are starting from here.
4. Art. Description Verify your own configuration page 6 (Wall View Legend) to identify your mounting option. The column
provides the description of the selected items necessary for your wall preparation.
5. Art. Description IN WALL BRACKET
. (Not found? Move to the next step.)
Verify x-position and y-position. These coordinates
correspond to the IN WALL BRACKET bottom left corner. Start from the reference point moving to the right on the
horizontal axe and mark the point (y-position).
EXPERT TIPS. Before proceeding consider your crystal position. For recessed installation the drilling points must be
positioned at 30 mm from the back of your crystal (25 mm for IN WALL BRACKET 150, 15 cm width). For flush installation
consider: Glass Depth + 30 mm (25 mm for IN WALL BRACKET 150, 15 cm width). Marginal inaccuracy can be corrected
with the long slots in the IN WALL BRACKET.
6. Art. Description IN WALL BRACKET
. (Not found? Move to the next step.)
Position the IN WALL BRACKET and mark the drilling
points with a pencil. Caution: you might have more IN WALL BRACKETs. Repeat the procedure for each one of them.