4) Art. Description - HOLDING ANGLE
. (Not found? Move to the next step.)
Drive the bolts incl. spring washers (and washers) half way
into the injection nuts of both sides of the DFU casing. Secure the 2 top holding angles at the injection nuts of the DFU.
5) Art. Description - HOLDING ANGLE
. (Not found? Move to the next step.).
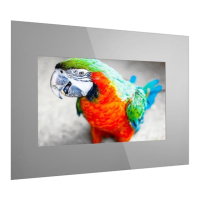
Lift your ad notam monitor and place it on the lower
HOLDING ANGLES so that the injection nuts on the bottom are aligned with the holes in the HOLDING ANGLE. The holes
in the upper HOLDING ANGLES should be aligned with the screw anchors. Marginal inaccuracy can be corrected with the
long slots in the HOLDING ANGLES. Secure the 2 top HOLDING ANGLES firmly.
EXPERT TIPS. The ad notam monitor can now be affixed with the connection plugs face up to the rear side of the crystal
surface. Clean the crystal rear side and the monitor properly before proceeding.
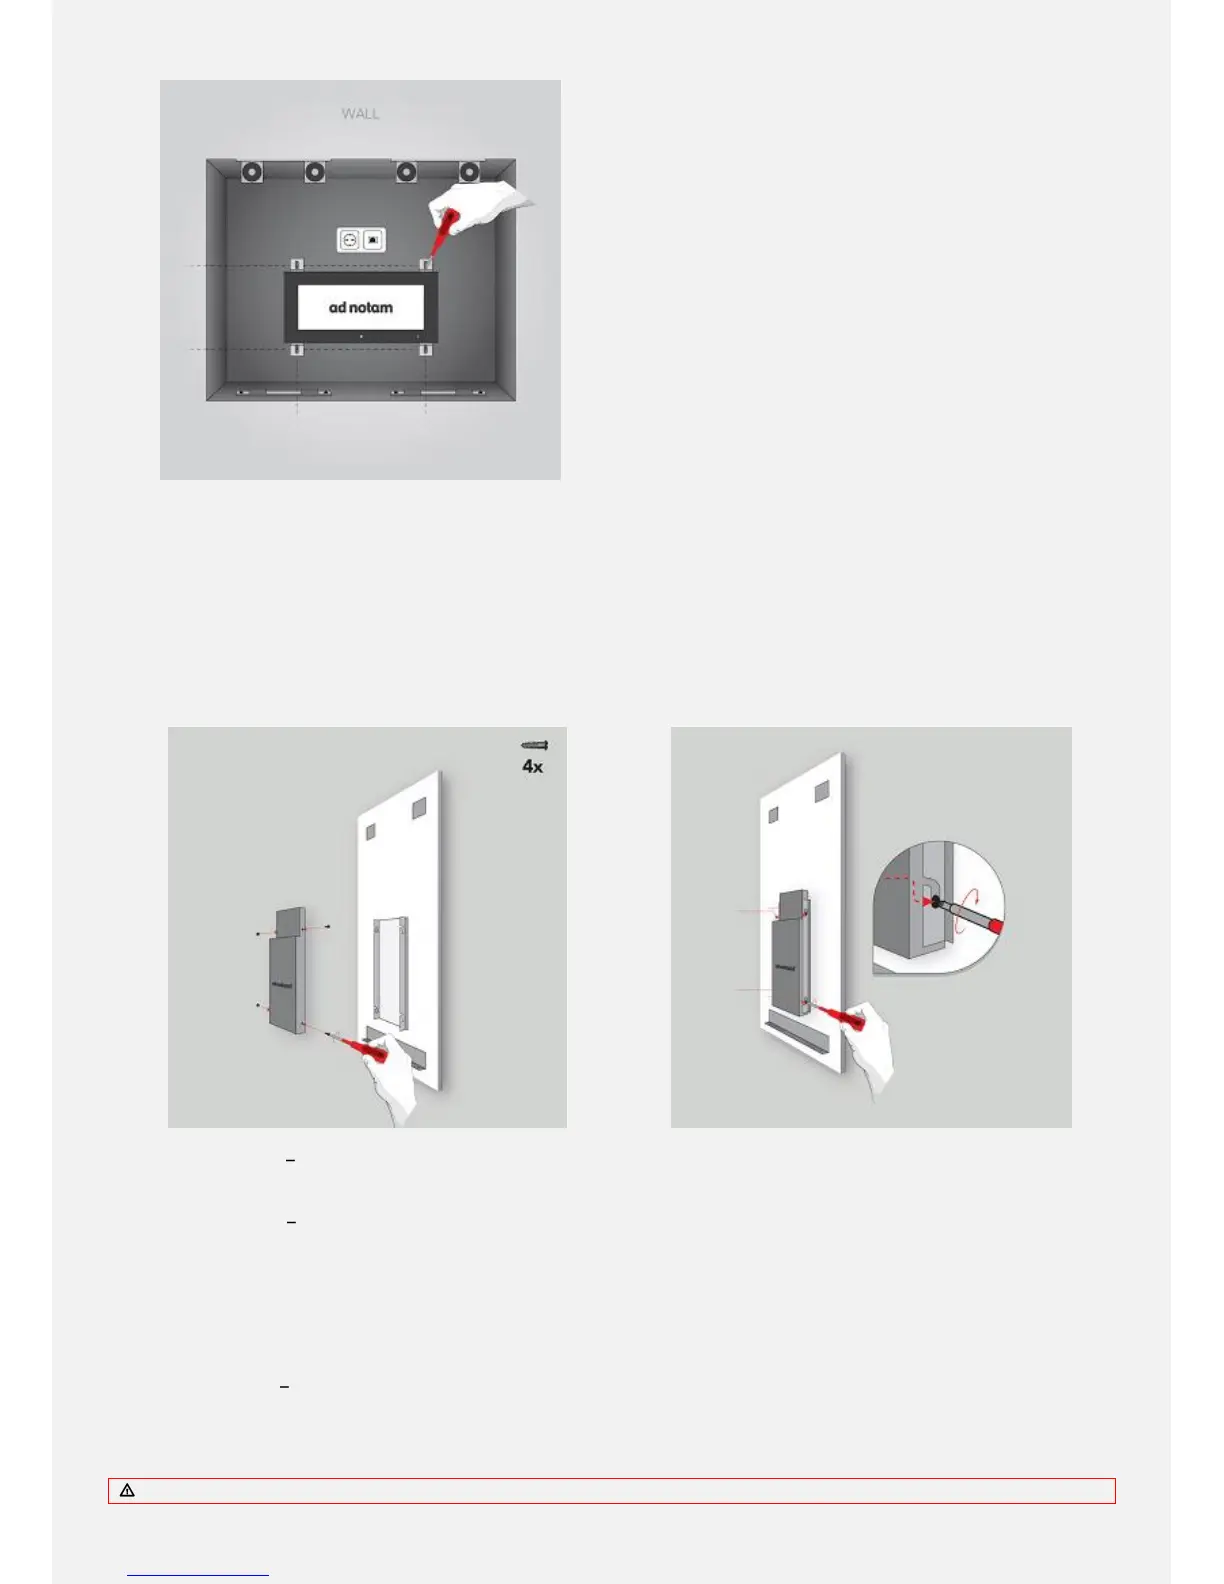
6) Art. Description MGS (Mounting Bracket)
. (Not found? Move to the next step.)
Drive the bolts incl. spring washers (and plain
washers) half way into the injection nuts of both sides of the DFU casing.
7) Art. Description MGS (Mounting Bracket)
. (Not found? Move to the next step.)
Let the monitor´s locking bolts slide into the
mounting brackets.
EXPERT TIPS. Ensure during the installation, whether the transparent image area of the glass is aligned to the monitor
active area.
EXPERT TIPS. Ensure that the in-built Monitor IR receiver is fully exposed to incoming IR signal verifying its alignment with
the transparent IR window. Any misalignment might result in disability to control your ad notam.
8) Art. Description MGS (Mounting Bracket)
. (Not found? Move to the next step.)
Secure the monitor tightening the bolts if the screen
active area is aligned to the crystal image area and there are only marginal gaps between the monitor and the mounting. If
there is a remarkable gap between the monitor and the MGS mounting bracket implicitly use the lock washers to fill the
gap before tightening the bolts.
Do not overtighten the bolts in order to avoid strains. Overtightening the bolt might affect the self-adhesive tape.