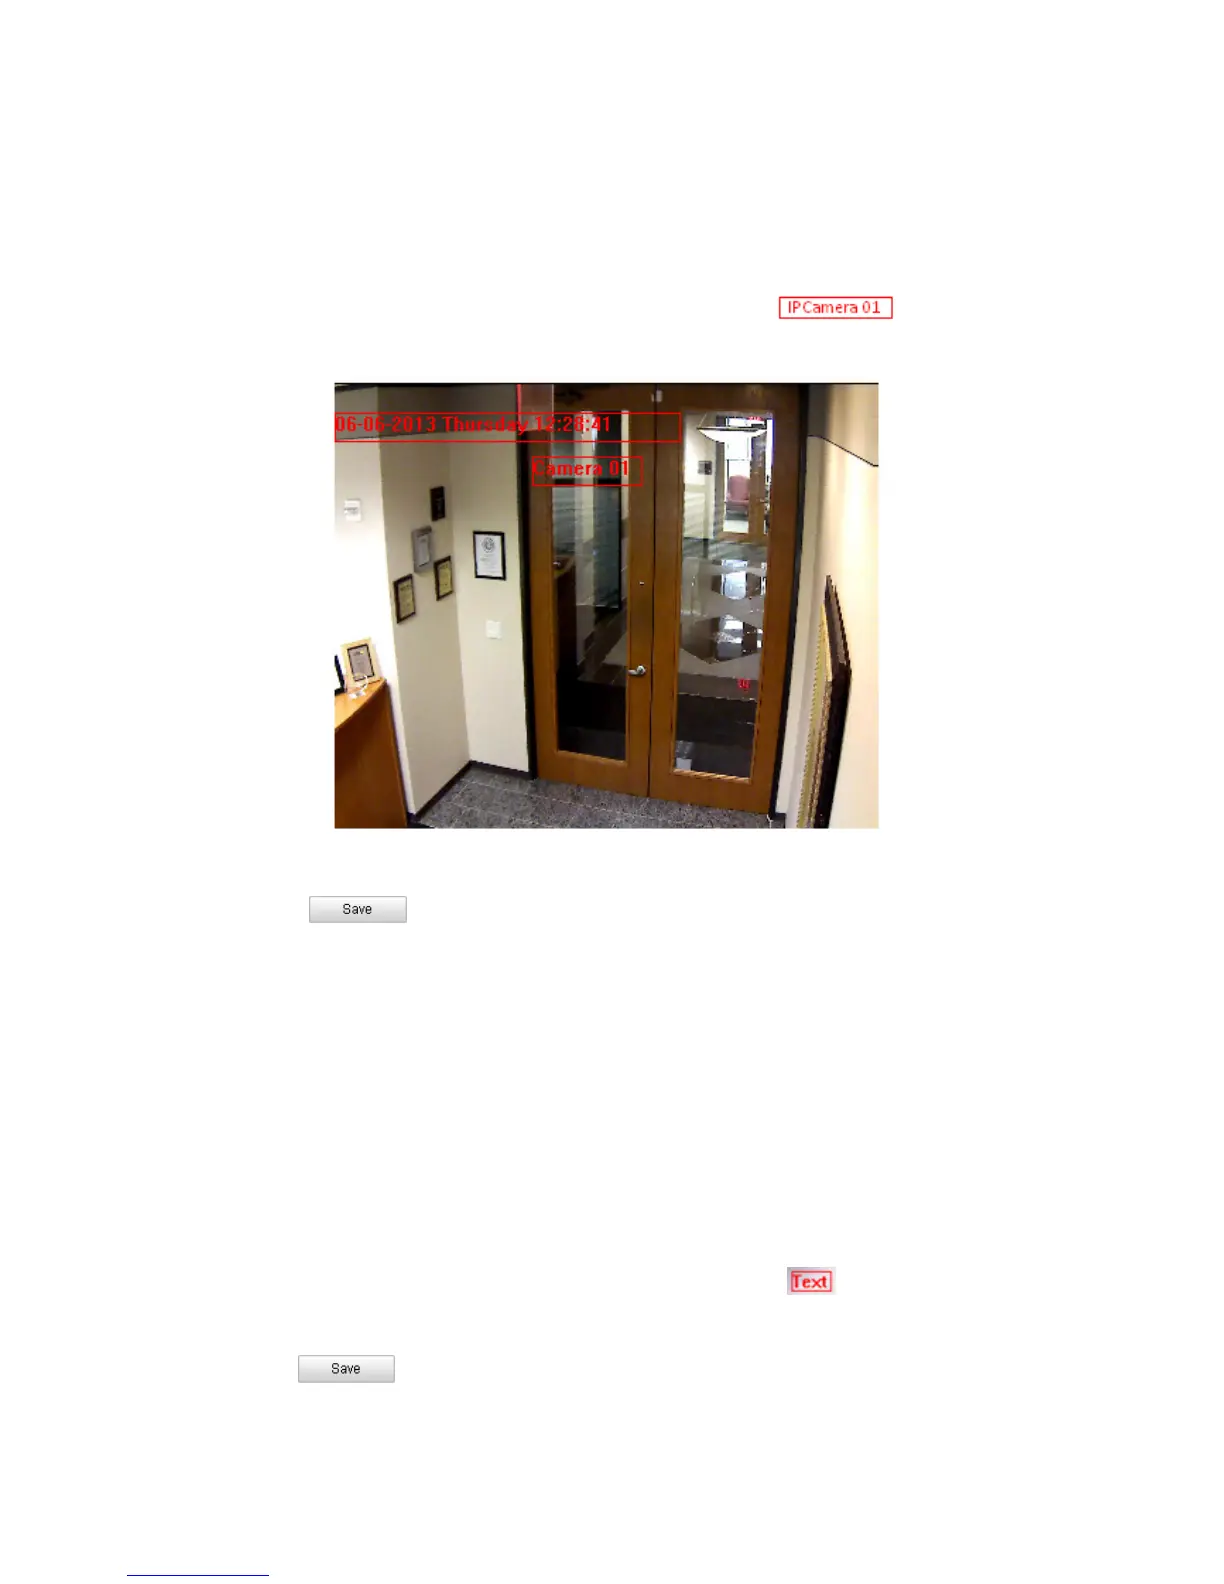
2. Check the corresponding checkbox to select the display of camera name, date or
week if required.
3. Edit the camera name in the text field of Camera Name.
4. Select from the drop-down list to set the time format, date format, display mode
and the OSD font size.
5. You can use the mouse to click and drag the text frame in the live
view window to adjust the OSD position.
Figure 5-23
Adjust OSD Location
6. Click to activate above settings.
5.5.3 Configuring Text Overlay Settings
Purpose:
You can customize the text overlay.
Steps:
1. Enter the Text Overlay Settings interface:
Configuration > Advanced Configuration > Image > Text Overlay
2. Check the checkbox in front of textbox to enable the on-screen display.
3. Input the characters in the textbox.
4. Use the mouse to click and drag the red text frame in the live view
window to adjust the text overlay position.
5. Click .
Note: There are up to 4 text overlays configurable.