79034308 B Rev. 01-21
Safety
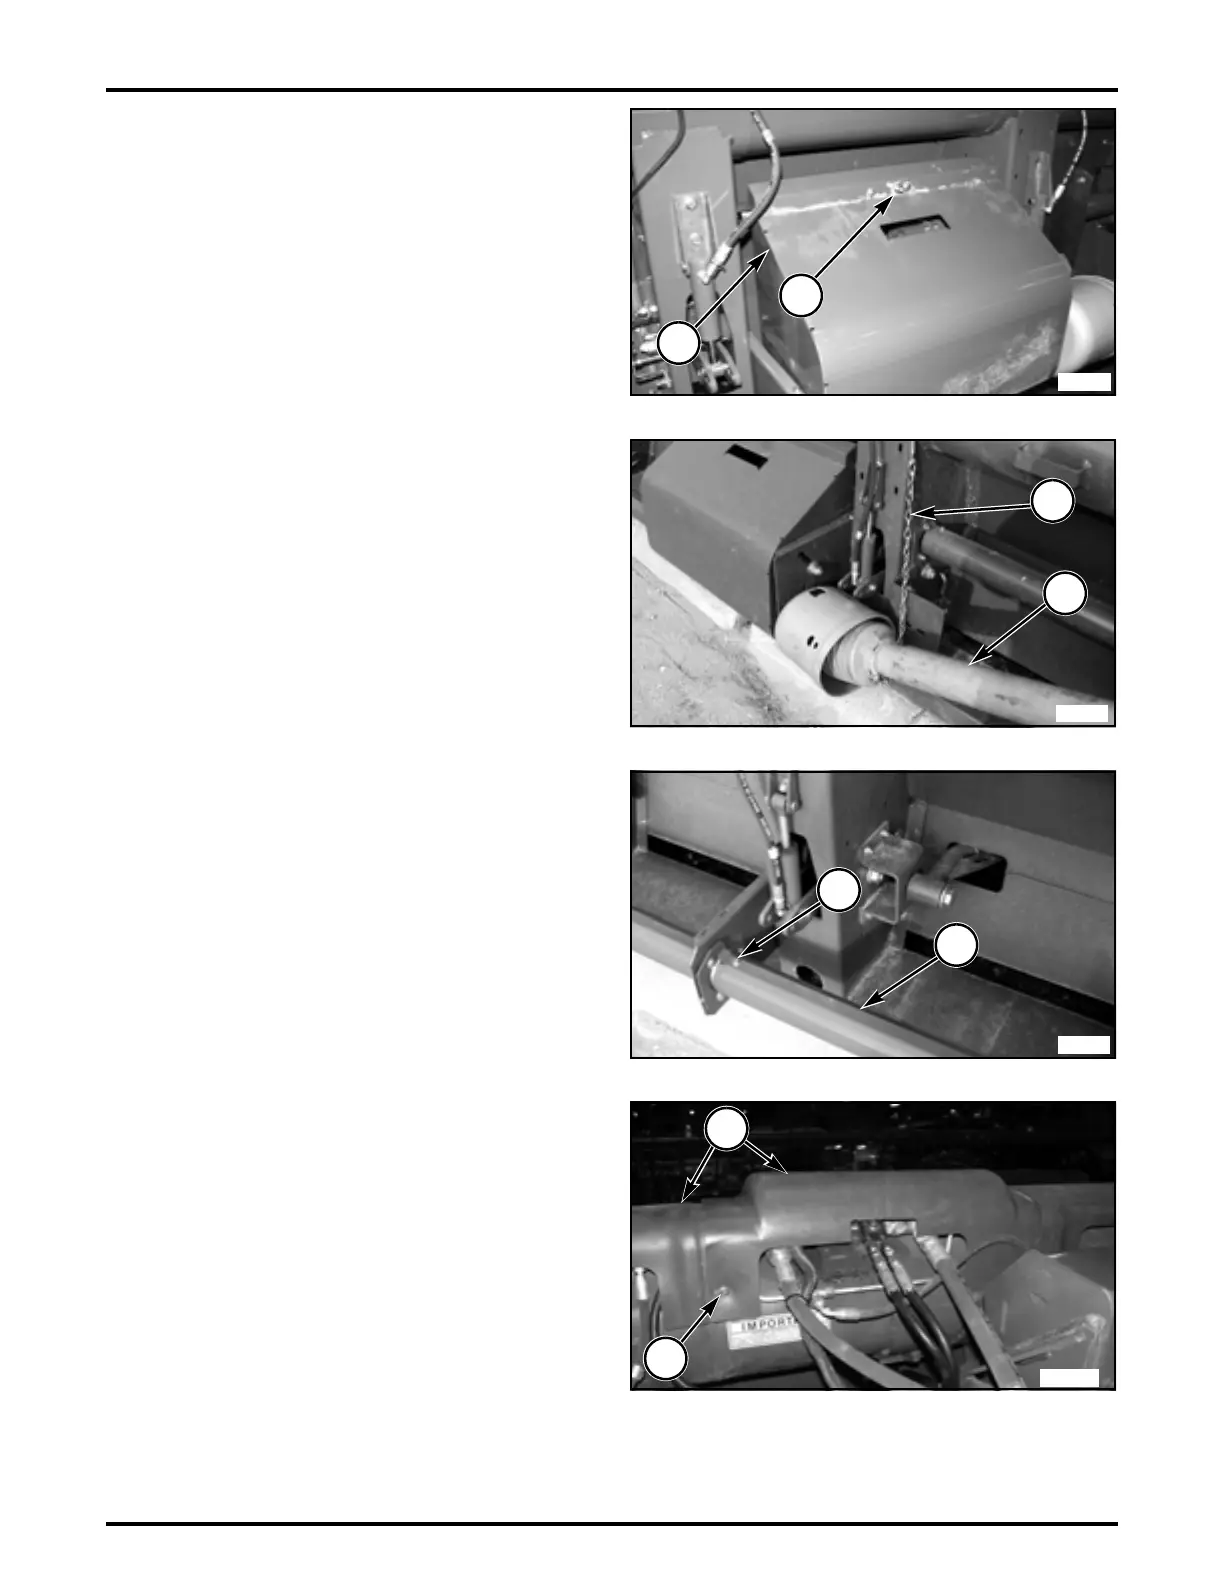
FIG. 50: To release the four drive shields (1) along the
back of the header, twist the latch handle (2) clockwise
using a wrench or a suitable tool. Pull the top of the drive
shield rearward and remove the drive shield by rotating
the drive shield up and off of the posts on the header
frame.
To install the drive shield, engage the bottom of the drive
shield onto the posts in the header frame and rotate the
latch on the drive shield into the striker (U-bolt) to secure
the drive shield.
FIG. 51: All implement drive lines (1) are shielded and
equipped with a shield anti-rotation chain (2).
To remove, service, and install the shields, refer to the
Drives division, Power Take Off Drive Shafts, Disassembly
and Assembly write up.
FIG. 52: Each drive shaft is shielded with two fixed
guards (1). The guards can be removed by removing the
four flanged screws (2).
FIG. 53: Shielding (1) along the top of the header frame
to protect the hydraulic lines and the electrical harness
can be removed by removing the flanged screws (2).
FIG. 50
FIG. 51
FIG. 52
FIG. 53
 Loading...