Installing GC Columns 2
5977B Series MSD Operation Manual 35
7 Position the column so it extends 4 to 6 mm past the end of the ferrule
(Figure 4).
8 Slide the septum up to the bottom of the nut to fix the correct column
insertion length.
9 Insert the column in the inlet.
10 Slide the nut up the column to the inlet base and finger-tighten the nut.
11 Adjust the column position so the septum is even with the bottom of the
column nut.
12 Tighten the column nut an additional 1/4 to 1/2 turn. The column should
not slide with a gentle tug.
13 Start carrier gas flow.
14 Verify flow by submerging the free end of the column in isopropanol. Look
for bubbles.
See also
For more information about installing a capillary column, refer to Optimizing
Splitless Injections on Your GC for High Performance MS Analysis, Agilent
Technologies publication number 5988-9944EN.
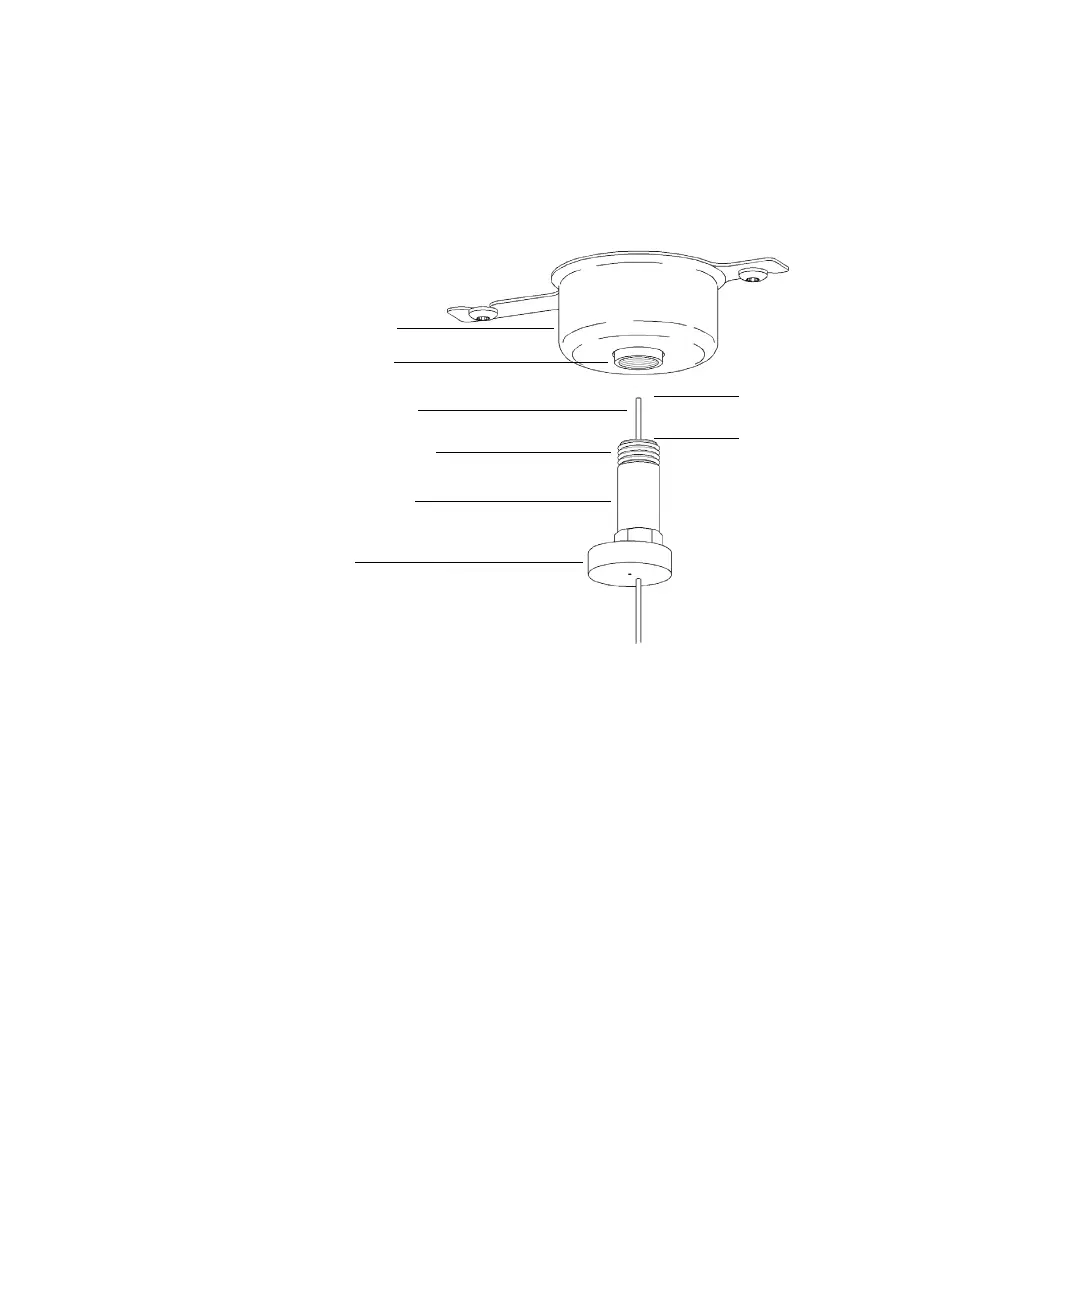
Figure 4 Installing a capillary column for a split/splitless inlet
Insulation cup
Reducing nut
Capillary column
Ferrule (inside nut)
Inlet column nut
Septum
4 to 6 mm