Page
25Air Techniques, Inc.
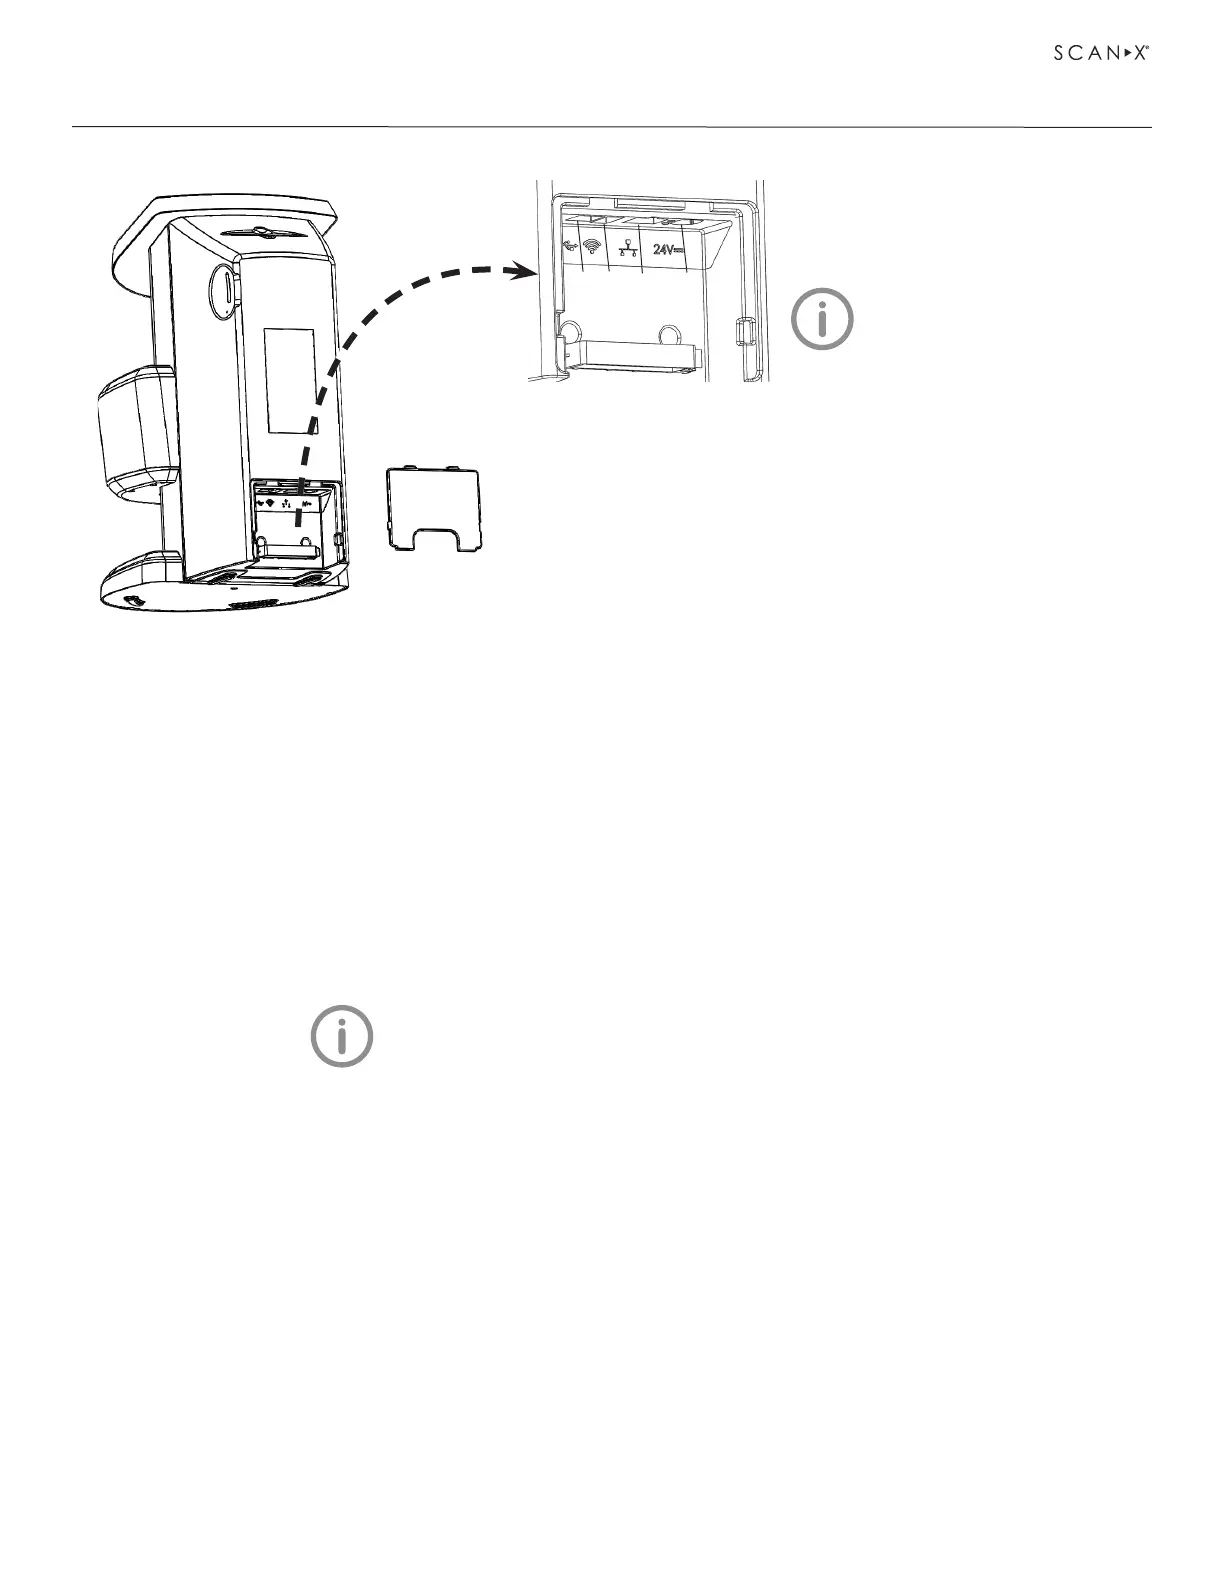
ScanX Rear Panel Connection Ports
INSTALLATION
4
3
2
1
Only one connection (USB,
Ethernet or WiFi) should be
used at any time.
1. USB Connector - Accepts USB Type B connector to connect ScanX
for operation via a single computer.
2. Wireless Dongle Connector - Accepts USB Type A connector to connect
a dongle allowing ScanX access to Wi-Fi network for operation.
3. Ethernet Network Cable Connection - Accepts RJ45 connector to
connect ScanX for operation via the Ethernet. This connection is also
used for diagnosis purposes by our Service Technician.
4. 24VDC Connection - Provides for connection of power supply unit
providing ScanX operating power.
7.6 Connect ScanX for operation.
ScanX may be connected for operation using USB, Ethernet or Wi-Fi connections. Only one connection
should be used at any time. Refer to the ScanX Rear Panel Connection Ports illustration above and perform
the connection as necessary.
Connect ScanX with USB.
Remove the cover on the rear of ScanX and connect the supplied USB cable between to the unit’s USB
connection port, item 1, and the computer. Replace and secure the rear cover making sure that it is
correctly fitted.
See8.1,installingandconguringScanX for information
on connecting to an Ethernet or Wi-Fi network.
Connect ScanX with Wi-Fi dongle.
Remove the cover on the rear of ScanX and connect the supplied Wi-Fi dongle to the unit’s wireless
dongle connection port, item 2. Replace and secure the rear cover making sure that it is correctly fitted.
Connect ScanX with Ethernet cable.
Remove the cover on the rear of ScanX and connect the supplied Ethernet cable between the unit’s Ethernet
network connection port, item 3 and the facility network connector. Replace and secure the rear cover
making sure that it is correctly fitted.