Air Techniques, Inc.
Page
42
Operation
NOTICE
Damage to the touch screen due to incorrect handling
•Onlyoperatethetouchscreenusingthetipofanger
or a stylus.
• Do not use any sharp instrument (e.g. ballpoint pen) to
operate the touch screen.
• Protect the touch screen from water.
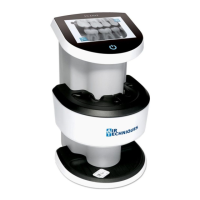
12.8 Scanning image data via the touch screen
Refer to Section 9 for details on operating the touch screen. Select the Help field for further information on
operating the unit via the touch screen. No PC connection is needed for scanning the image data when using
the touch screen.
The images are stored locally on the memory card. In order to transfer the image data to the imaging
software, the unit must be connected to a computer to read the memory card. There are two options for
scanning via the touch screen:
The touch screen scanning modes differ in that the Scan mode starts with
the patient and image information while the Rapid Scan mode scans
withoutpatientandimageinformationentered.Thespecicationofthe
patient and imaging information can be added to previously scanned
images as necessary.
Scan mode.
Before scanning the image data, the patient data and exposure settings of the image are acquired
and saved with the image data. The X-ray image is stored on the SD card together with the image
information under the name of the patient. If no patient data and exposure settings of the image are
entered, the image is saved.
1. Turn on the ScanX at the on/off switch.
2. On the touch screen, tap Scan.
3. Enter the patient data. (See note.)
4. Select the image settings and scanning mode.
5. An animation on the touch screen prompts for insertion of the imaging plate.
6. Insert the imaging plate only when the bar above the animation is green.
Rapid scan mode. (See note.)
The scanning order starts without specification of the patient and image information. The X-ray image is
stored on the SD card saved to a folder with the date and time and no additional information.
1. Turn on the ScanX at the on/off switch.
2. On the touch screen, tap on Rapid scan.
3. Select the scanning mode.
4. An animation on the touch screen prompts for insertion of the imaging plate.
5. Insert the imaging plate only when the bar above the animation is green.
Use of LCD Screen
The image that appears on the LCD during and after scanning should NEVER
be used for diagnostic purposes. Do not form a diagnosis from any image
appearing on the LCD screen.