33
Http Port: In most cases, you can leave this value as-is. However, if your Internet Service Provider blocks this
port, you may change it to another port number such as 8060.
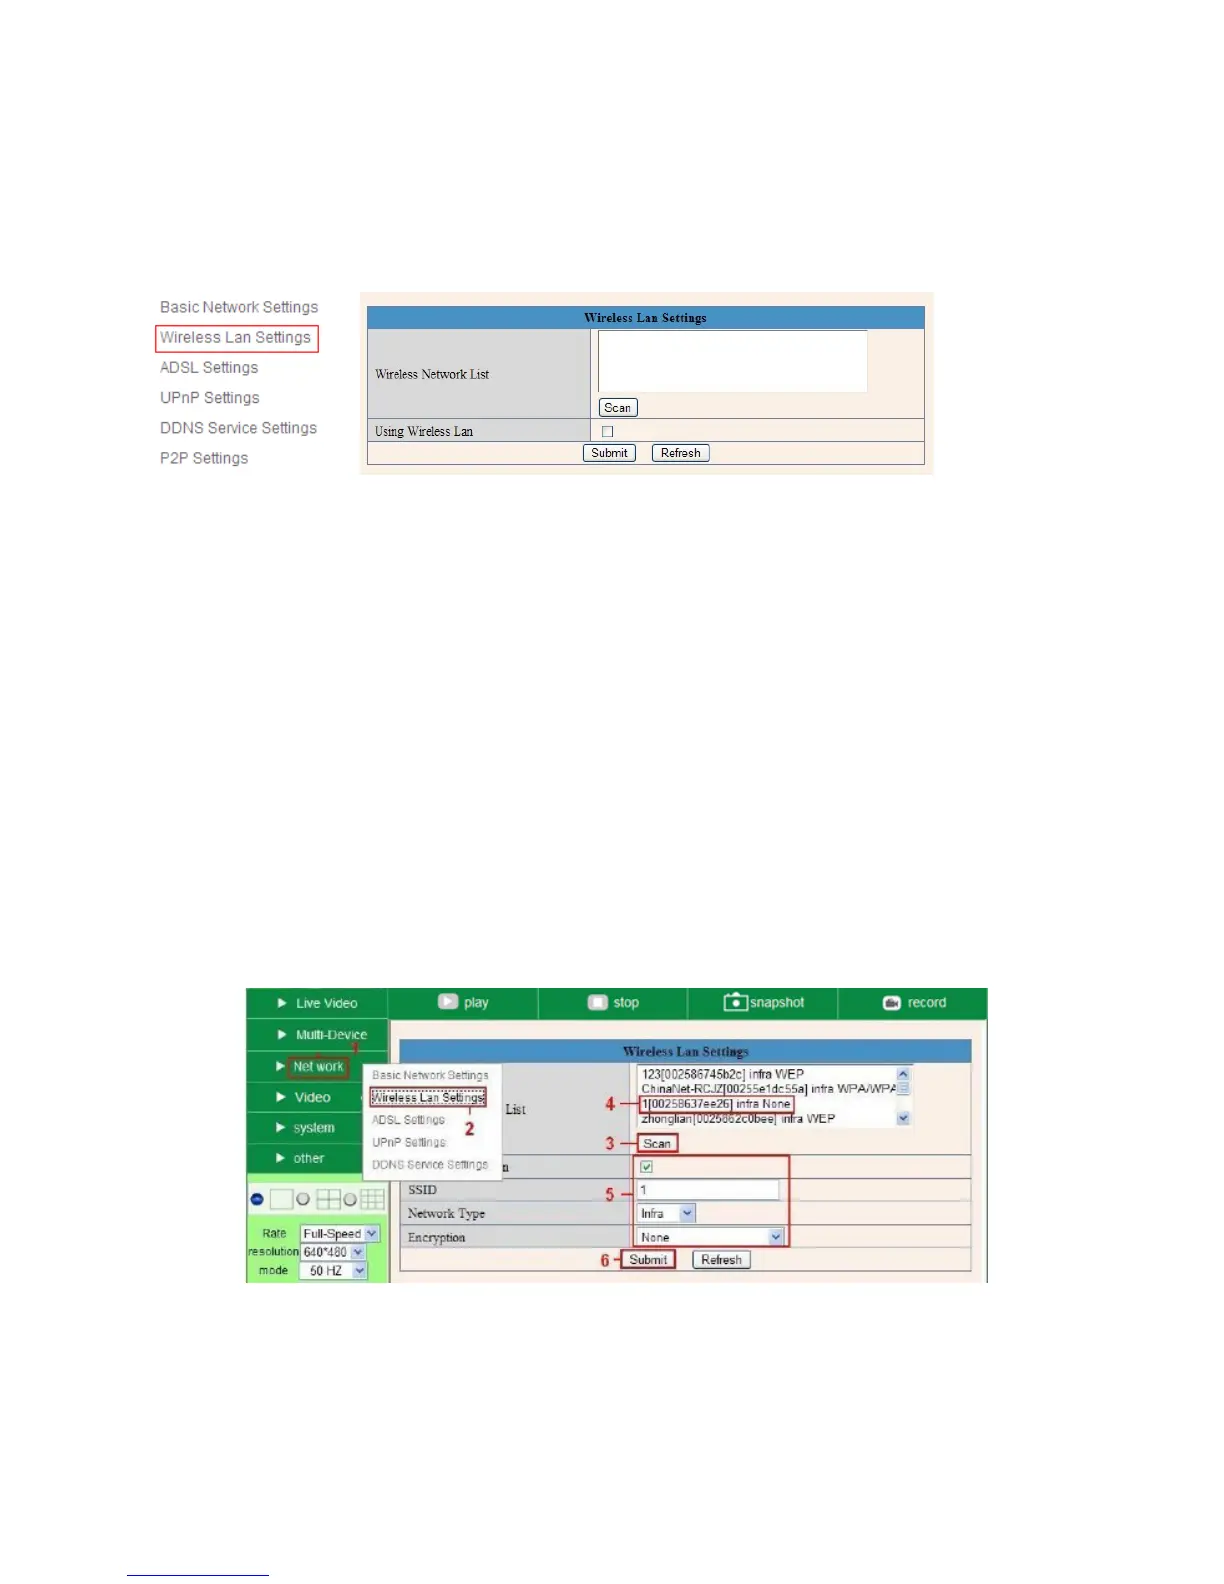
3.4 Wireless LAN Settings
Figure 6.2
You should set up your camera using a network cable (wired) first before you attempt to use it wirelessly. (See
Hardware Installation).
1. Make sure your router is a wireless router.
2. Make sure the Wi-Fi antenna is installed on the camera.
3. Determine if your router uses encryption, (see your router’s owner’s manual for how to do this), if it
uses encryption, note the share key.
4. Login to the camera using the IP Camera Tool, like you did when setting up with a network cable.
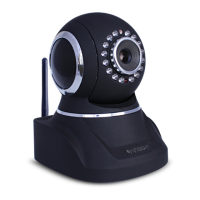
5. When you see the screen below, click “Network” then ”Wireless Lan Settings” then click on “Scan”,
wait and then click it again, when you see your network’s SSID in the Wireless LAN settings box, clic
k
on it
.
6. If there is no encryption, just click “Submit”, if there is encryption, input the share key, then click
“Submit
”.
7. Unplug the network cable and wait about 30 seconds while the camera reboots.
Fig
ure 6.3