AirSpeed 2900 gNB 5G OD Installation Guide
© Copyright Airspan Networks Ltd., 2021 P/N DUG01085 Rev. A, Nov 2021
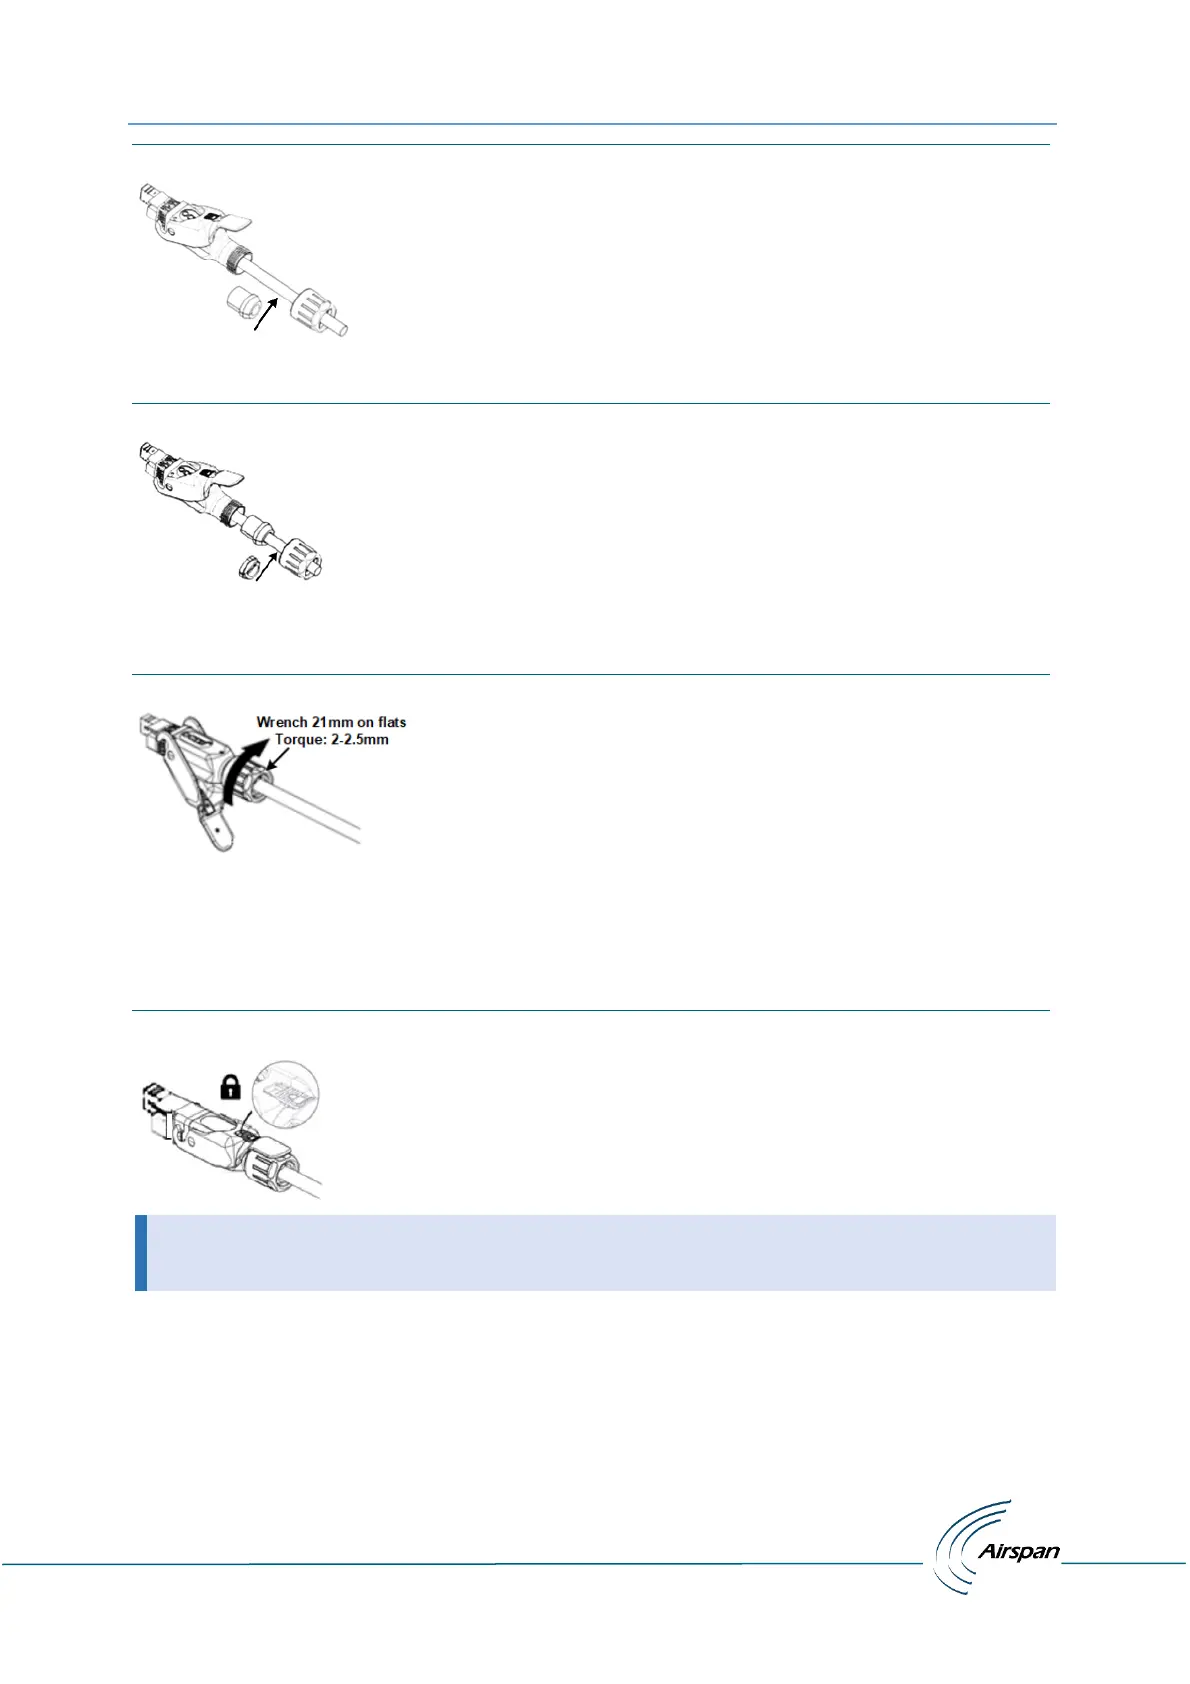
Figure 23: Place Split Rubber Gland
10. Place the tightening cone onto the split rubber gland.
Figure 24: Place Tightening Cone on Split Gland
11. Tighten the gland nut with a 21mm wrench, to a torque of no more than 2-2.5 Nm (1.47 –
1.84 ft-lb) max.
Figure 25: Tighten gland Nut
12. Insert the connector into the Power port on the bottom of the chassis. Verify that the
connector’s latch faces the rear of the unit to enable potential unlocking.
13. Close the lever and secure the lock by sliding the secondary lock/button, so that lever can’t
be lifted.
Figure 26: Secure Housing Lock
• When securing the cable verify there is no tension on the connector so that it is easy
to disconnect and re-connect for future maintenance actions.