Page 68 of 80
1. Locate the 14-pin ribbon cable.
2. Refer to Figure 48 for the cable orientation. Note that the red stripe on the cable
faces up when connecting to the controller.
3. Touch the chassis first. You may get a static electricity shock, but better you than
the controller (it has protection, but let’s avoid exercising it).
4. Install the 14-pin ribbon cable:
a. Attach one end to the tone/volume PCB. Look for the keying features of
both connectors to get the orientation correct.
b. Attach the other end to the 14-pin connector on the controller PCB. Look
for the keying features of both connectors to get the orientation correct.
5. Re-install the IEC power cord and turn the power on.
6. Wait a few seconds after power up.
7. Push the TC button on the front panel. Each push should produce a soft but
audible mechanical thump from the tone control relay on the Tone Volume PCB.
8. Push the HUSH button on the front panel. Each push should produce a soft but
audible mechanical thump from the HUSH relay on the Tone Volume PCB.
9. Push the MONO button on the front panel. Each push should produce a soft but
audible mechanical thump from the MONO relay on the Tone Volume PCB.
10. Point the remote control at the PR102. Press the volume up/down buttons. You
should see and hear the volume control move.
11. Point the remote control at the PR102. Press the balance left and right buttons.
You should see the balance control move.
Remove the IEC power cable from the AC mains and the IEC connector of the
Section 9: Final Mechanical Assembly
In this section you’ll complete final assembly of the PR-102. This consists of: Final
mechanical Assembly
Final Mechanical Assembly
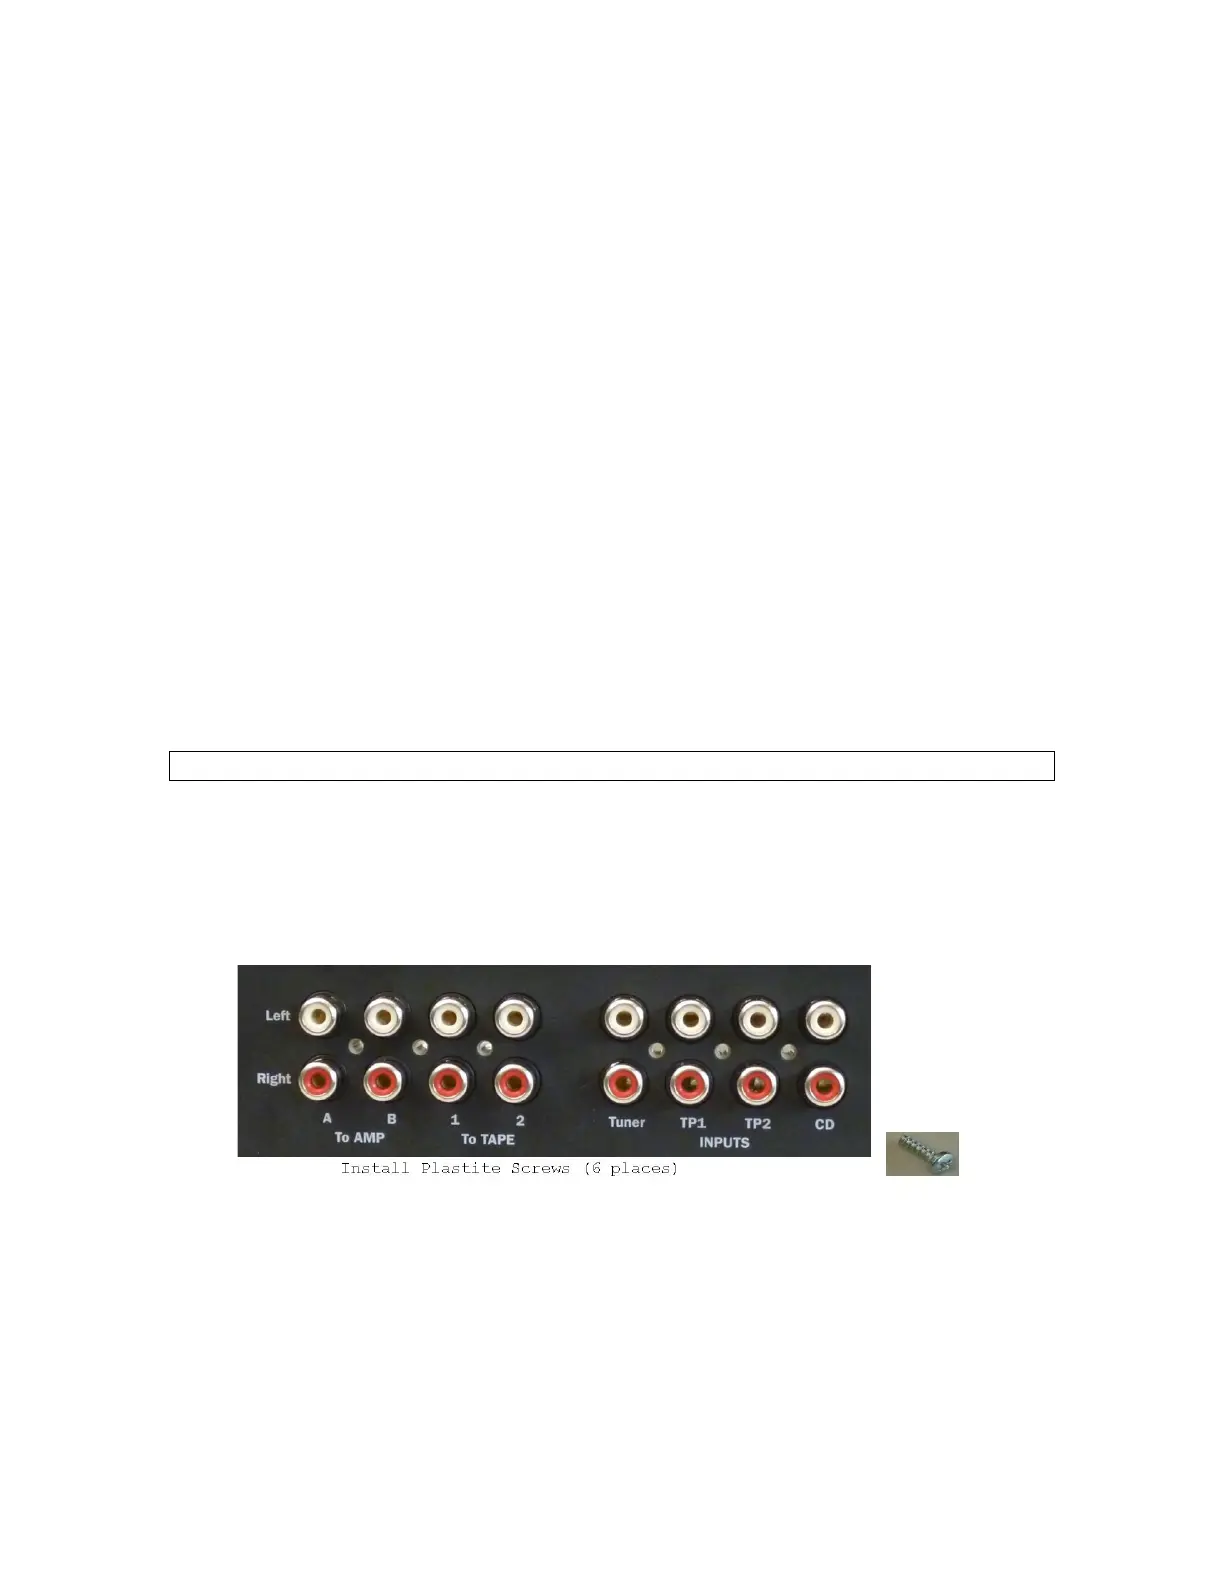
Figure 49-Install plastite screws (6) in the holes between the left and right channel input jacks
1. Turn all four controls fully counterclockwise. Look at the shaft openings on the
two large knobs. The balance control knob opening is circular. The volume
control opening is D-shaped. With that information in mind, push the following
knobs on the shafts, each with the indicator pointing to 7 O’clock:
a. Large knob for balance (circular hole for the shaft)
b. Large knob for volume (D-shaped hole for the shaft)
c. Small knob for bass
d. Small knob for treble