Do you have a question about the Akuvox C313W-2 and is the answer not in the manual?
Details compliance with FCC rules and interference guidelines for equipment operation.
States compliance with FCC radiation exposure limits for uncontrolled environments.
Guides through initial device setup, including language, time zone, and network connection.
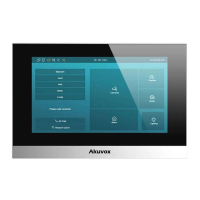
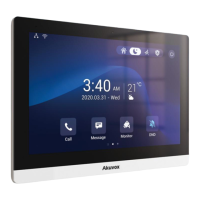
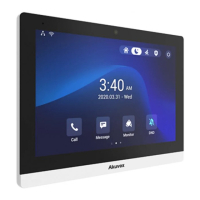
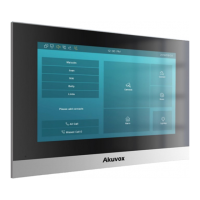
Explains and allows selection of different home screen display modes like Call list or Nine Square.
Details how to access and configure basic and advanced device settings via the device screen.
Describes logging into the device's web interface using IP address for configuration.
Allows configuring the display language on the device and its web interface.
Covers setting time zone, date, and time format on the device and web interface.
Configure brightness, screen saver, and sleep settings directly on the device.
Customize screen displays for visual and operational experience via the web interface.
Allows uploading custom pictures from SDMC or local storage as screen savers.
Enables uploading a custom image for the device's booting process.
Allows uploading a custom logo image for display on the device's web interface.
Customize icon display on home and more screens for operational convenience.
Adjust ringtone, talk, mic, and touch sound volumes on the device.
Configure contacts by adding, editing, and managing the list directly on the device.
Manage contacts via web interface, including configuration, blocking, and display.
Configure DHCP or static IP connection for the device's network access.
Set up device location, connection type, and discovery mode in the network environment.
Configure Network Address Translation (NAT) for transparent internet connectivity.
Configure Wi-Fi connection settings for the device.
Configure Virtual Local Area Network (VLAN) for network segmentation and traffic control.
Configure direct IP calls and the corresponding port settings on the device.
Configure SIP call parameters for making calls via Session Initiation Protocol.
Register and configure up to two SIP accounts on the device for communication.
Set up the SIP server details for achieving call session through the server.
Configure outbound proxy server for routing call requests and establishing sessions.
Set up DND (Do Not Disturb) feature to manage incoming SIP calls.
Configure Real-time Transport Protocol (RTP) ports for data transmission.
Select transport protocols like UDP, TCP, TLS for SIP message transmission.
Configure auto-answer function and auto-answer allow list for incoming calls.
Enable intercom preview function for seeing the door station image before answering.
Enable feature to prevent eavesdropping on SIP communication sessions.
Configure emergency (SOS) calls to three designated emergency contacts.
Set up multicast for one-to-many broadcasting of calls or messages.
Configure call forwarding to redirect incoming calls to a specified third party.
Check, create, and clear text messages on the indoor monitor.
Create, delete, and view audio messages from family members recorded on the device.
Select audio codecs (PCMU, PCMA, G729, G722) for call sessions based on bandwidth.
Configure video codec support, specifically H.264, for video calls.
Configure monitor settings for door phones, including IP/SIP details and display options.
Connect alarm detection devices and configure arming zones, types, trigger modes, and status.
Enable screen locker function to protect the device screen with a password.
Upload and configure client certificates for secure SSL communication.
Enable power output function for the PON interface, with a note on potential reboots.
Configure local and remote relay settings for door access and chime bells using DTMF codes.
Control door access using network-based web relays by configuring IP, username, and action commands.
Configure door unlocking via DTMF codes, HTTP commands, or icon buttons.
Integrate with lift systems for summoning elevators via HTTP commands.
Control home sensors like lights using HTTP commands via the web interface.
Understand the principles and protocols behind automatic device provisioning.
Learn about general and MAC-based configuration files for auto-provisioning.
Set up schedules for automatic device provisioning based on time and boot-up.
Manually configure server URLs and encryption keys for firmware and configuration file downloads.
Configure and export system logs for debugging purposes.
Capture and analyze network data packets for debugging and troubleshooting.
Change the password for accessing advanced device settings.
Change the password for accessing the device's web interface.
Reboot the device or schedule a system restart.
Reset the device system or configuration to factory settings.
| RS485 | Yes |
|---|---|
| Installation | Wall-mounted |
| Aspect Ratio | 16:9 |
| Connectivity | Wi-Fi, Ethernet |
| Power | 12V DC |
| Operating Temperature | -10°C |
| Storage Temperature | -20°C |