Rack-Mounting Chassis and Power Supplies
page 3-38 OmniSwitch 6900 Hardware Users Guide June 2020
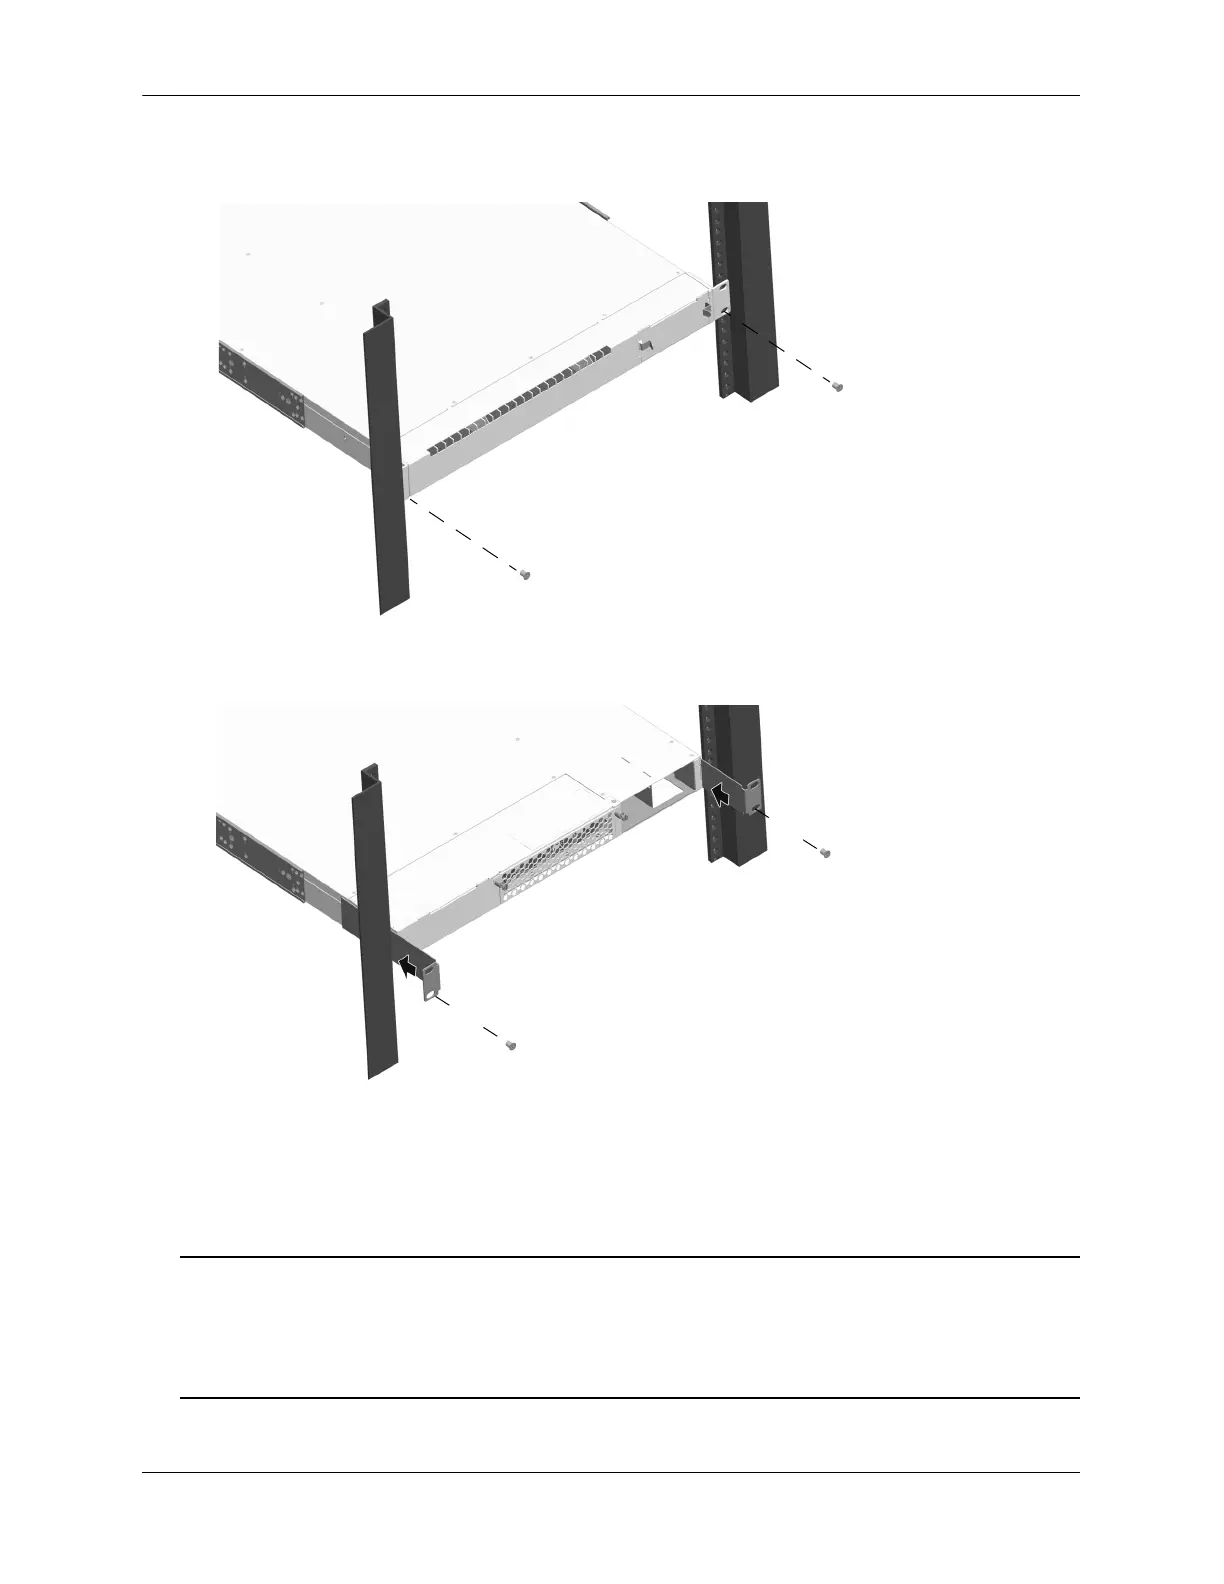
5 Once the holes are aligned, the second person should insert a screw through the bottom hole on each
flange. Tighten both screws until they are secure.
6 From the back of the chassis and with the flanges facing out, insert the slide-in braces into the slot rails
until they meet the rack posts.
7 The chassis installation should be level. Be sure that the holes and flanges of the slide-in brace are
aligned with the corresponding holes at the front of the rack.
8 Once the flanges are aligned, install the remaining screws in all four flanges. Be sure that all screws are
securely tightened.
Note. Never rack mount OS6900 switches using only the front-installed rack mount flanges. Due to the
chassis overall depth, OS6900 switches must be mounted using additional support braces (available from
Alcatel-Lucent) or by attaching flanges to the mid portion of the chassis (using the threaded holes
provided). Failure to properly mount the switch may result in the chassis sagging in the rack or damage to
the switch and its components. Refer to the following sections for more information.
 Loading...