3. If the oil level is close to or below the lower level line, refill with 4 stroke oil
to the upper level line (Fig O).
Do not use the generator when the oil level is close to the low level.
Fill the oil tank before use each time.
4. If the oil is contaminated or has discoloured, ensure you change
the oil. Replace the oil dipstick (15). DO NOT start the generator with the oil
dipstick (15) not firmly replaced.
NOTE: This engine is fitted with a
low oil indicator light (7). If the oil
level is too low the engine will stop
operating or the engine will not start.
It is advised to check the oil level
each time the generator is used and
fill to the upper mark on the oil
dipstick (15) by the above method.
Do NOT over fill.
Engine oil replacement
1. Place the generator on a flat and level surface and warm up the engine for
several minutes. Then stop the engine.
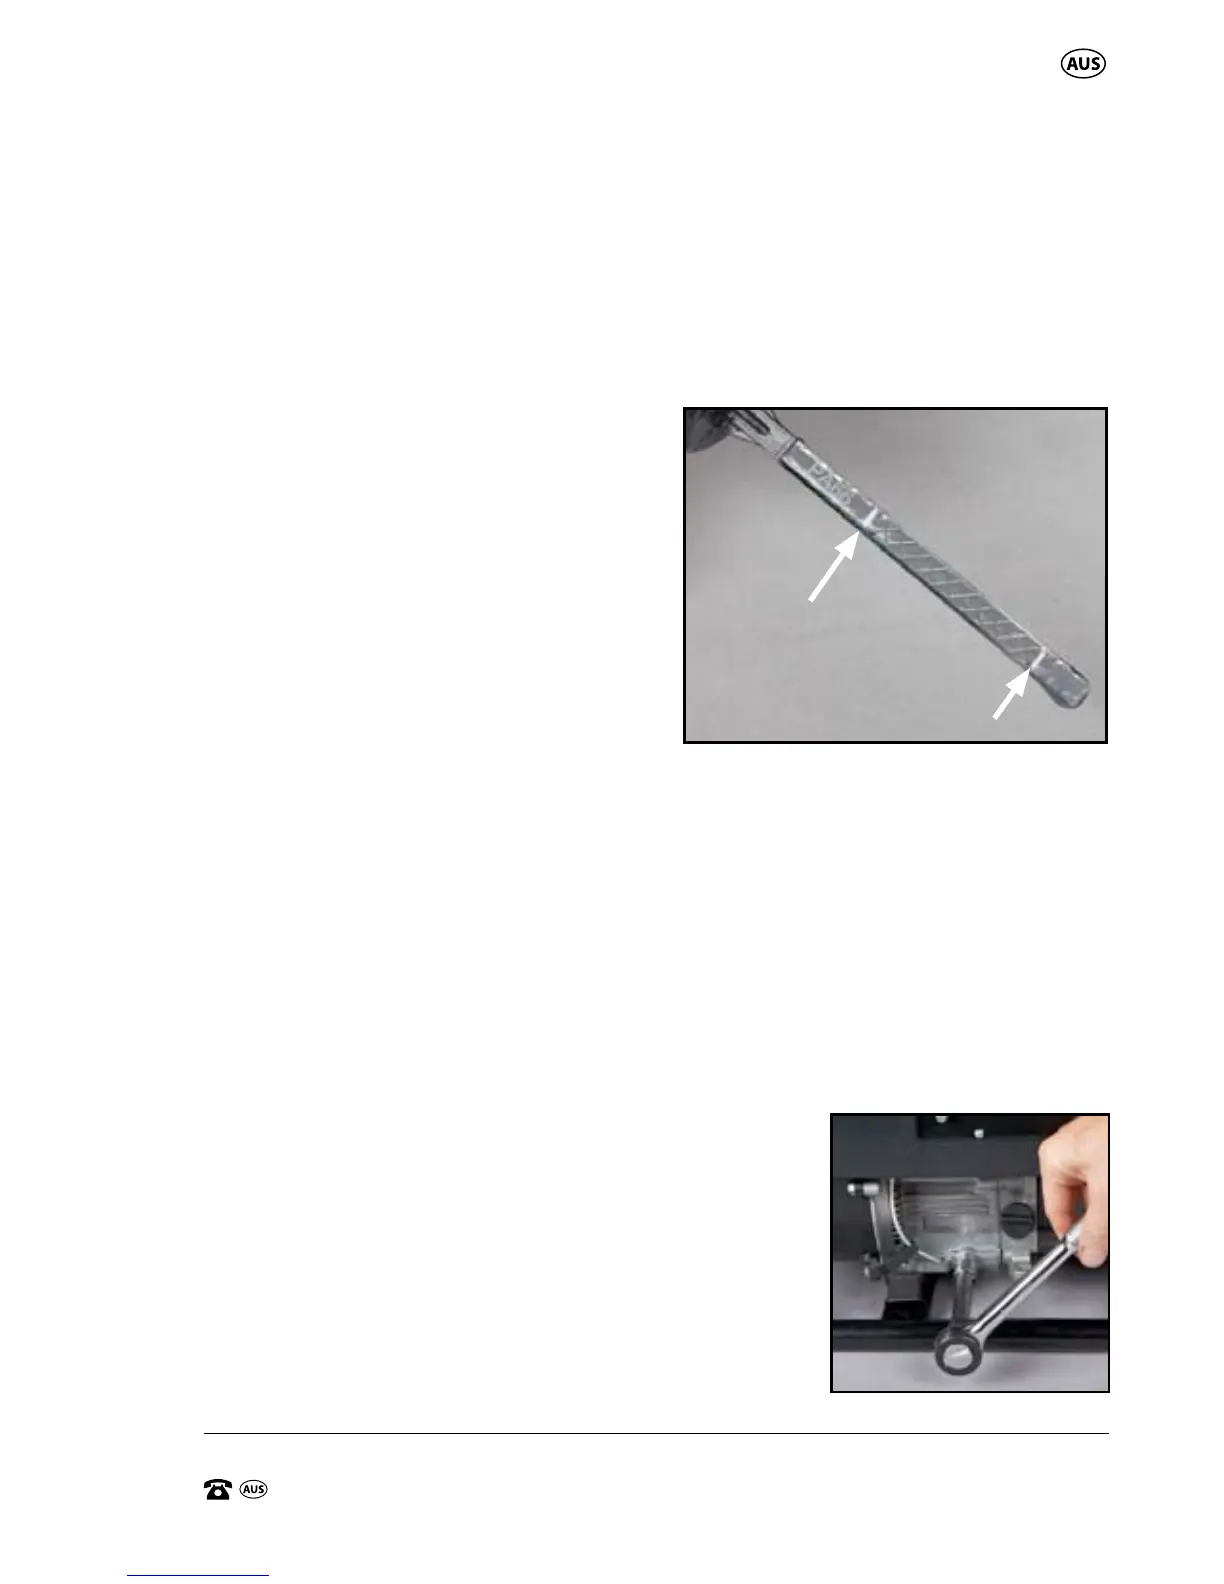
2. Place an oil pan under the generator and commence removing the oil drain
plug (16) by using a 10mm socket (not supplied), and rotating in an anti
clockwise direction to remove, so that the oil can be completely drained
from the oil tank (Fig P).
NOTE: Do not loose the small aluminium sealing washer on the thread of
the oil drain plug.
3. Check the oil drain plug (16), gasket washer, oil filler cap (15) and O-ring.
If these are damaged, have these replaced.
4. Reinstall the oil drain plug (16), and gasket washer
using a 10mm socket (not supplied), and rotating
in a clockwise direction until secure.
5. Refill with 4 stroke oil to the upper level line of the
oil dipstick (15) as detailed above.
CAUTION. Check that no foreign material, debris,
dust enters the crankcase.
6. Ensure to replace the oil filler cap (15).
Engine Oil
O.
UPPER
MARK
LOWER
MARK
P.