Diagnosis
28
Control Buttons
Press and hold the following buttons, then turn on the power to enable the preset testing:
Press the lowest “C”+ “Eb” to enter Firmware Update Mode.
Press the lowest “C”+“Gb” to enter Firmware Restoration Mode.
Press the lowest “C” + “Ab” to enable LED Test / Trade Show mode.
Press the lowest “C” + “C#” + “D” + “E” to enter System Self-testing.
System Self-testing helps QA to do a comprehensive check on the following functionality: LED, MIDI
OUT port, function buttons, keyboard, pedals, USB and so on.
Before power on, please follow the procedures below:
1. Insert the batteries as required. Connect the USB port of the instrument and the USB dongle to a
computer. Connect the MIDI OUT port to a sound source.
2. Hold down the lowest “C”+ “C#”+ “D”+ “E”, then push the Power Supply switch to battery.
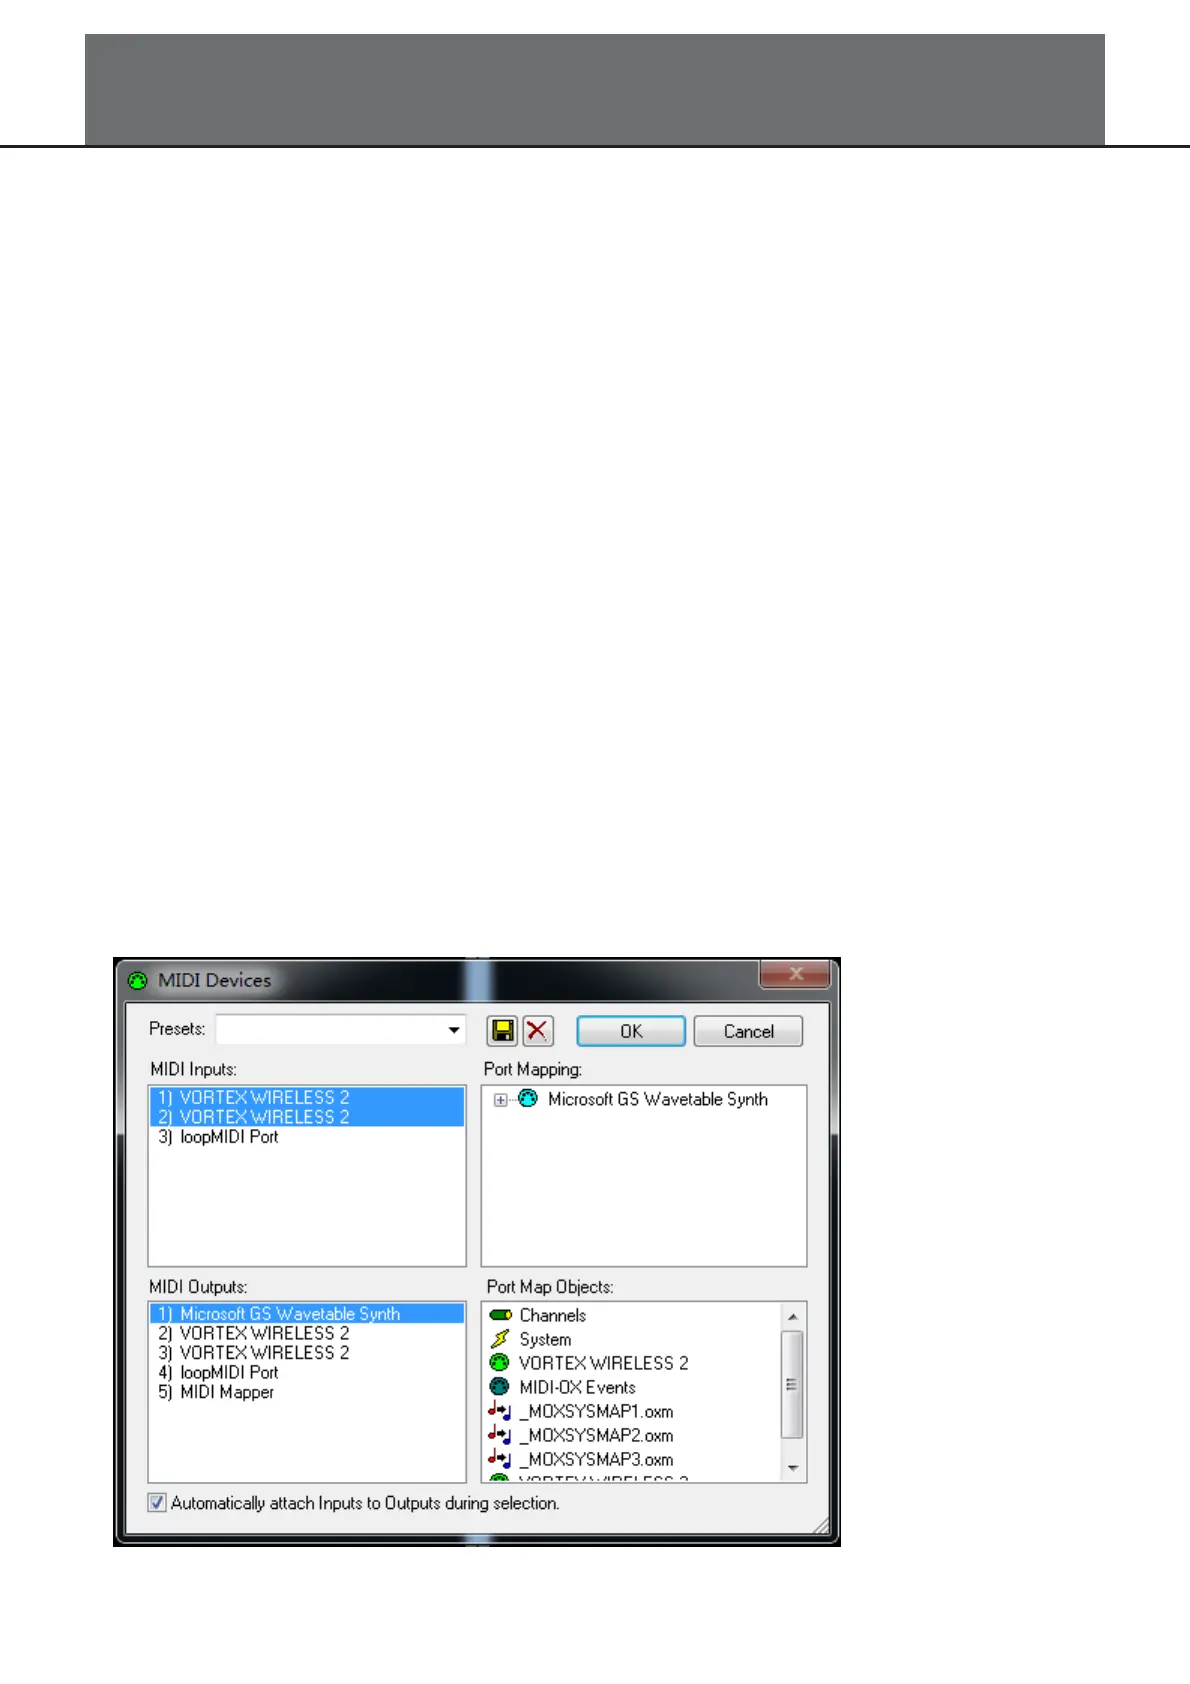
3. Run the software MIDI-OX on computer, then select the two “VORTEX WIRELESS 2” in the MIDI
Inputs box. Select “Microsoft GS Wavetable Synth” in the MIDI Outputs box. As shown in the picture
below: