9
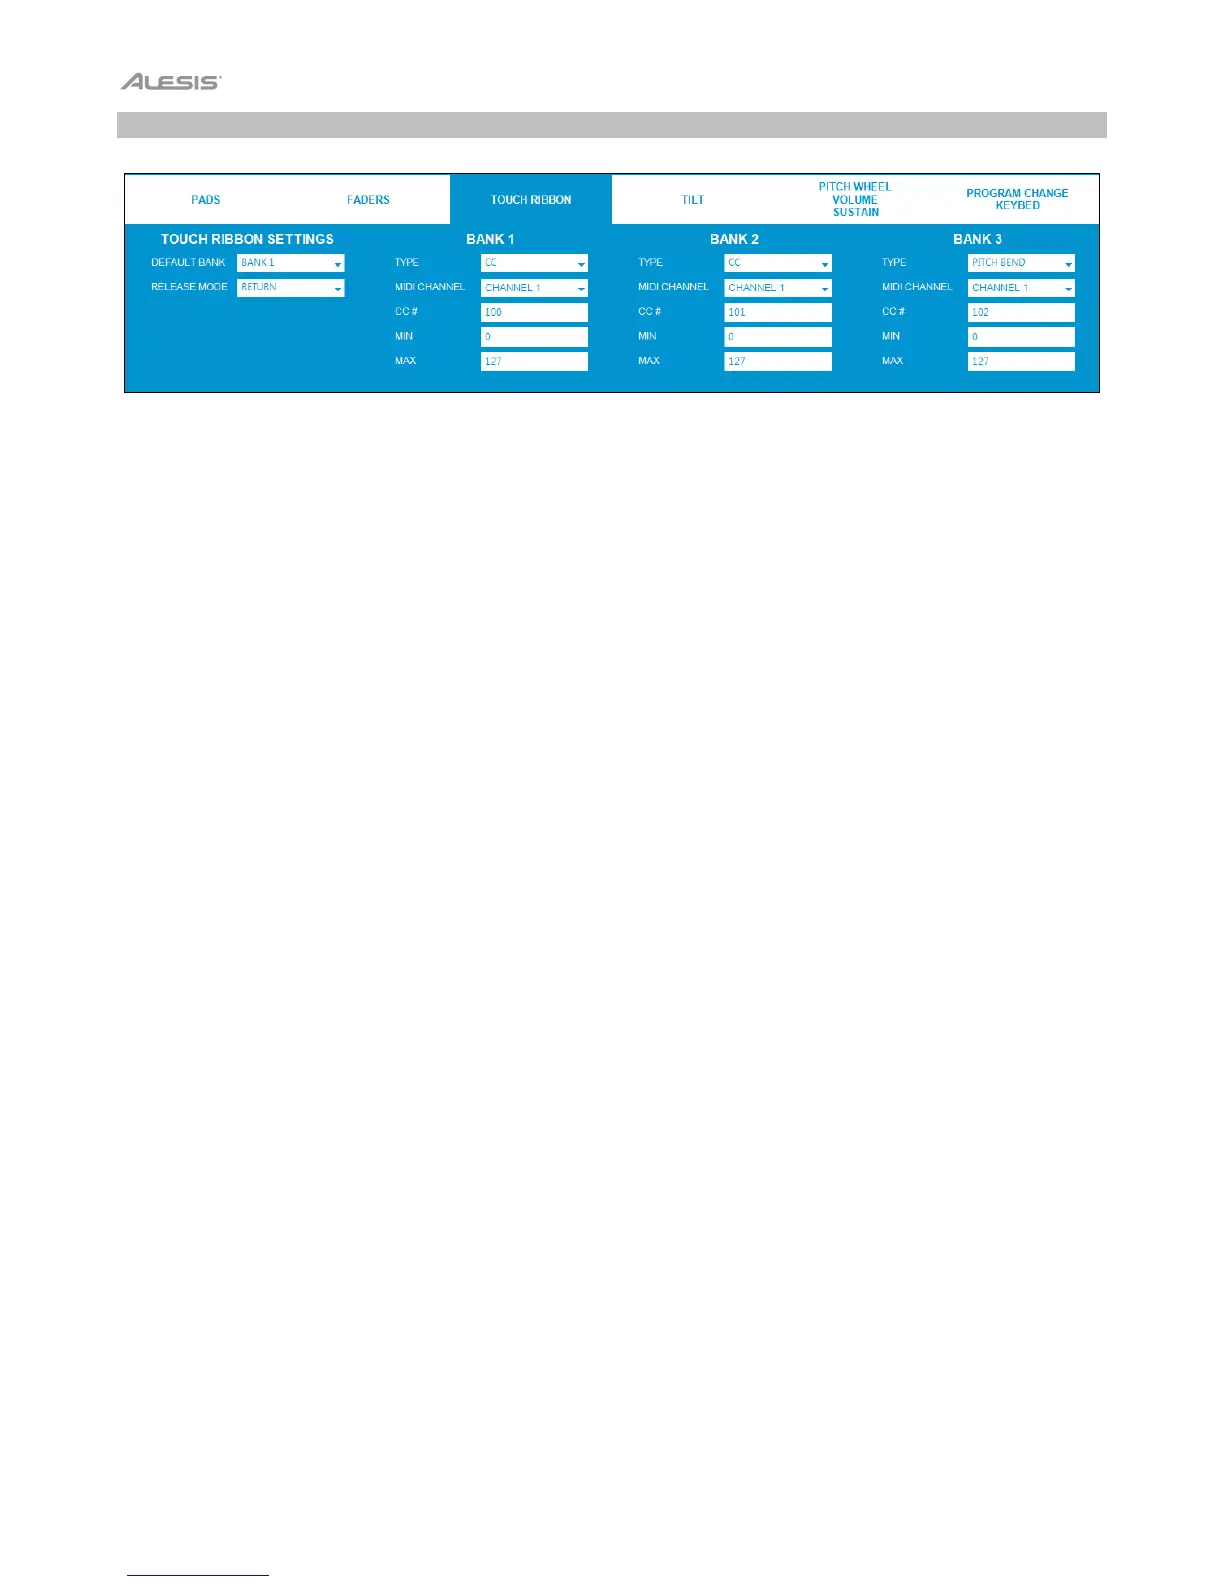
Touch Ribbon
Click the Touch Ribbon tab to set the MIDI assignments for Vortex Wireless 2's ribbon controller.
Touch Ribbon Settings
Default Bank: Click this menu to set the Default Bank when the preset is selected. Select Bank 1, Bank 2, or Bank
3.
Release Mode: Click this menu to select one of the following options.
• Latch: The ribbon controller will not send additional MIDI messages when you release it, which is useful for
changing modulation parameters.
• Return: The ribbon controller will send the default MIDI message for the controller when you release it, which is
useful for changing parameters like pitch bend.
Bank 1/2/3
Type: Click this menu and select one of the following options.
• CC: The ribbon controller will send Control Change MIDI messages.
• Pitch Bend: The ribbon controller will send Pitch Bend MIDI messages.
MIDI Channel: The ribbon controller will send its MIDI messages over this channel. Click this menu and select
Channel 1 – Channel 16.
CC #: When Type is set to CC, the ribbon controller will send its MIDI messages using this CC number. Click it and
enter a number (0–127).
Min: This will be the lowest value that the ribbon controller can send. Click it and enter a number (0–127).
Max: This will be the highest value that the ribbon controller can send. Click it and enter a number (0–127).