B.
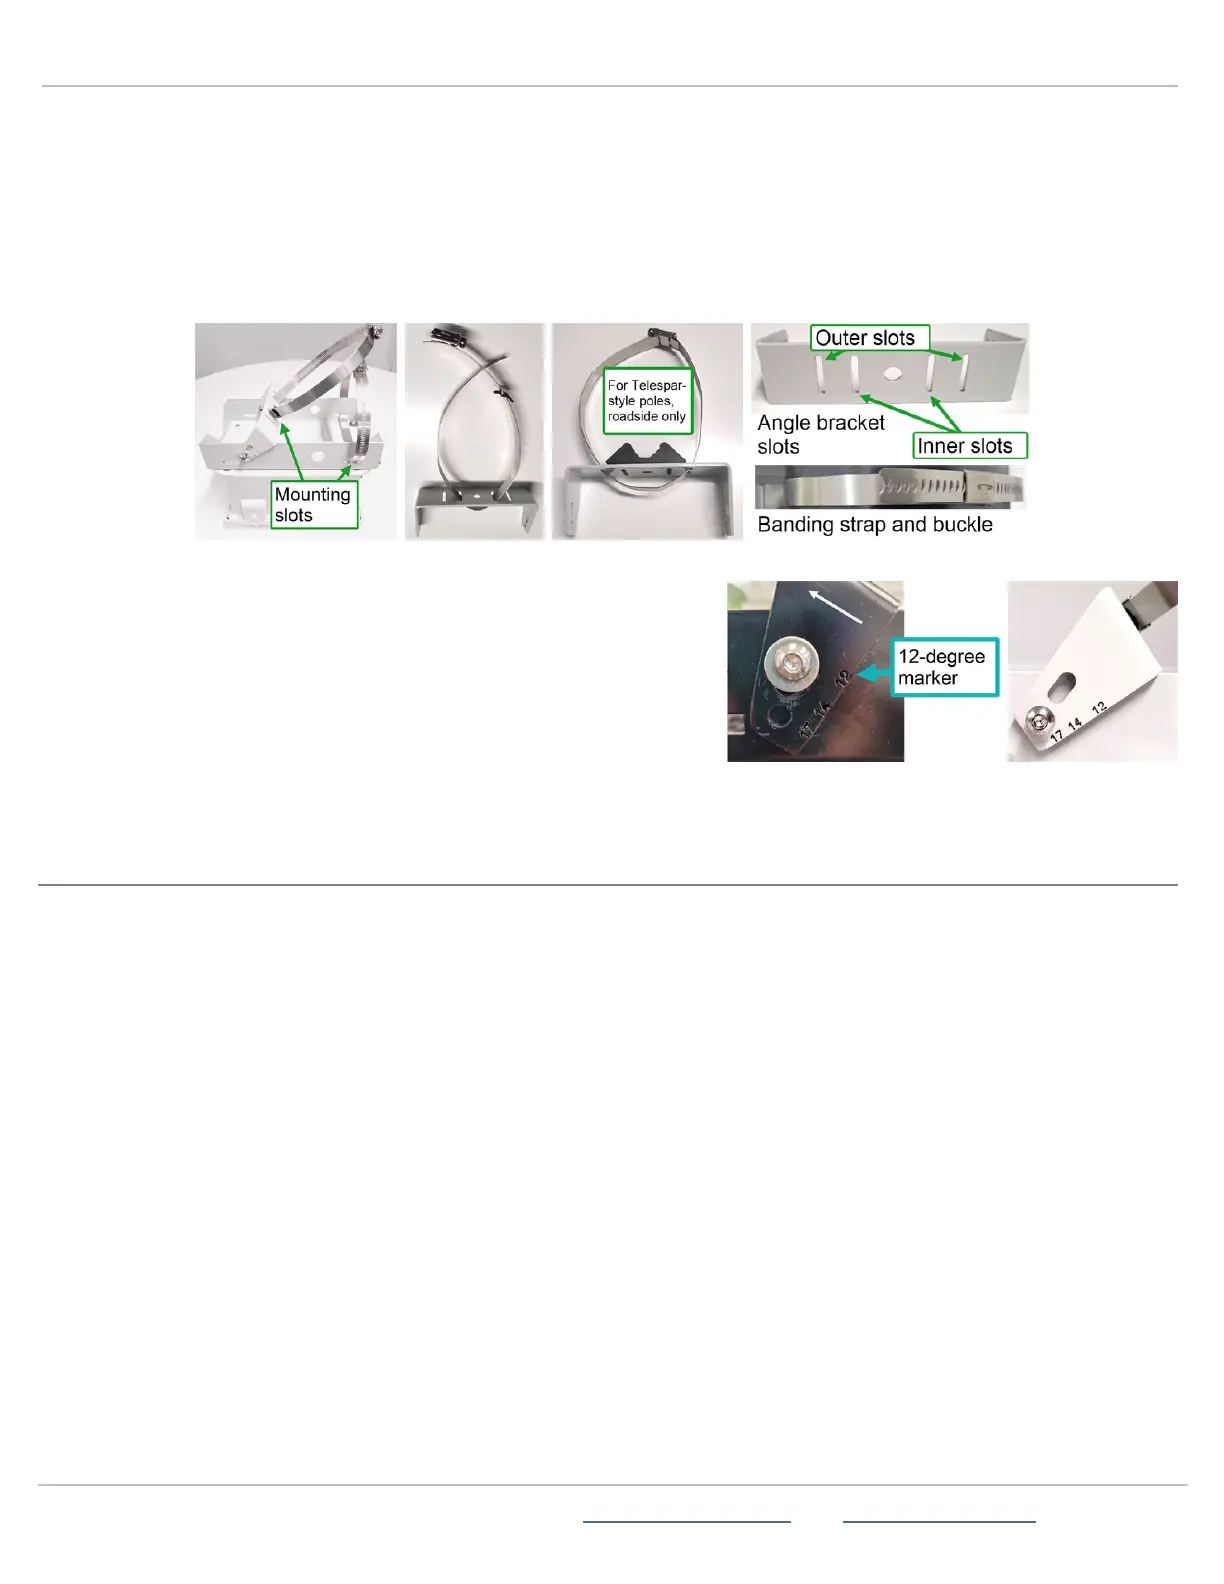
Squeeze the second stainless steel banding strap into a narrow loop (as shown below middle)and thread it through the
mounting slots on the angle bracket, being careful not to pinch your finger between the bracket and the banding strap.
C.
Do one of the following:
l
For 4-in. (10 cm)poles, thread one of the longer banding straps through the inner bracket slots of the angle bracket
and the other longer banding strap through the bottom slots of the pole bracket. You won't need the shorter strap.
l
For 2-in. (5cm)Telespar-style poles, thread the shorter banding strap through the outer slots of the angle bracket and
thread the longer banding strap through the bottom of the pole bracket, as shown.
To set the downward mounting angle:
l
Install the angle bracket onto the pole bracket, making sure to place the
bracket so that the angle numbers are facing up:
i.
For roadside installations, install and tighten the angle bracket
into the 17-degree slot.
ii.
For median installations, install and tighten the angle bracket into
the 12-degree slot.
iii.
Thread the bolts and washers into the threaded fittings and tighten
them with a wrench.
STEP 6:MOUNTING AND AIMING THE STATTRAK-E
Use the steps in this section for help with median setup. Like speed-enabled radar signs, the StatTrak-E must be located in close
proximity to the traffic being monitored, directly facing the traffic in close proximity to the traffic being monitored, directly facing the
traffic for median installations, or facing the roadway at a 45-degree angle for roadside installations.
Positioning the StatTrak-E
To optimize accuracy of the data capture, position the StatTrak-E on the median at the roadside or on the median so that the
device has an unobstructed line of sight to the traffic lanes you want to measure and detects vehicles when they're about 100 ft. (30
m)feet away. The green LEDon the base of the StatTrak-E flashes when it detects a vehicle.
Installing the StatTrak-E on a pole
» Place the StatTrak-E on your selected pole at the planned horizontal angle to the traffic and a height between 5 ft. 6 in. and 8ft.
(1.7 m and 2.5 m). Then, tighten the included banding straps to the pole with a nut driver and power tool.
To install the StatTrak-E on a Telespar-style pole:
» Make sure you install the pole bracket and angle bracket adapters (roadside installations only)as shown on the previous page.
» Set the required horizontal angle to the traffic (directly facing the traffic for median installations) (directly facing the traffic for
median installations or angled at 45 degrees for roadside installations).
ATS | Chantilly, VA | USA | Tel: 1-866-366-6602 | Email: sales@alltrafficsolutions.com | Web: www.alltrafficsolutions.com
Copyright © 2024 |
StatTrak-E Quick Start Guide, TraffiCloud Subscriber Edition
, ver. 1.01 | 4800268 | All rights reserved.
Step 6:Mounting and aiming the StatTrak-E Page 8 All Traffic Solutions