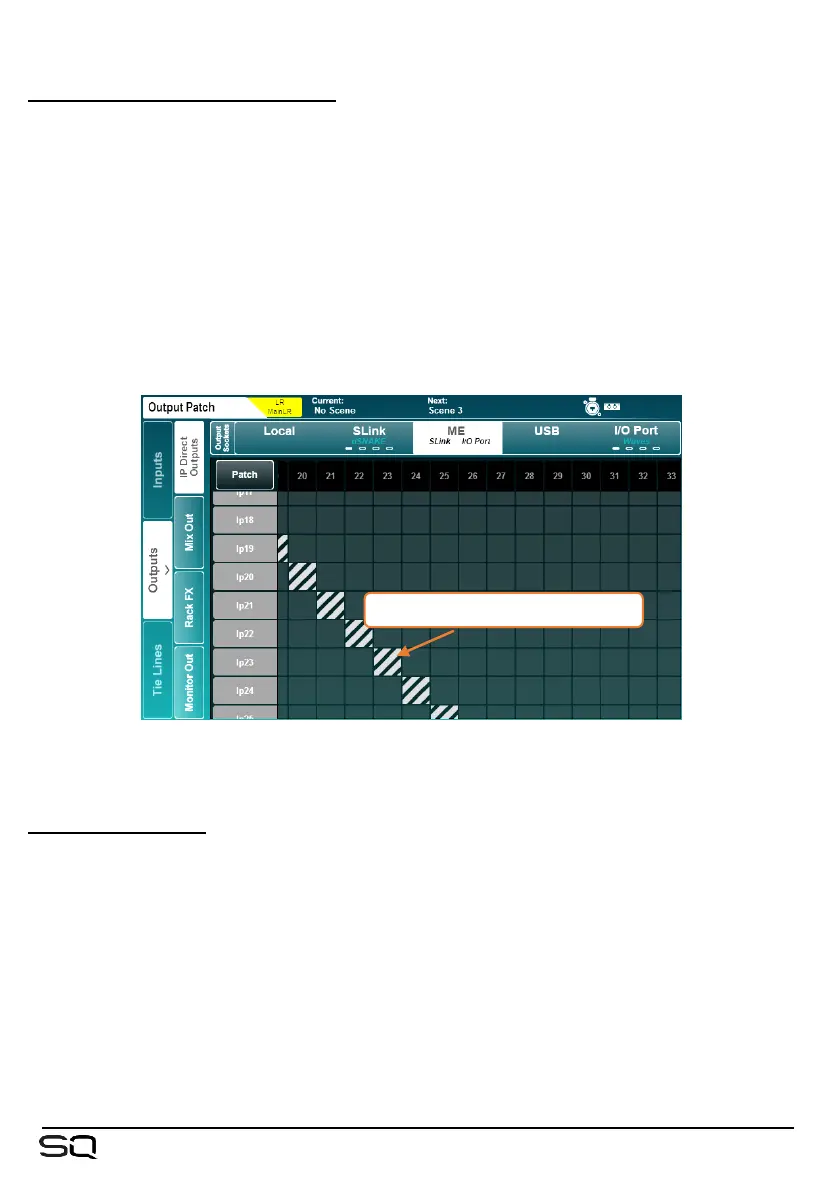
Patching a Source to a Destination –
• Touch the ‘Patch’ button on the screen at the top left of the patching matrix to
enable patching.
• Touch a patching block on the matrix to make or delete a patch.
• Available patching blocks are grey and are filled light grey when patched.
• Currently unavailable patching blocks are dark grey and striped light grey when
patched.
• Input or Output sockets that are currently in use are dark grey (including if they
are being used by insert points). Sockets that are not in use are light grey.
The Patch switch will be turned off automatically whenever leaving the I/O screen. It can
be disabled entirely in the Surface Prefs screen.
All patching to a currently disconnected device will become active once the device is
connected.
Sequential Patching –
For quick sequential patching (also known as ‘block’, ‘one-to-one’ or ‘diagonal
patching’)
• Touch and hold the first available patching block you wish to patch to until the
touchscreen rotary illuminates.
• Turn the touchscreen rotary increase or decrease the number of channels you
wish to patch; these are displayed as blue patching blocks.
• Remove finger from screen to apply patching.
It is not possible to delete patches sequentially, so the starting patching block must be
currently unpatched.
 Loading...