CUID400N | CUID400N | CONTROL UNIT CUID400N 49
ADJUSTMENT
TX
RX
NC
NO
COM
-
+
-
+
X11
PH.T
PH1SE+24V+12V
S
CL
OP
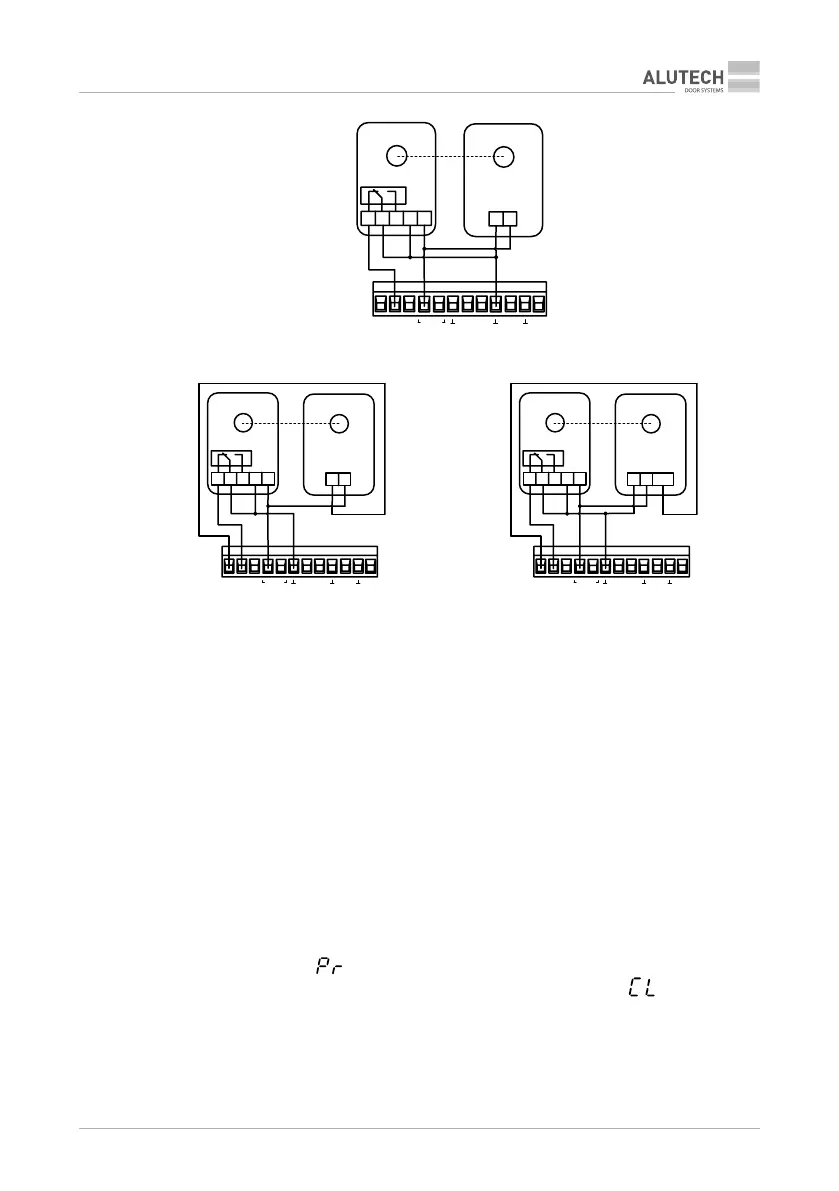
Figure 4. Photocells connection
TX
RX
NC
NO
COM
-
-
+
X11
PH.T PH1 SE +24V +12V
S
CL
OP
+
TX
RX
NC
NO
COM
-
-
+
X11
PH.T PH1SE+24V+12V
S
CL
OP
+
TEST
A B
Figure 5. Photocells connection to perform automatic test of their operation (Phototest):
A—photocells with typical connection,
B—photocells with special output TEST
6. ADJUSTMENT
The operation parameters are set using the display and control unit module buttons. To enter
the operation parameters set-up mode, press and hold the button ‘F’ on the control module
for at least 3seconds (g. 2). Select the necessary settings (table7) using the ‘F’ button. The
selection of the required parameter value is performed by pressing or holding buttons ‘+’ or ‘−’
on the control unit module. Press button ‘F’ to conrm the selected value. Press and hold the
button ‘F’ for at least 3seconds to exit the operation parameters set-up mode, in this case all
the selected values will be saved. All control commands for the door movement are ignored in
the operation parameters set-up mode.
To return to the initial settings of the control unit module (default settings) enter the operation
parameters set-up mode (‘
’on the indication display), press and hold the button ‘CL’ for at
least 3 seconds on the control unit module (g. 2). Short-term indication ‘
’ on the display
means deletion of all previously set values and return to the default values.