Mounting the Clock
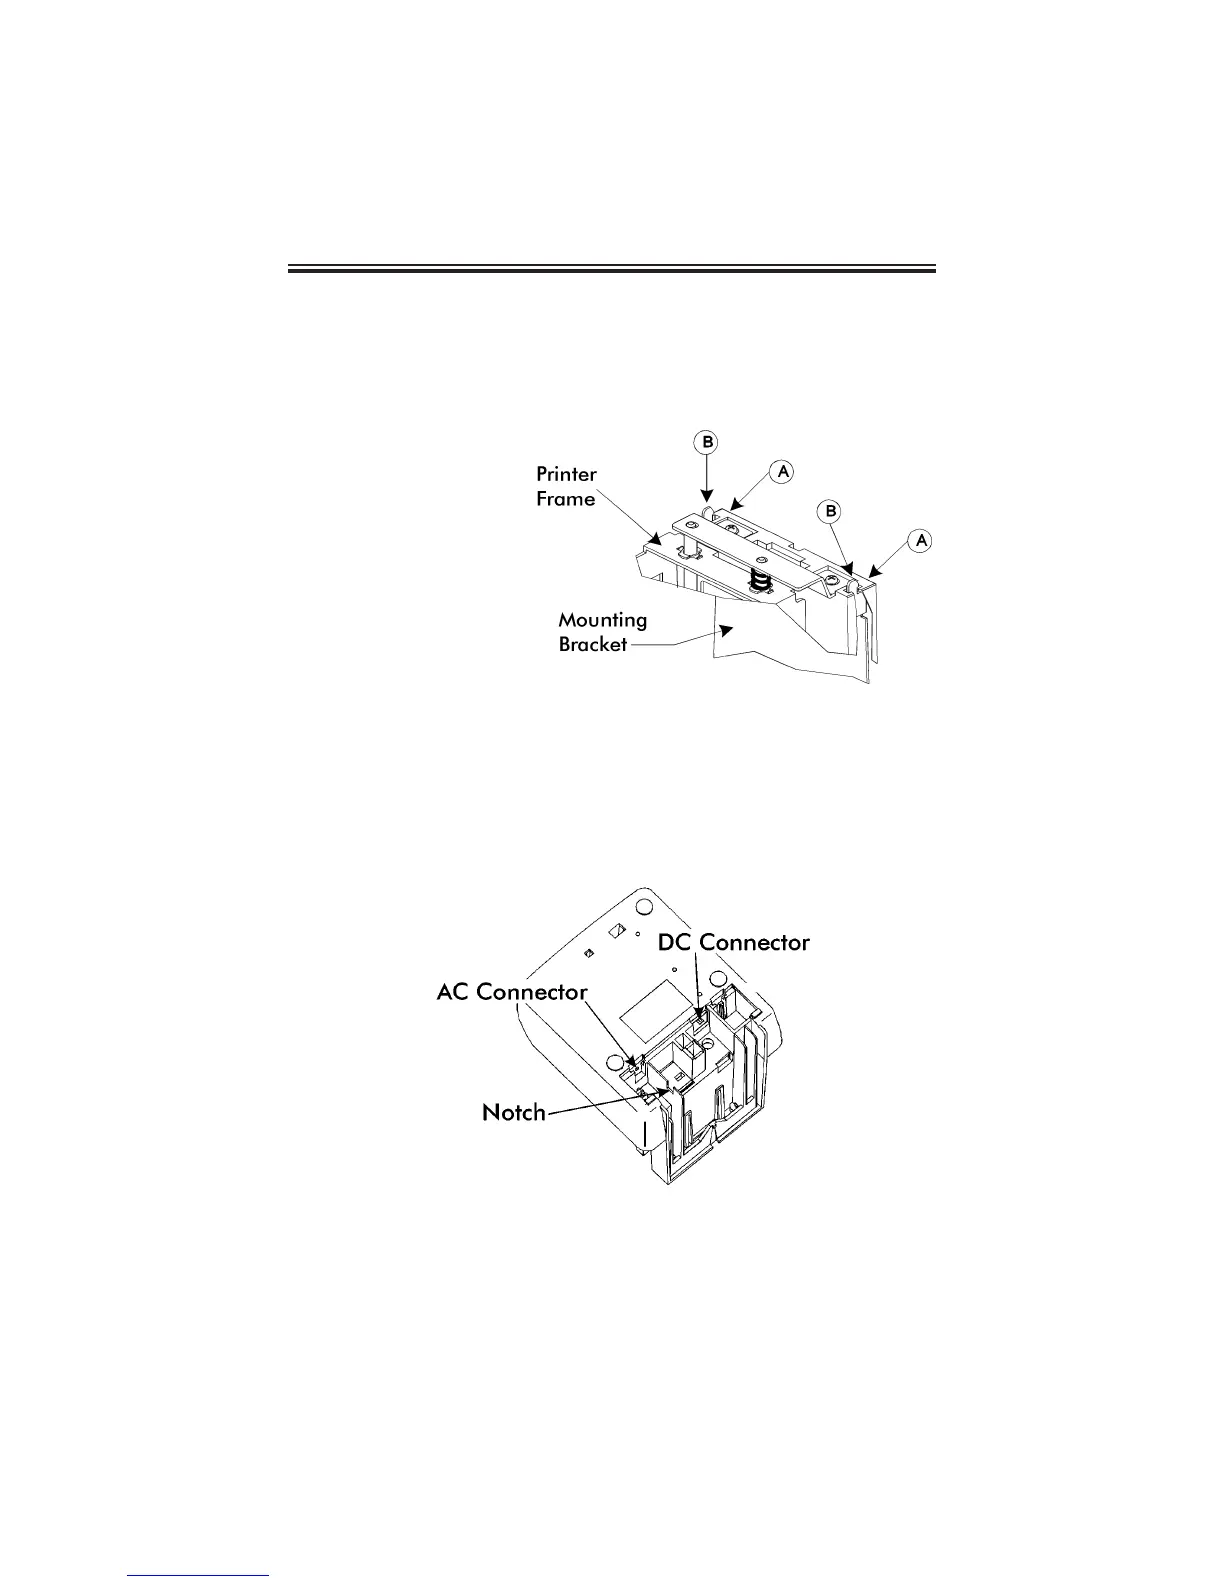
1. Remove the mounting bracket from the clock by pushing forward on the
top tabs “A” and then pushing the tabs down “B” (See below).
2. If you are using the
Mobile Mounting Unit
gooseneck and special
mounting bracket (P/N
AJR-208800), mount
the gooseneck to the
vehicle in the desired
location first. Mount the
special mounting
bracket to the
gooseneck using the
three #M5 acorn nuts
and washers provided.
You may discard the
original PIX mounting
bracket if you wish.
3. If you are not using the Mobile Mounting Unit, securely mount the PIX
mounting bracket on the wall using three #10 wood screws or equivalent.
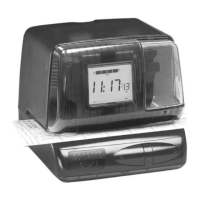
4. Refer to the illustration below to plug the appropriate power cord into the
bottom rear of the clock.
If you are using the DC power cord, locate the rubber grommet on the
power cord and install the grommet into the notch in the housing. The
power cord will exit the clock through the opening on the bottom. Refer
to page 16 for more information about using the DC power cord.
Page 3