Version 1.6 ©Copyright 2020, Ambient LLC. All Rights Reserved. Page 3
1 Introduction
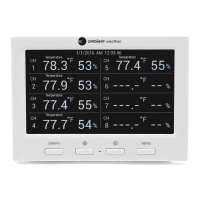
Thank you for your purchase of the Ambient Weather WS-3000 Thermo-Hygrometer, Dew Point, Heat
Index Wireless Monitor with Graphing, Alarming, and Radio Controlled Clock. The following user
guide provides step by step instructions for installation, operation and troubleshooting. To download
the latest manual and additional troubleshooting tips, please visit:
https://ambientweather.net/product/ws-3000-x5
2 Getting Started
Note: The power up sequence must be performed in the order shown in this section (insert
batteries in the remote transmitter(s) first, Display Console second).
The WS-3000 weather station consists of a display console (receiver), and up to 5 thermo-hygrometers
(remote transmitters), based on your order configuration.
2.1 Parts List
* 1,2,3,4, or 5, based on your order configuration.
2.2 Recommend Tools
Hammer and nail for hanging remote thermo-hygrometer transmitter(s).
2.3 Thermo-Hygrometer Sensor Set Up
Note: Do not use rechargeable batteries. We recommend fresh alkaline batteries for outdoor
temperature ranges between -4 °F and 140 °F and fresh lithium batteries for outdoor temperature
ranges between -40 °F and 140 °F.

 Loading...