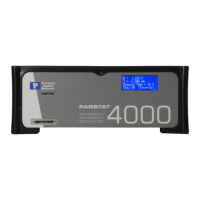
PARSTAT 4000 Hardware Manual
PARSTAT 4000 Hardware Manual 18
The first time the PARSTAT4000 is connected to the host PC and powered on,
Windows® should display a “Found New Hardware” message, and request driver
installation. Upon this request, insert the VersaStudio CD into the CD-ROM drive, and
select “Automatic” to install the driver. This driver should be located in the C:\Program
Files\Princeton Applied Research\VersaStudio\ folder.
3.3.2. Connecting the Cell
To connect the cell cable (part no. 223945) to the PARSTAT 4000:
1. Make sure the POWER switch is off.
2. Match and attach the D connector side of the Cell cable to the front of the
PARSTAT 4000, and secure the screws on either side.
3. After cell cable is connected to front panel, power the unit on and let it boot fully
(approximately 1 min to boot up) before connecting a cell to the leads of the cell
cable.
CAUTION: Having a cell connected at power-on or at power-off should be
avoided to prevent any voltage or current spikes from reaching the cell, or
in the case of energy storage devices (such as batteries, capacitors, or fuel
cells), preventing spikes from discharging back into the PARSTAT 4000 and
causing damage to the instrument.
4. The opposite end of cell cable is color-coded at the tip as follows:
Green – Working (WE) electrode lead. This lead connects to the electrode of
interest at which the desired reactions will occur. The current (I) is measured
through the WE.
Red – Counter (CE) electrode lead. This lead connects to the electrode
opposite the WE and controls the power output of the PARSTAT 4000.
Gray – Sense (SE) electrode lead. This usually connects to the working
electrode (the combination often referred to as the working-sense), and is a
component of the differential amplifier that measures/controls the voltage
between itself and the reference electrode.
White – Reference (RE) electrode lead. This connects to the reference
electrode, a component of the differential amplifier that measures/controls the
voltage between itself and the sense electrode.
Black – Ground lead. The use of the ground lead depends on the application,
but it is not ordinarily used in most experiments. It can be used to supply a
 Loading...