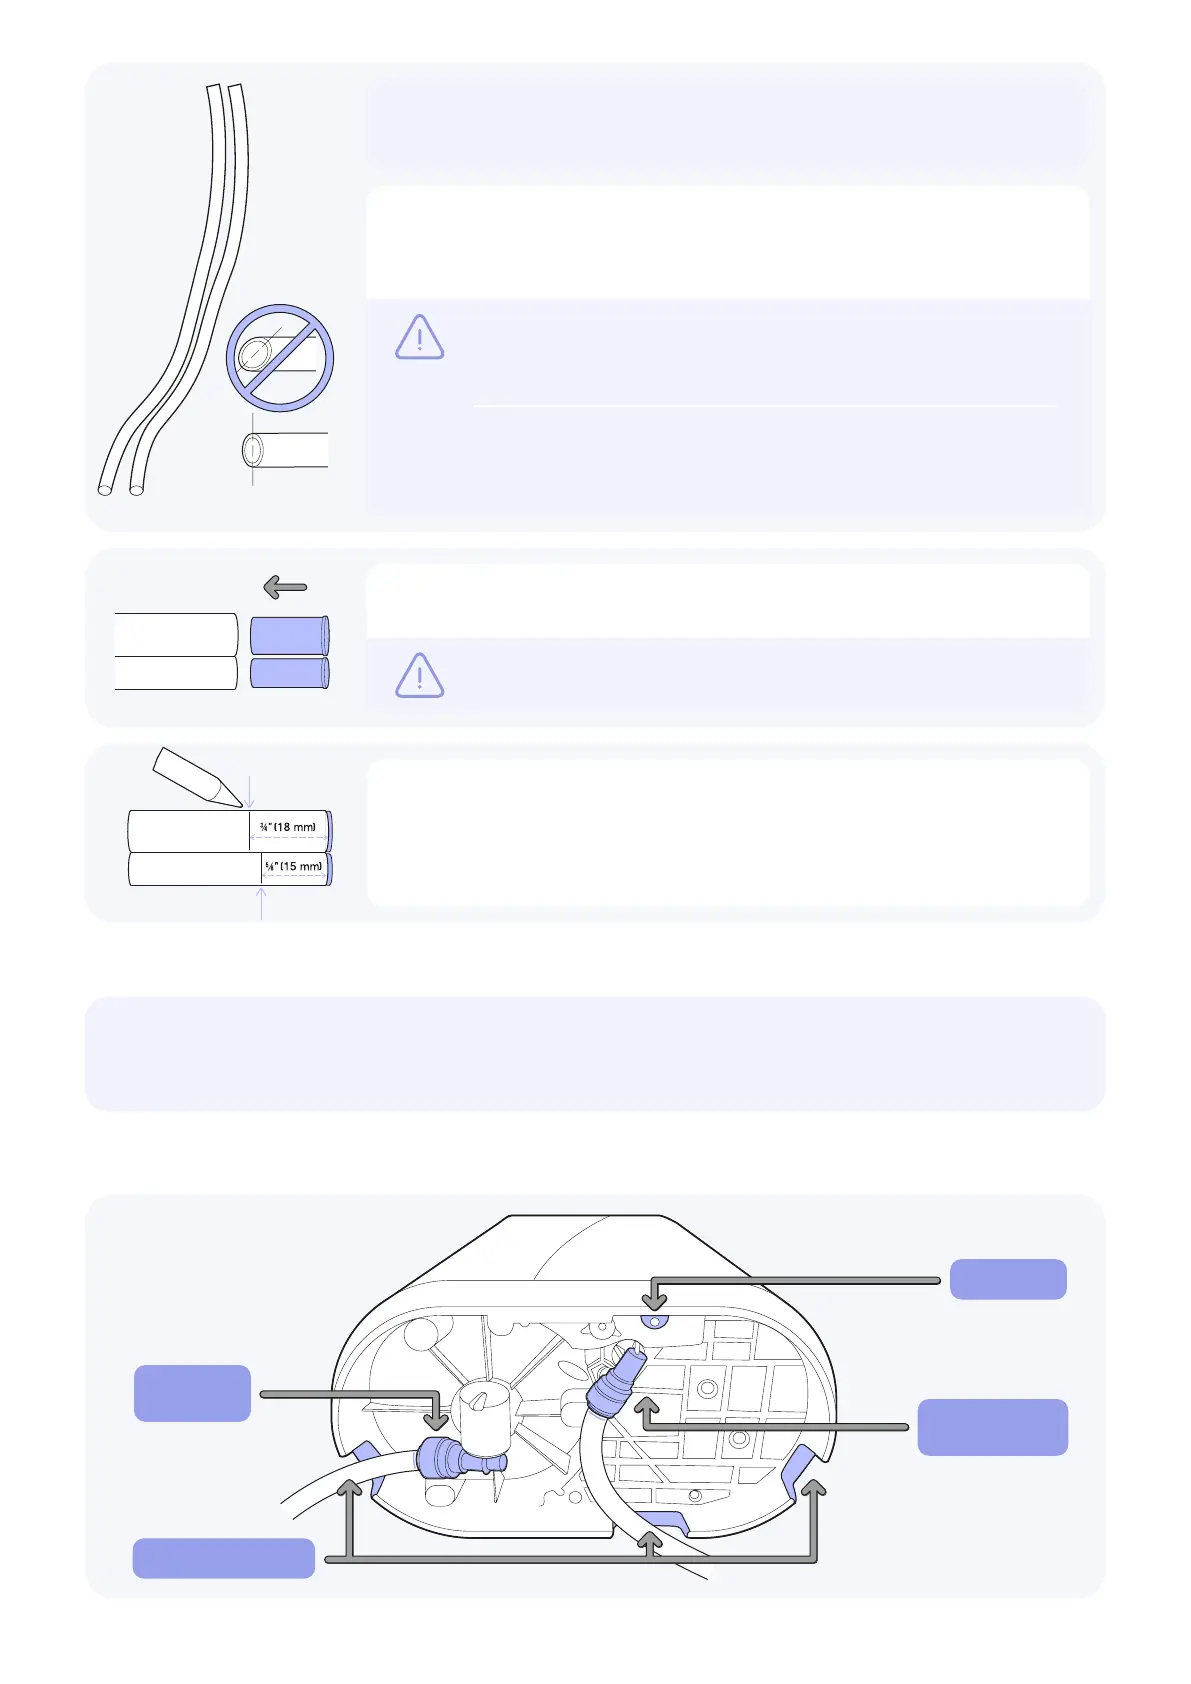
b. Use a sharp knife carefully to cut the tubes to the same length
in a location where they are NOT BONDED TOGETHER. Make sure
to make a straight cut to form a at end on the tubes.
CAUTION: SHARP BLADE. CONTACT WITH SHARP KNIFE
MAY RESULT IN INJURY. ALWAYS KEEP SHARP OBJECTS
AWAY FROM FINGERS AND BODY.
IMPORTANT: Once the tube supports are inserted, they will
be very dicult to remove and making it hard to further
trim the tube lengths.
c. Push tubing supports into their respective tubes.
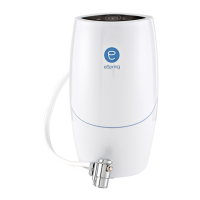
e. Insert tubing (with inserts) into the proper locations on the bottom of the base unit.
IMPORTANT: There will be resistance before the tube is fully installed. ENSURE THE TUBES
ARE FULLY PUSHED in until they meet the marks, or the marks disappear as a check on each
of the tube connections to avoid leaks.
Plug the power adapter into the jack at the bottom of the unit. Wait until the nal step to plug
the adapter into the wall outlet.
IMPORTANT: Make sure that each tube has been cut and
marked properly before inserting supports.
Large (1)
3/8’’ Inlet
Small (2)
5/16’’ Outlet
DC Jack
Tubing Openings
14
Note: If the tubing is too long on the counter, cut tubes
to desired length.
d. Use a ruler to measure and a pen to MARK A LINE across them
at the arrows. These marks will show you when the tubes are fully
inserted in following steps to avoid leaks.