Do you have a question about the Analog Devices EVAL-AD2428WD1BZ and is the answer not in the manual?
Provides instructions for installing, operating, and configuring the evaluation board hardware.
Outlines the sections included in the manual, such as board usage and hardware reference.
Guides users on how to contact Analog Devices sales or distributors for assistance.
States that the evaluation system supports the Analog Devices AD2428 IC.
Provides information on where to find details about SigmaStudio and the A2B software plug-in.
Directs users to Analog Devices website for information on the AD2428 product family.
Describes the Analog Devices website and its resources for product information and updates.
Introduces EngineerZone as a technical support forum for ADI products and design assistance.
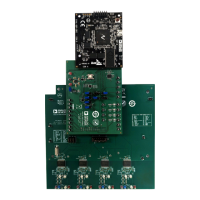
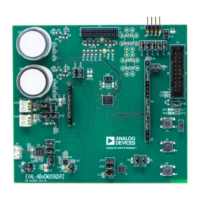
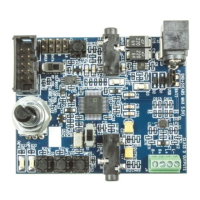
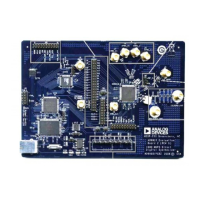
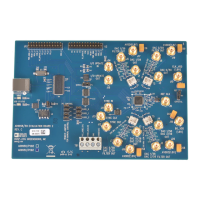
Details the main features and capabilities of the evaluation board, including audio components and connectivity.
Lists all items included in the EVAL-AD2428WD1BZ package for setup and operation.
Explains the default hardware settings for jumpers, switches, and LEDs for initial board use.
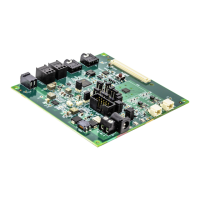
Provides information on the board's schematic design, layout, fabrication, and assembly.
Describes the 512Kb EEPROM chip used for storing configuration and data on the board.
Details the AD2428 chip, its role in A2B networks, and its features for audio data transmission.
Explains the ADAU1452, its automotive-qualified audio processing capabilities, and architecture.
Describes the ADAU1761 audio codec, its low power consumption, and 24-bit audio processing features.
Details the LT8609 voltage regulator for efficient power management with low quiescent current.
Describes the LT8620, a high-voltage step-down regulator suitable for various power applications.
Explains the LTC3121 step-up converter for applications requiring output voltages up to 15V.
Details the LTC3621, a high-efficiency step-down regulator with ultralow quiescent current.
Describes the LTC4040 for battery backup and power management functions.
Guides users on how to use the evaluation board with associated software tools for setup and operation.
Provides step-by-step instructions for setting up the hardware configuration for an A2B system.
Describes the overall hardware configuration and block diagram of the board.
Explains the function and operation of the board's switches.
Details the reset pushbutton's function and its effect on the SigmaDSP.
Explains the SPDIF input connector and its connection to the audio processor.
Details the SPDIF output connector and its connection to the audio processor.
Describes the 3.5mm stereo audio jacks for input and output.
Explains the SDP connector for connecting daughterboards.
Details the connector for interfacing with SigmaStudio via the USBi board.
Describes the A2B connectors for upstream and downstream slave connections.
Details the 2-pin DuraClik connector for A2B connections.
Explains the 12V power input connector.
Describes the alternative 12V power input terminal.
Details the battery connector for 3.7V Li-Ion battery connection.
Introduces the section on configuration jumpers and their locations.
Explains the jumper for selecting the MCLK source for the ADAU1761.
Describes the JP2 jumper for hybrid/local power mode.
Explains the JP3 jumper for enabling hybrid power mode.
Details the JP4 jumper for controlling the SigmaDSP self-boot operation.
Describes the JP5 jumper for routing the AD2428 BCLK signal.
Explains the JP6 jumper for routing the AD2428 SYNC signal.
Details the JP7 jumper for routing the AD2428 DRX0 signal.
Explains the JP8 jumper for routing the AD2428 DRX1 signal.
Describes the JP9 jumper for routing the AD2428 DTX1 signal.
Details the JP10 jumper for routing the AD2428 DTX0 signal.
Explains the JP11 jumper for routing the ADP621 CLK signal.
Details the JP12 jumper for thermistor monitoring circuits.
Explains the JP13 jumper to enable/disable the AD2428 transceiver regulator.
Describes the JP14 jumper to select the voltage for the AD2428 transceiver.
Describes the on-board LEDs and their functions.
Describes the LED indicating A2B interrupt status.
Details the LED indicating ADAU1452 SigmaDSP programming status.
Explains the LED indicating an active SigmaStudio session.
Describes the LED indicating the board's reset status.
Details the LED indicating battery charging status.
Explains the LED indicating battery charging fault conditions.
Describes the LED indicating power-fail comparator status.
Details the LED indicating LTC4040 reset status.
| Brand | Analog Devices |
|---|---|
| Model | EVAL-AD2428WD1BZ |
| Category | Motherboard |
| Language | English |