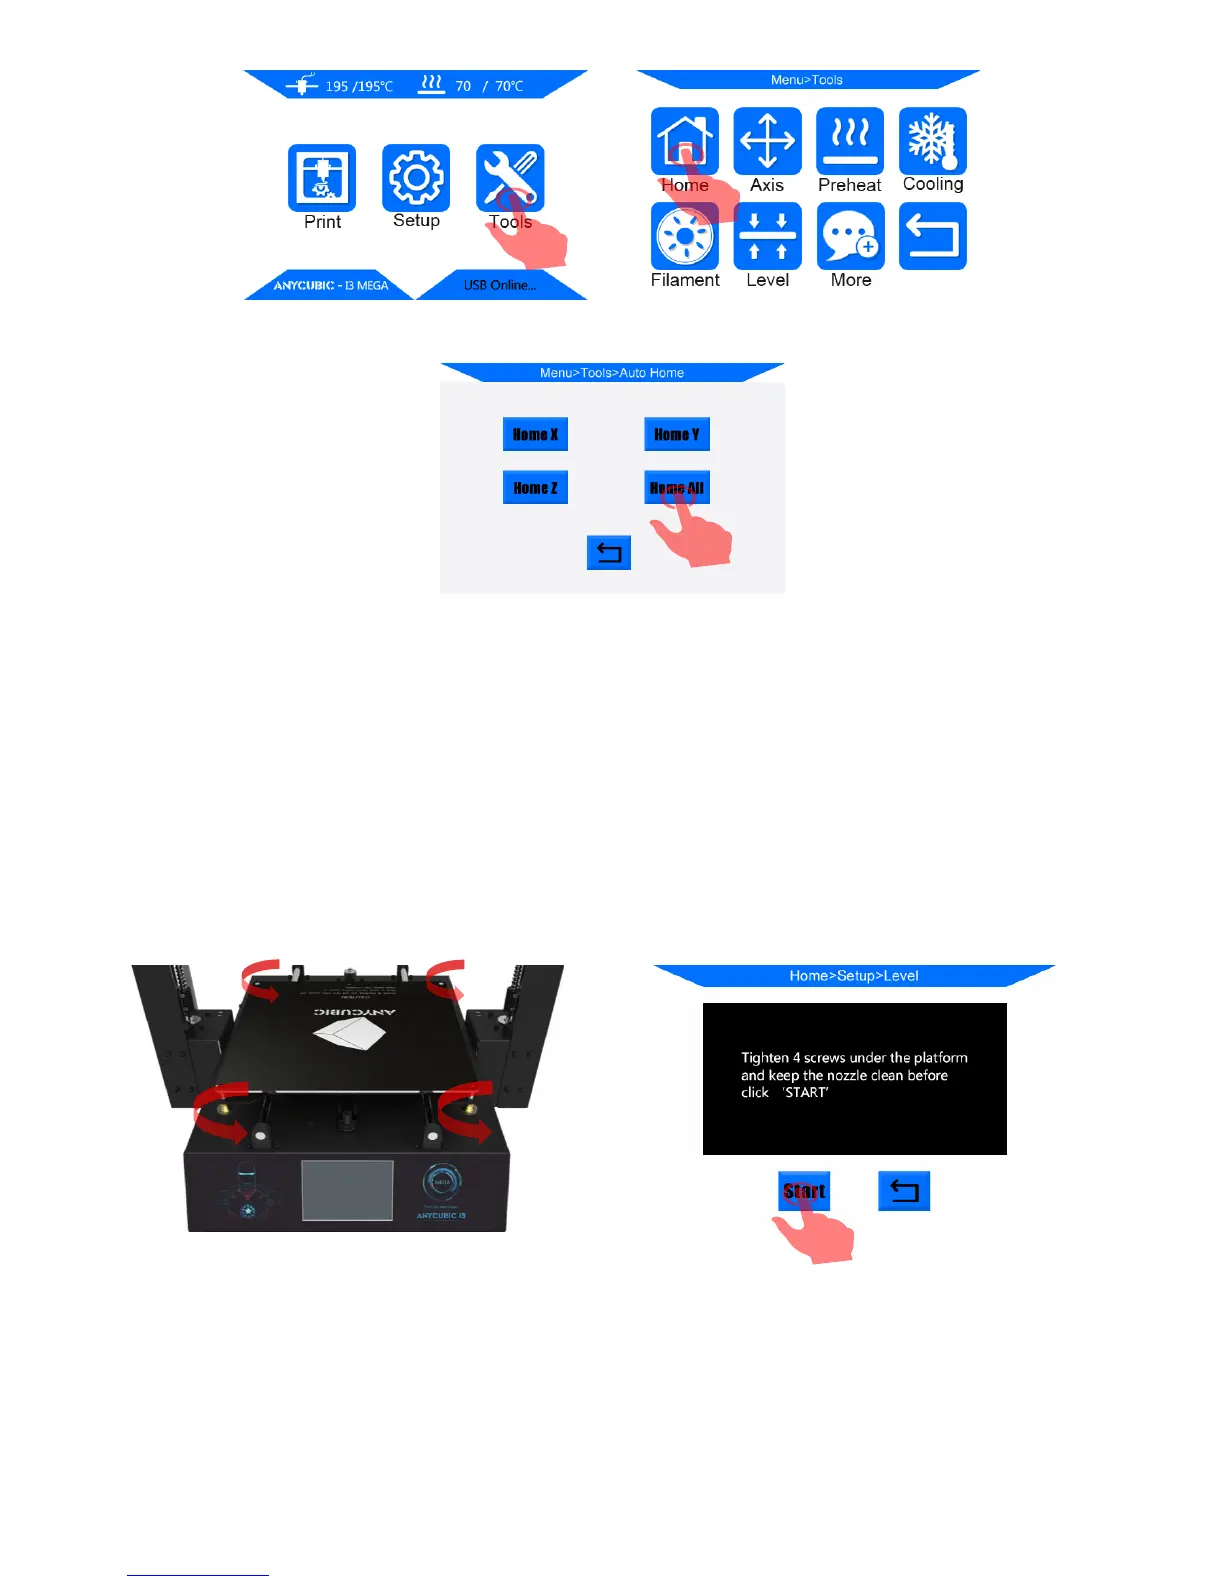
11
(Figure 11)
3. Tighten the 4 screws/nuts underneath the print platform till stop (Fig. 12), to create a
distance between the platform and print head.
Click “Tools”-->“Level”, the machine will auto home first and then the X/Y/Z axis will
be locked and cannot be moved manually. Next, click “Start” in the pup-up window.
(Figure 12)
4. The print head will be traveling to the 4 corners of the print platform anti-clockwisely.
When it arrives at the first point, please slowly loosen the corresponding nut (Fig. 13), so
the platform will be gradually bouncing back toward the print head and proximity sensor