3.0 INSTALLATION
To install the Aphex Aural Exciter Type III for use with your system, per
form the instructions described in the following sections.
CAUTION... H Id Thoroughly read Section 3.5 before you apply power to the unit. An
incorrect line voltage setting can damage the unit.
3.1 Unpacking
Your Aural Exciter Type III was carefully packed at the factory, and the
container was designed to protect the unit from rough handling. Neverthe
less, we recommend careful examination of the shipping carton and its
contents for any sign of physical damage which could have occurred in
transit. If damage is evident, do not destroy the container or packing mate
rial. Immediately notify the carrier of a possible claim for damage. Shipping
claims must be made by the consignee.
3.2 Setting Input Sensitivity
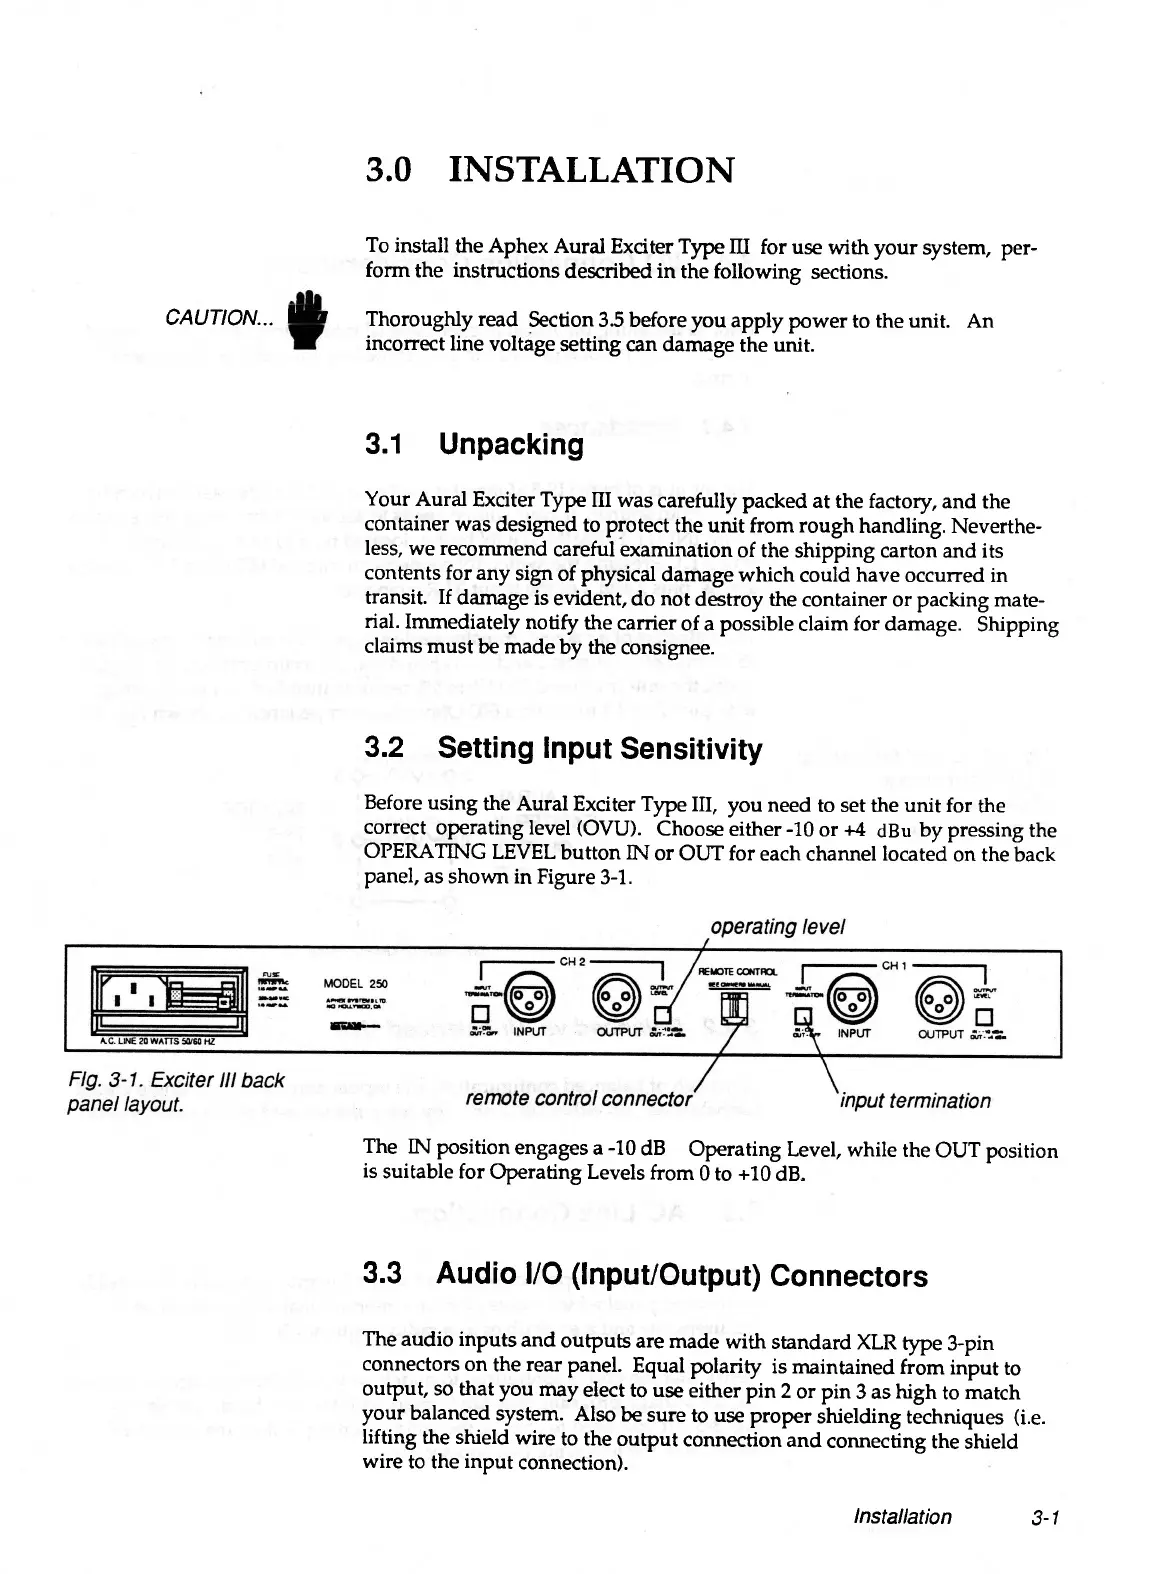
Before using the Aural Exciter Type III, you need to set the unit for the
correct operating level (OVU). Choose either -10 or +4 dBu by pressing the
OPERATING LEVEL button IN or OUT for each channel located on the back
panel, as shown in Figure 3-1.
The IN position engages a -10 dB Operating Level, while the OUT position
is suitable for Operating Levels from 0 to +10 dB.
3.3 Audio I/O (Input/Output) Connectors
The audio inputs and outputs are made with standard XLR type 3-pin
connectors on the rear panel. Equal polarity is maintained from input to
output, so that you may elect to use either pin 2 or pin 3 as high to match
your balanced system. Also be sure to use proper shielding techniques (i.e.
lifting the shield wire to the output connection and connecting the shield
wire to the input connection).
Installation
3-1