Apogee ONE | User’s Guide for Windows
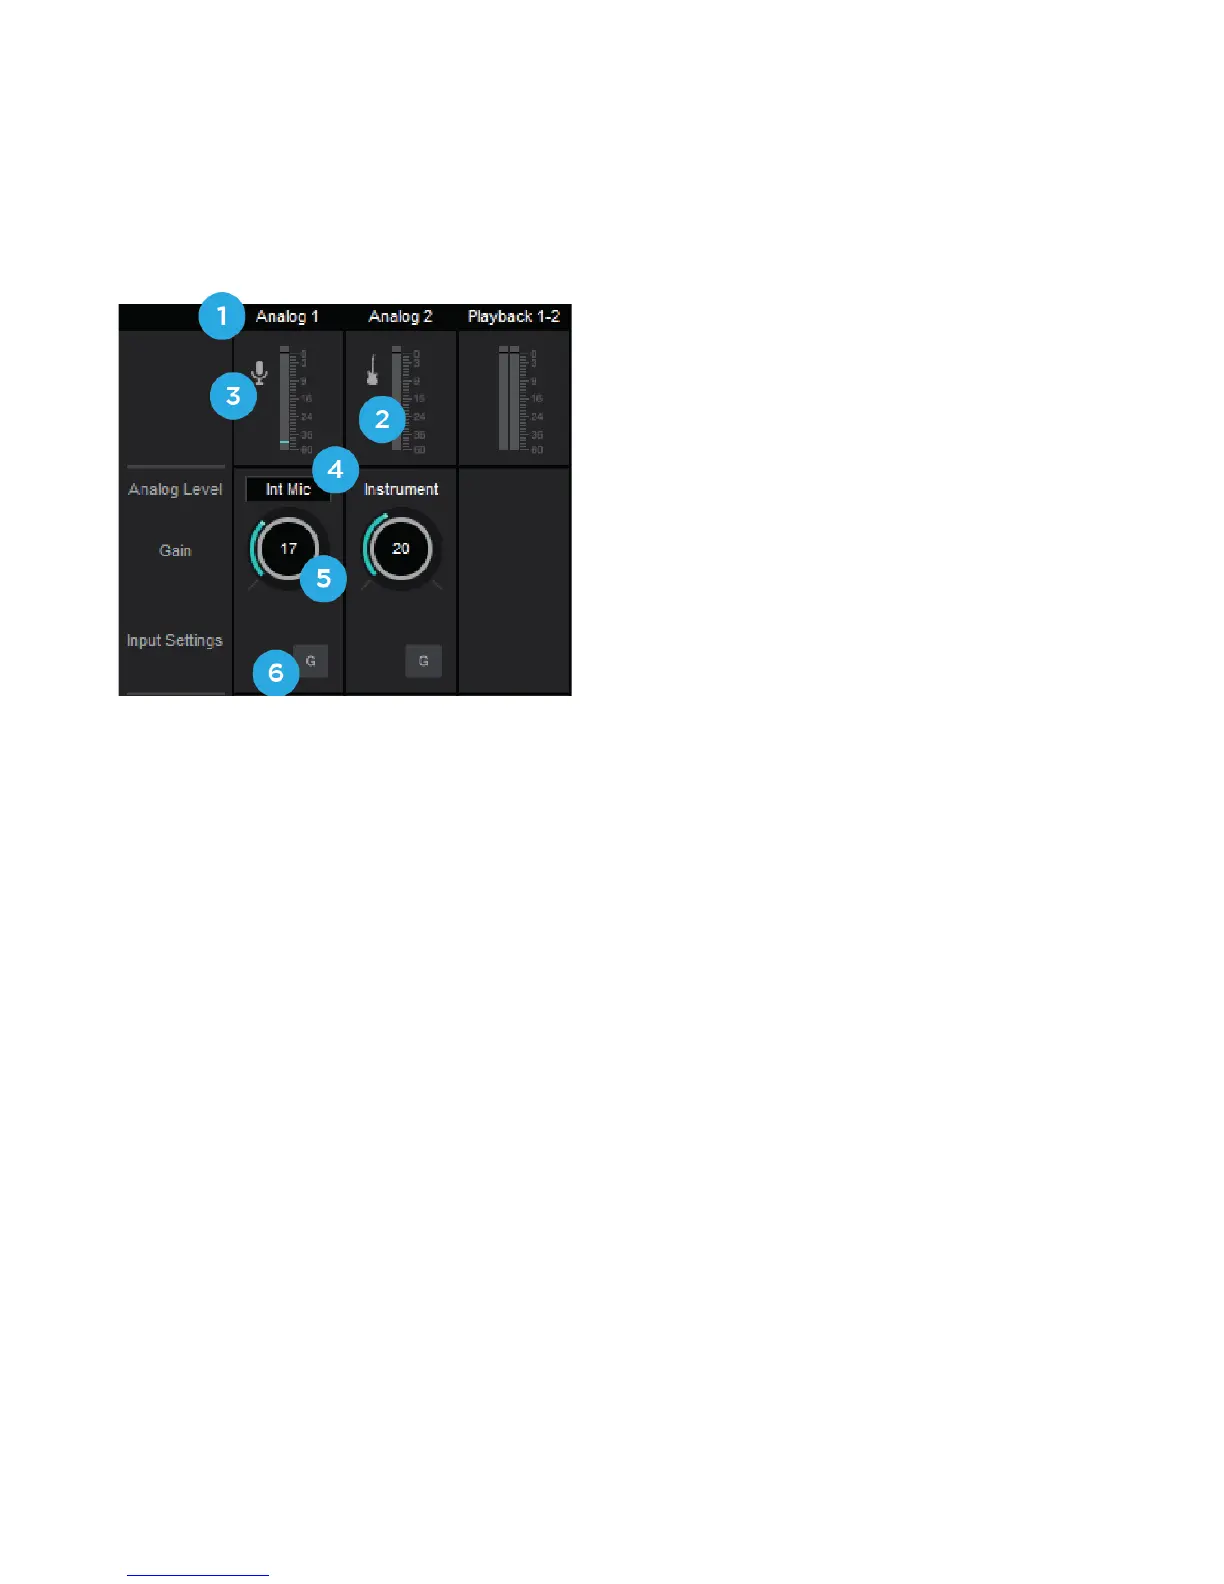
Channel Section
This portion of the Primary Window displays Channels for Analog input, and Playback from audio
software.
1. Channel Top Label - Indicates the channels
source.
2. Input Channel Level Meter - Shows the
post-gain digital signal level coming into the
channel.
3. Input Icon - Shows the input type selected from
the Analog Level drop-down
4. Analog Level - Use this pop-up menu to select the source for Input 1 - the built-in mic (Int
Mic), an external mic connected to the breakout cable’s XLR connector (Ext Mic), or an
external mic that requires phantom power connected to the XLR connector (Ext Mic 48v)
a. Input 2 is always the ¼” connector and can be used for any high impedance (Hi-Z)
instrument. The signal is sent through a Hi-Z to Low-Z conversion circuit before sent
through the microphone preamplifier circuit.
5. Gain Control - Use to adjust the gain of the microphone preamp. Not available when the input
is set to +4dBu or -10dBV
6. Group - This button groups the gain setting of both inputs so that Apogee ONE’s multi-function
knob or software gain knob controls both input gains simultaneously. If a gain offset is present
between inputs when Group is set to On, this offset is preserved.
Page 19