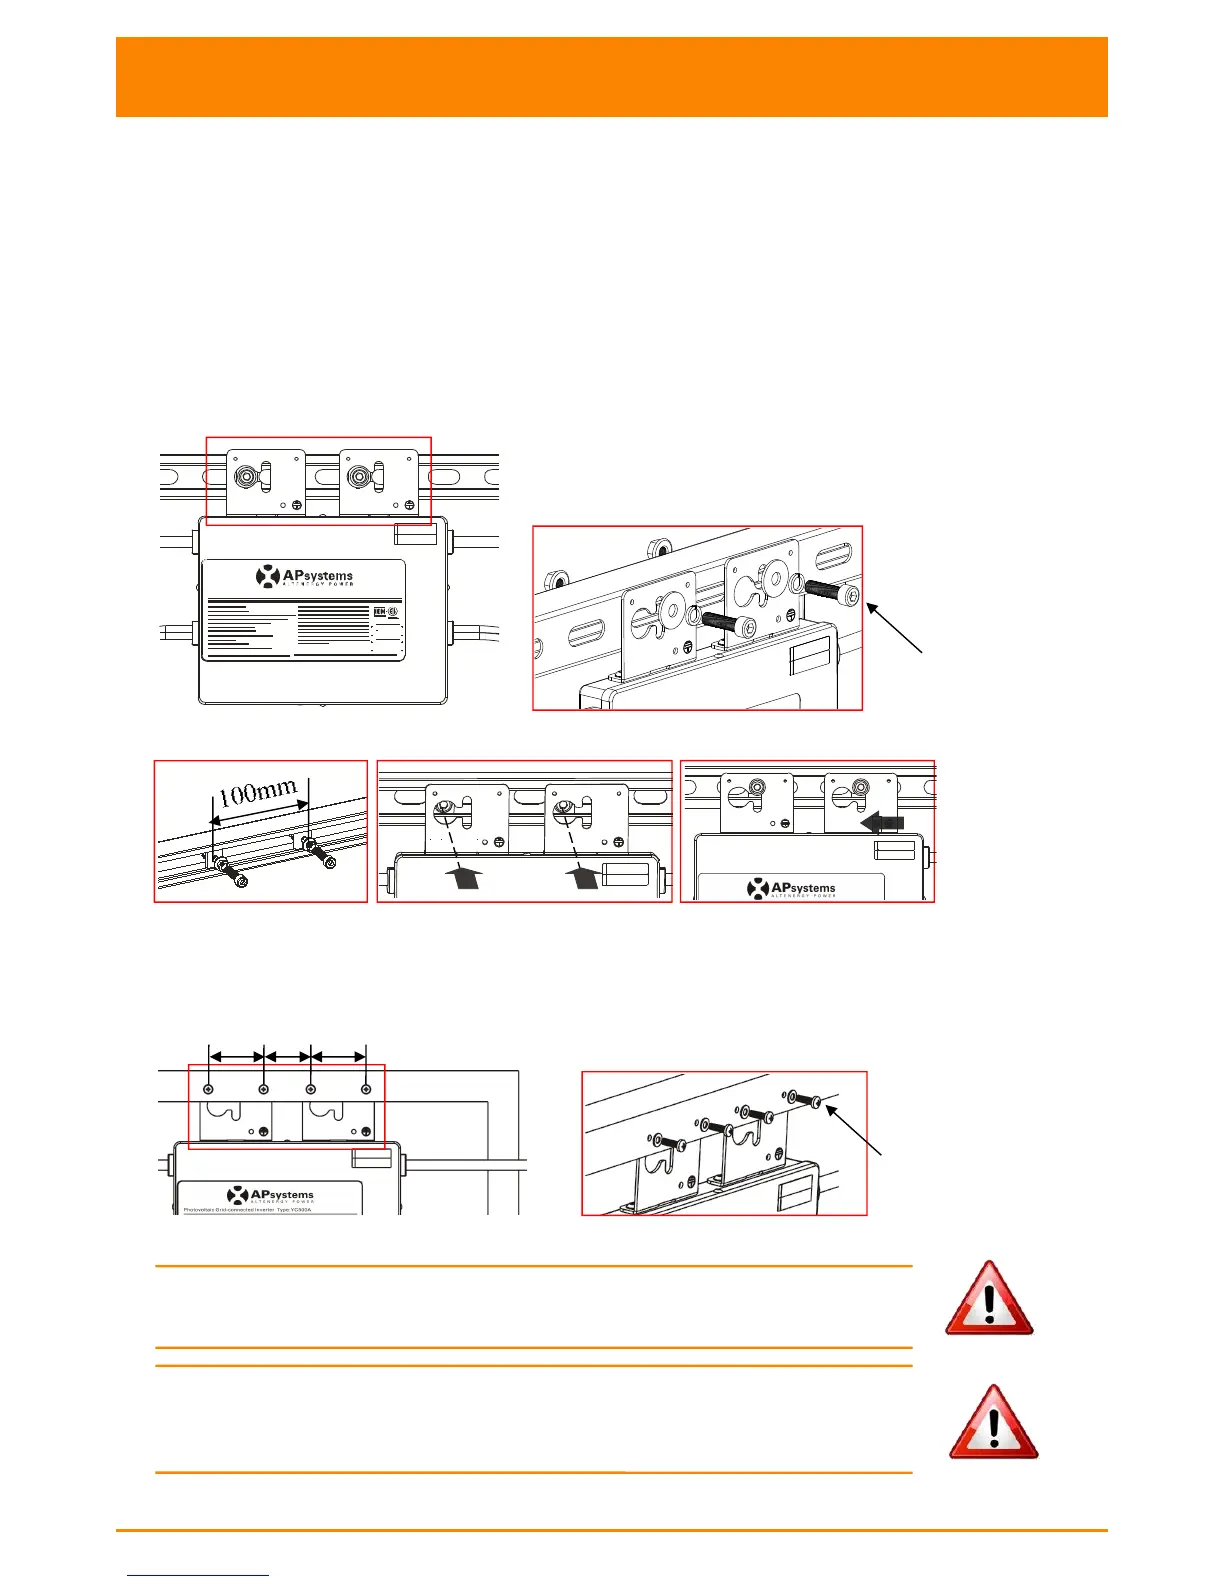
EasyManua.ls Logo

APsystems YC500A - Step 2: Attach Microinverters to Racking or PV Module Frame

APsystems YC500A
23 pages
Print Icon
To Next Page IconTo Next Page
To Previous Page IconTo Previous Page
Loading...
YC500A Installation/User Manual
9
YC500A Installation Procedures
Step 2 - Attaching the APsystems Microinverters to the Racking or the
PV Module Frame
Attach to the racking
a. Mark the location of the Microinverter on the rack, with respect to
the PV module junction box or any other obstructions.
b. Mount one Microinverter at each of these locations using hardware
recommended by your module racking vendor.
Option 1:
Photovoltaic Grid-connected Inverter Type:YC500A-NA-MX
AB
Figure 4
Option:2
Figure 5
Attach to the PV module frame.
Drill holes on the PV module frame before installing YC500A. Please check with
the module manufacturer the compatibilty of such installation process.
Figure 6
WARNING:
Prior to installing any of the microinverters, verify
that the utility voltage at the point of common connection matches
the voltage rating on microinverter label.
WARNING: Do not place the inverters (including DC and AC connectors)
Where exposed to the sun, rain or snow, even gap between modules.
Allow a minimum of 3/4’’(1.5cm.) between the roof and the bottom of the
Microinverter to allow proper air flow.
M8
(not supplied
by APsystems)
54
54
46
M4

Other manuals for APsystems YC500A

Related product manuals