EasyManua.ls Logo

ARAG IBX100 - Wiring Connections; General Precautions for a Correct Harness Position; Control Unit (ECU) Connection

ARAG IBX100
76 pages
Print Icon
To Next Page IconTo Next Page
To Previous Page IconTo Previous Page
Loading...
9
INSTALLATION
6 WIRING CONNECTIONS




6.1 

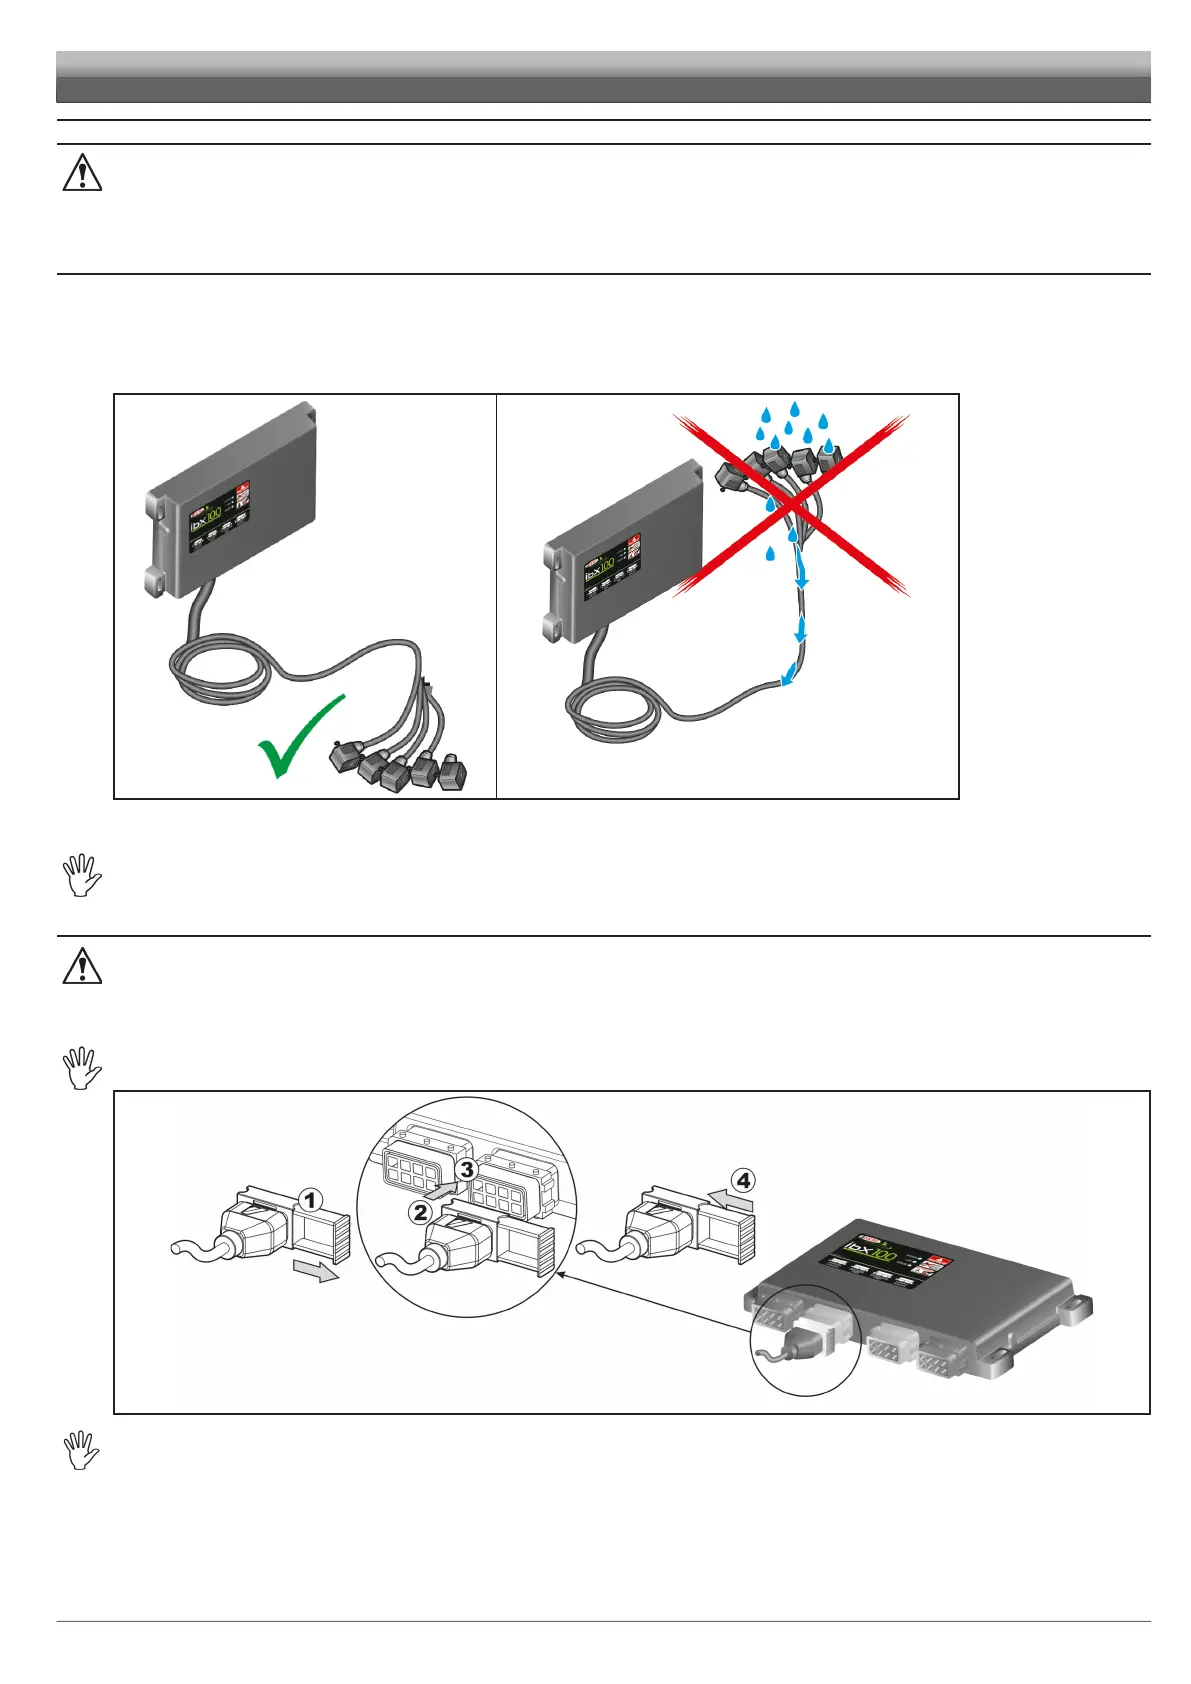
- secure the harness so that it does not interfere with moving parts;
- route the harnesses so that they cannot be damaged or broken by machine movements or twisting.

- the cable branches must ALWAYS be face down (Fig. 8).



- Do not force the connectors by pushing too hard or bending them: the contacts may be damaged and system operation may be compromised.


6.2 
).
THIS CONNECTION MUST BE CARRIED OUT LATER, ONLY AFTER INSTALLING ALL THE COMPONENTS 7
).
Connect harnesses as specified in par. 5.3; each one of them shall be connected to the corresponding socket on the remote control unit.
Close the unused connectors with the relevant caps supplied in the package.




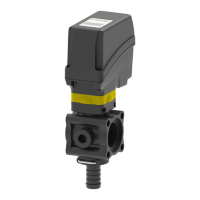
• Open connector slide (1, Fig. 10).
• To position connector (2), insert it inside socket (3), then press: .
• Close slide (4) until it locks in place.

Table of Contents