1. When ready to cut, place the torch
near the work, make certain all safety
precautions have been taken and pull
the trigger. The pilot arc will start.
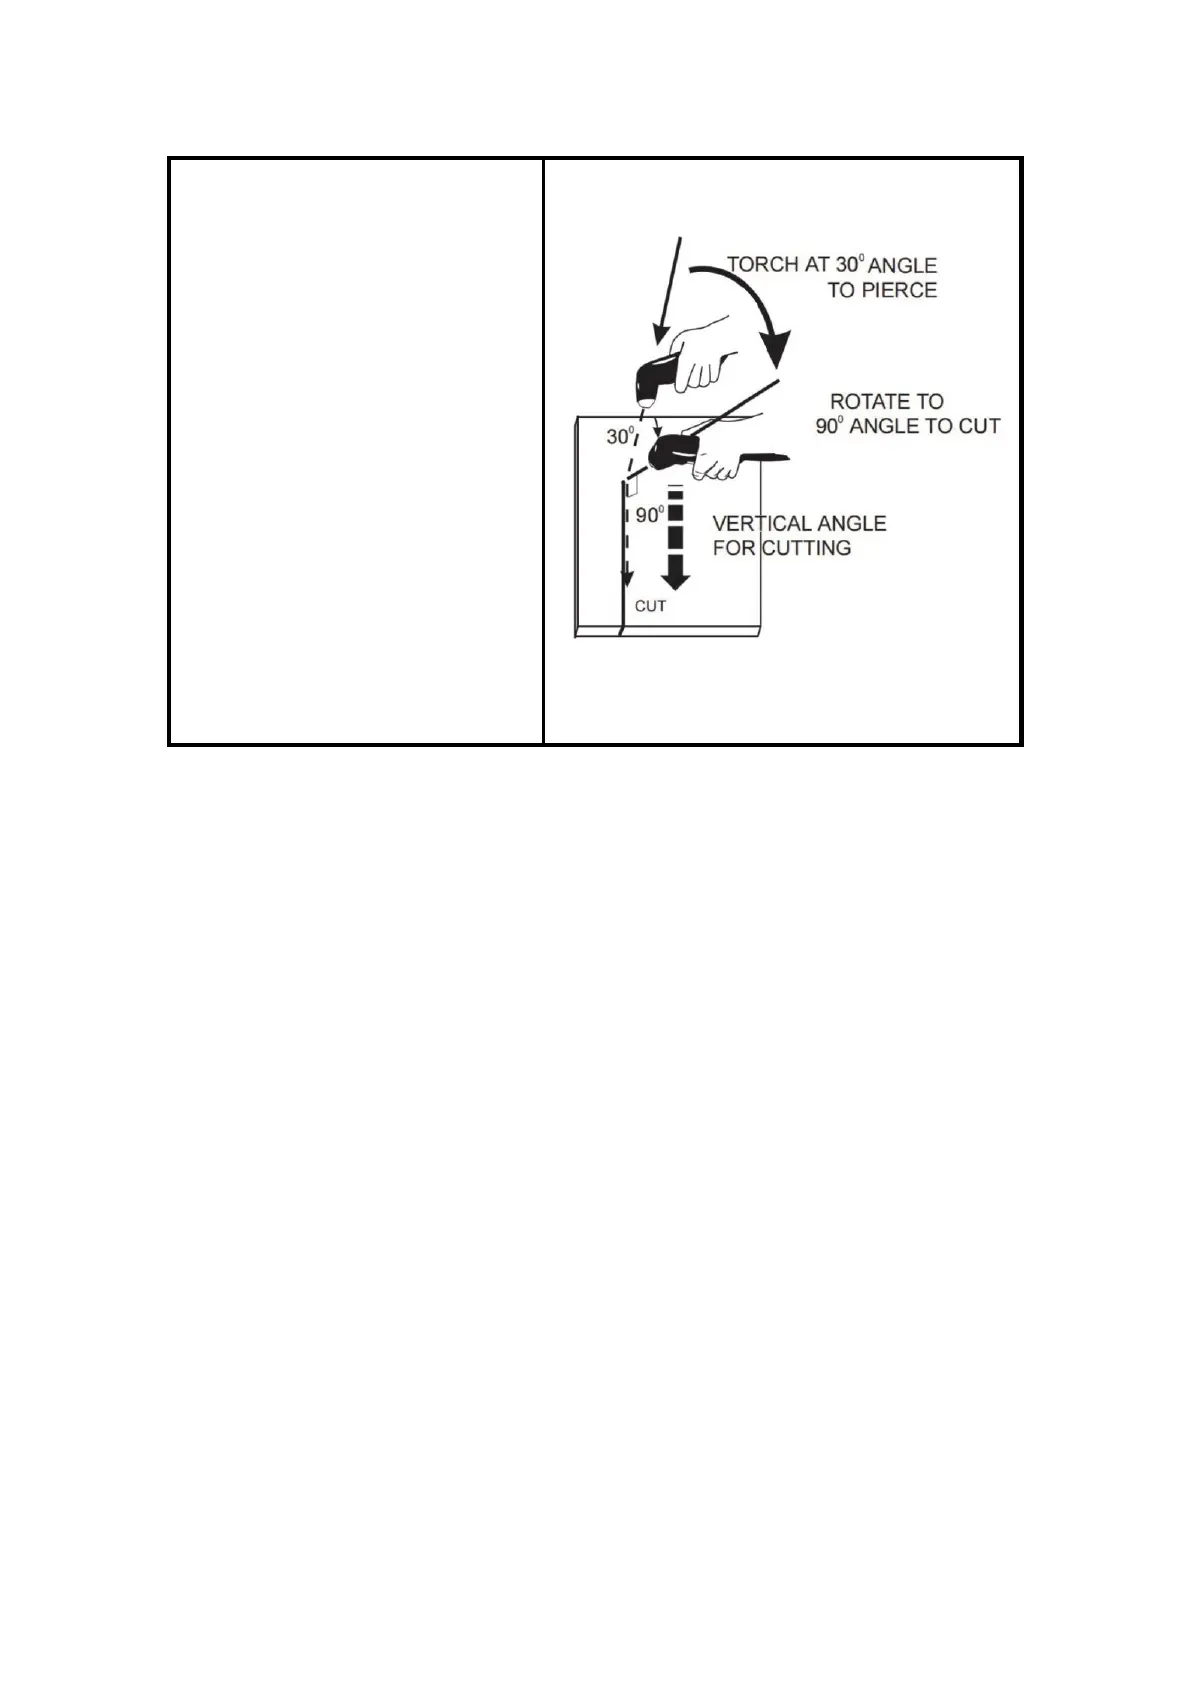
2. Pierce the work piece by slowly
lowering the torch onto the metal at a
30° angle away from the operator.
This will blow the dross away from the
torch nozzle. Slowly rotate the torch
to vertical position as the arc
becomes deeper.
NOTE: Graphics shown are for
understanding torch angles for best
results – the distances from the
workpiece are exaggerated. In actual
operation, the nozzle should be held
just above the work piece surface.
Figure 17 Cutting operation
NOTE
For better torch control, it is acceptable to let the nozzle drag along the work piece surface.
This will shorten nozzle life. Also, it is acceptable to place a non-conductive torch guide on
the work piece in order to achieve a cleaner cut
• When the trigger is released, the arc will stop. The gas will continue to flow for 5 seconds
of postflow. If the trigger is activated within this time period
• If the dross is difficult to remove, reduce the cutting speed. High speed dross is more
difficult to remove than low speed dross.
• The right side of the cut is more square than the left as viewed along the direction of
travel.
• Clean spatter and scale from the nozzle frequently.
Parts in place
Cutting torch reference Figure 7 cutting torch head. If the accessories of cutting
torch need to be replaced, please log in to the official website:
WWW.ARCCAPTAIN.COM
• Check the assembly of the torch consumables. If they are not properly in place, the
machine will not start. Make sure that the shield cup is hand tight. Do not use pliers
or over tighten.
• Check the conditions of the inside of the nozzle. If debris has collected, rub the
electrode on the inside bottom of the nozzle to remove any oxide layer that may have built
up. Refer to the “Routine Maintenance Section".