99
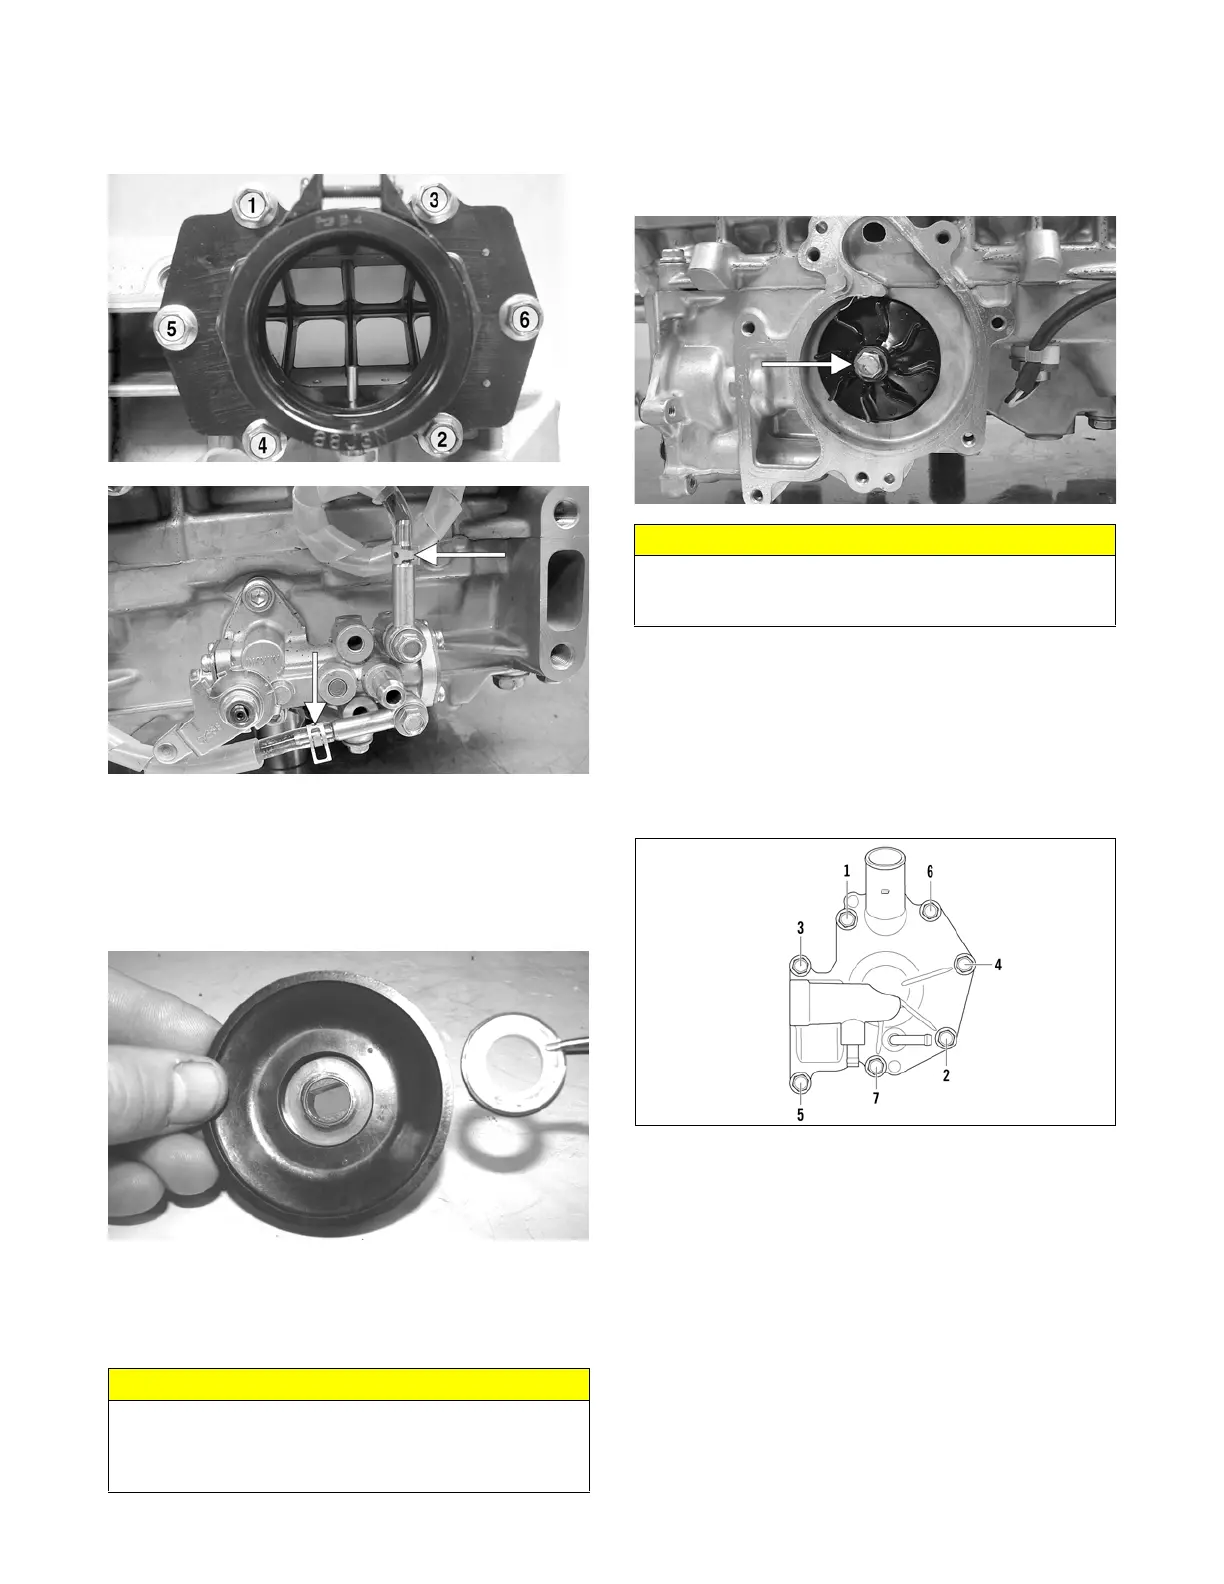
19. With new gaskets, install the reed valve assemblies
and intake flanges using the pattern shown. Tighten
to 96 in.-lb; then secure the intake flange oil hoses to
the oil pump and secure with the clamps.
IO021A
IO022A
20. Install the coolant temperature sensor (threads coated
with white Loctite #575) and tighten to 18 ft-lb; then
secure the sensor wire to the sensor with a cable tie.
21. Position the ceramic/rubber seal into the back side of
the water pump impeller with the ceramic face of the
seal directed out.
CM168
22. Using a suitable tool, press the seal into position
making sure its marked side is positioned towards
the rubber seal cup; then apply a thin coat of grease
to the seal outer surface.
23. Place the impeller into position and secure with a cap
screw and washer. Be sure the rubber side of the
washer is lubricated with a light coat of grease and
directed toward the impeller. Apply blue Loctite
#243 to the threads of the cap screw and tighten to
108 in.-lb.
IO018A
24. Apply High-Temp Sealant to the crankcase/water
pump cover seam; then install the dowel pins into the
crankcase.
25. Apply a thin film of low-temp grease to the water
pump cover O-ring; then position the O-ring into the
water pump cover. With the alignment pins in place,
install the cover. Secure with the screws using the
pattern shown. Tighten to 96 in.-lb.
0742-257
26. With the bypass valve of the thermostat directed to
the 12 o’clock position, install the thermostat and
housing; then in a crisscross pattern, tighten the cap
screws to 96 in.-lb.
CAUTION
When installing the ceramic/rubber seal into the impel-
ler, never touch the ceramic part of the seal. Make sure
components are clean and free of any dirt or contami-
nants.
CAUTION
The rubber side of the washer securing the impeller
must be positioned toward the impeller. If installed
incorrectly, a coolant leak will result.
 Loading...