32
NOTE: On LXR/LTD models prior to lowering and
securing the seat, connect the seat heater harness con-
nector.
RE MOVING CUSHION
1. Remove the seat assembly.
2. Using a sharp tool, pry out all staples securing the
seat cover to the plastic seat base.
3. From beneath the seat foam, remove the seat wire
from the two elastic loops; then remove the cover
from the seat base and seat foam.
INSTALLING CUSHION
1. Position the cover over the seat foam and seat base;
then pull the two elastic loops through the slots in the
seat foam and secure with the seat wire. Check to
make sure it is positioned straight.
2. Fold the rear edge of the cushion down and around
the plastic base. Using a staple gun and 1/4 in. sta-
ples, staple the rear flap of the cushion to the plastic
base in the same areas as the original staples were
located. Position staples 1 in. apart.
3. Fold the sides of the cushion down around the bot-
tom edge of the plastic seat base. Position the staples
in the same area as the original staples were located.
NOTE: Note the cushion fit. If any wrinkles are
noted, remove by pulling the cushion material in the
appropriate direction before securing with staples.
4. Fold the front cushion material back and onto the
plastic seat base. Check for wrinkles and secure with
staples and two screws.
5. Install the seat assembly.
Seat Assembly
(M Sno Pro/HCR/LTD)
REMOVING/INSTALLING
1. Remove both torx-head screws from the side of the
seat; then remove the four tabs from the seat base
from the lower console. Pull back and remove the
seat cover and foam.
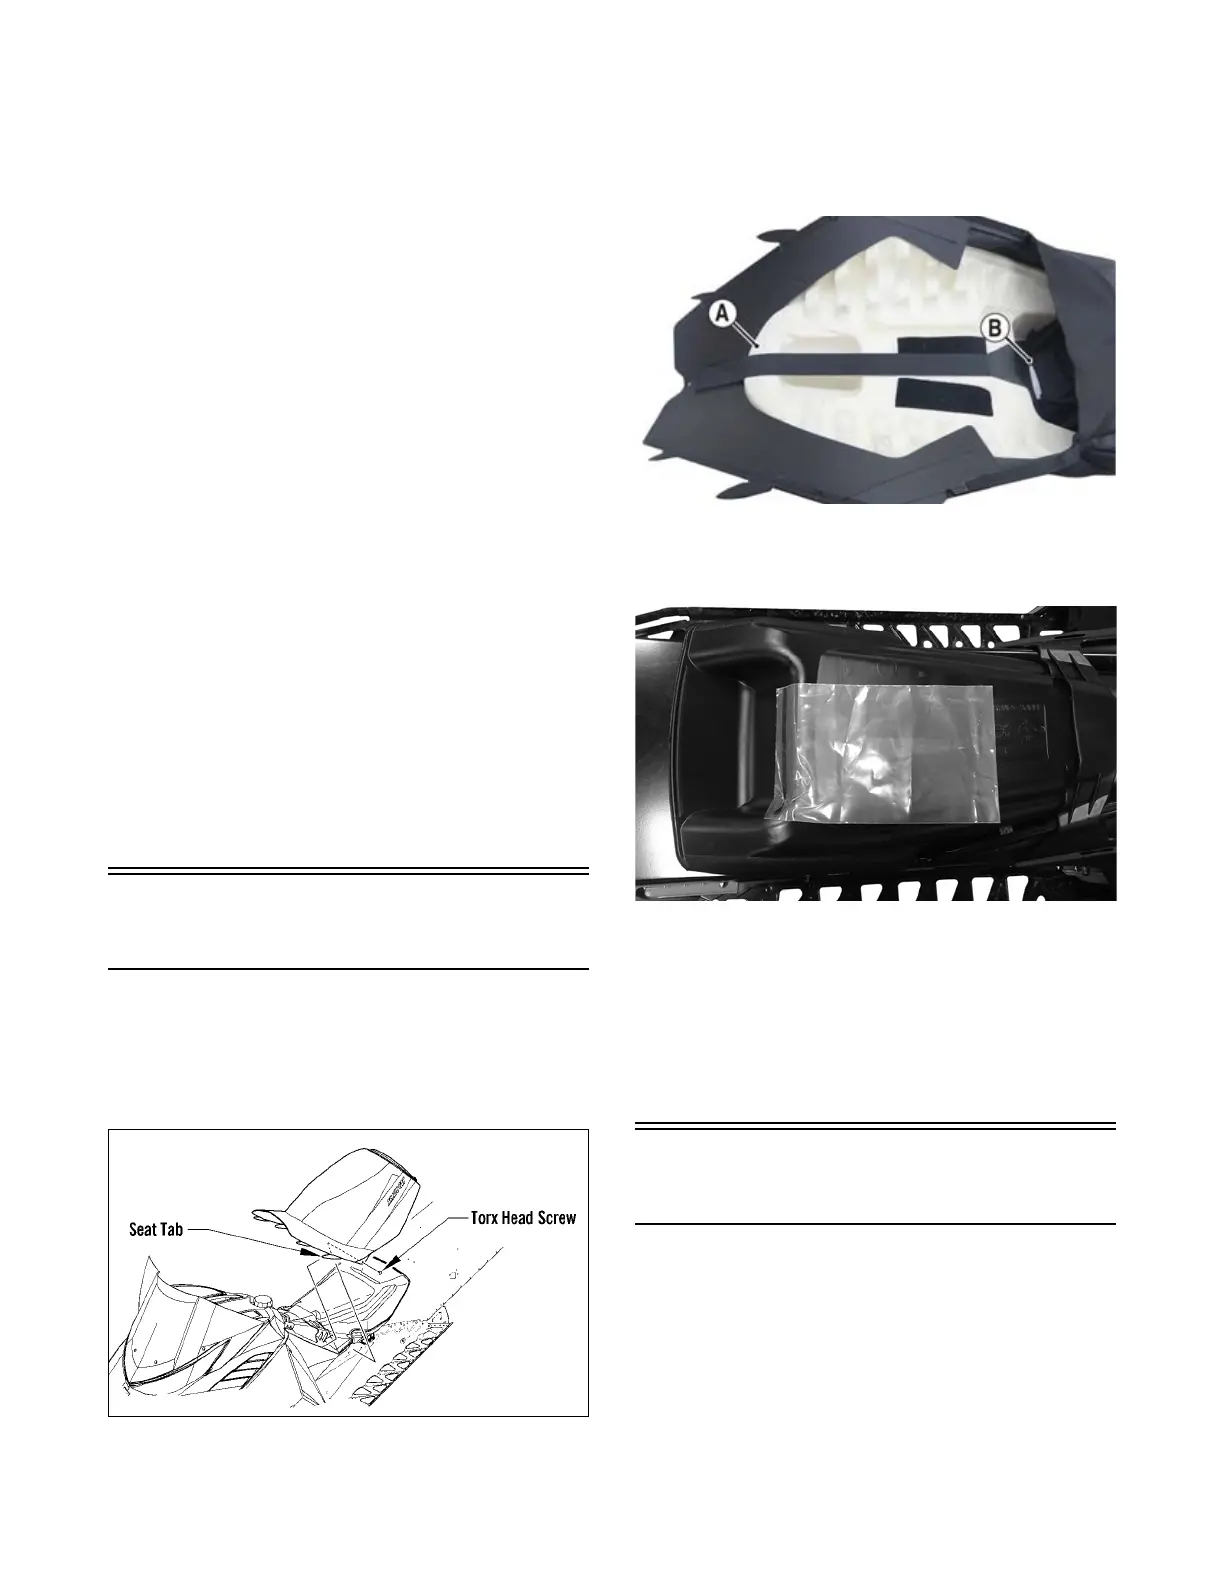
0747-530
2. Position the seat foam into the seat cover by first
aligning the front of the foam with the front of the
seat base/cover (A); then wrap the rear of the seat
base/cover over the rear of the seat foam (B). Cover
the sides of the seat foam with the seat base/cover
and secure using the Velcro strap.
SNO-1203A
3. Remove the backing from the installation bag (p/n
1655-841); then adhere it to the gas tank making sure
the bag covers the Velcro on the gas tank.
SNO-1206
4. Slide the rear of the seat cover with foam over the
rear of the gas tank; then slide the four tabs into the
four holes in the lower console and secure to the tun-
nel using two self-tapping screws. Do not over
tighten.
NOTE: To ease the installation of the seat cover,
carefully pry up the rear of the gas tank so the seat
cover can easily slide around the rear of the gas tank.
Taillight/Brakelight
Assembly
1. Remove the two machine screws securing the tail-
light to the taillight support; then disconnect the tail-
light harness connector.