149
4. Inspect the inner housing for tightness and cracks. If
the housing shows any signs of being loose or
cracked, replace the pinion assembly.
5. Inspect the pinion return spring for wear. If the
spring shows any worn areas, replace the spring.
ASSEMBLING PINION (6000)
1. With low-temperature grease applied to the threads of
the pinion shaft, slide the pinion gear, spring retainer,
pinion spring, and snap-ring retainer (note end-for-end
orientation) onto the shaft in their original positions.
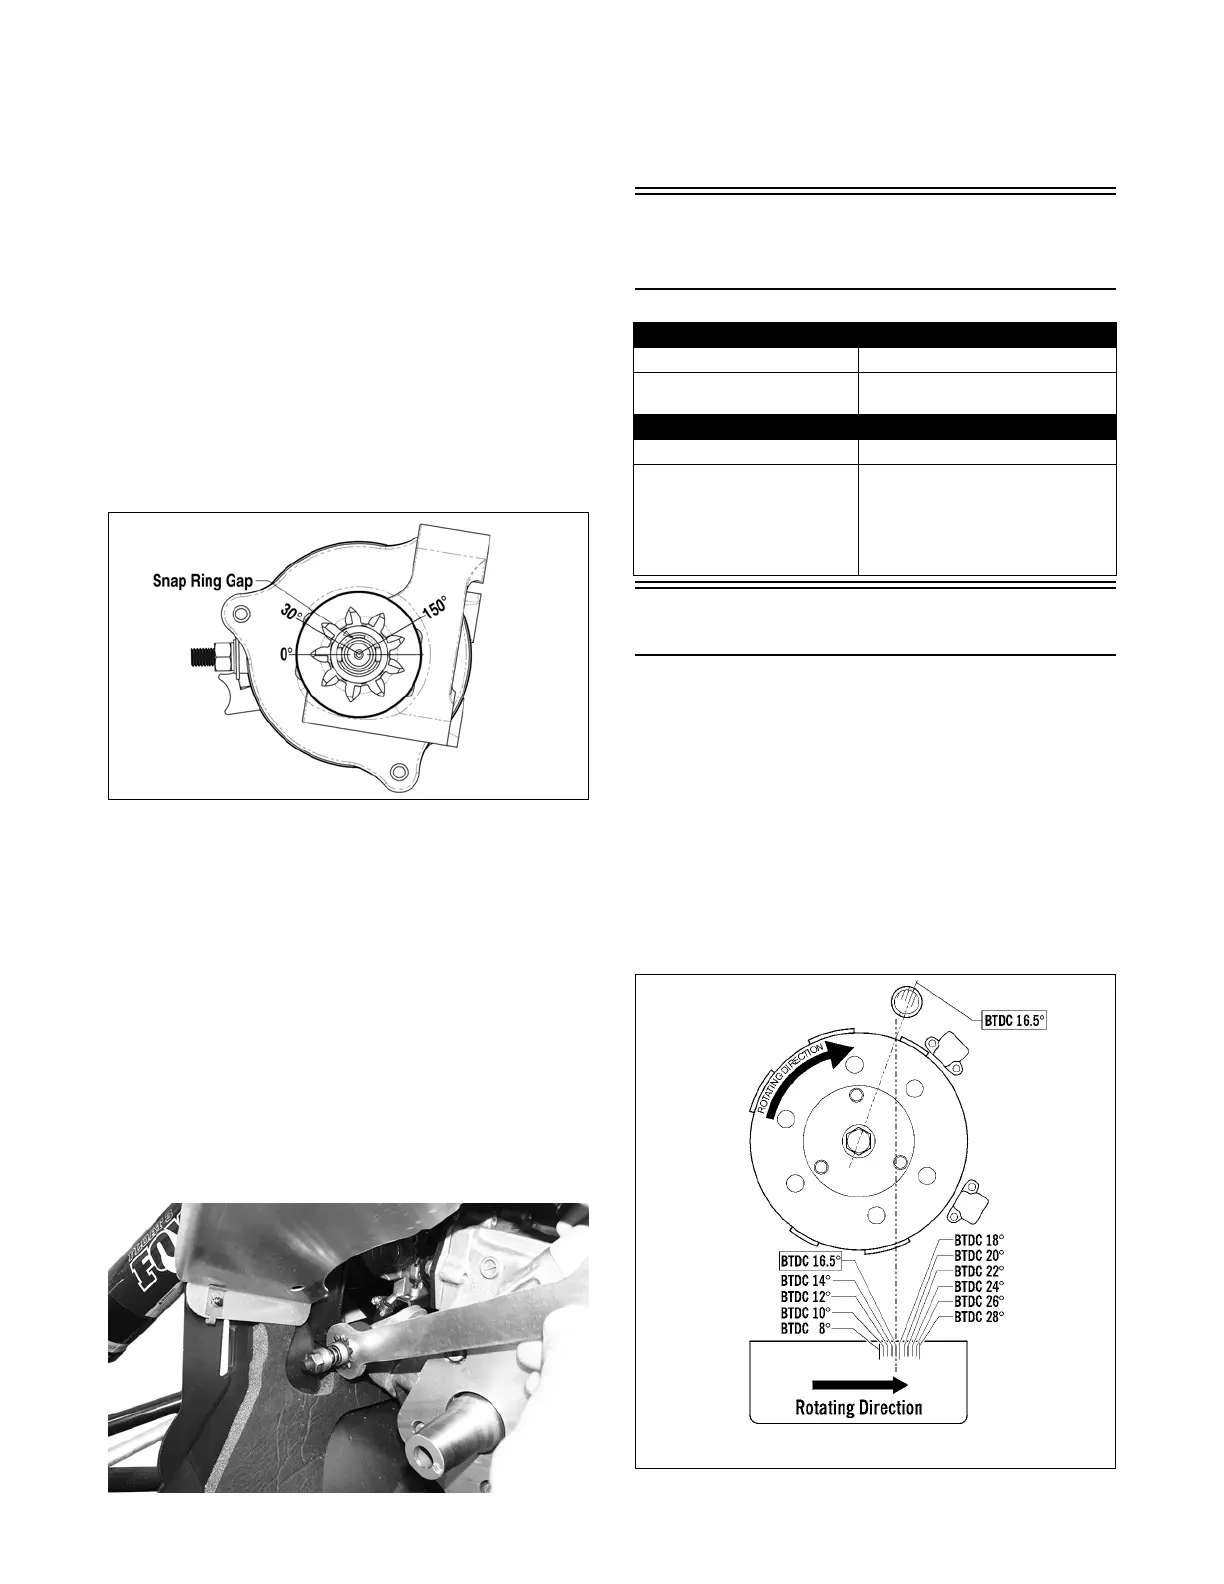
2. Place new snap ring over the end of the pinion shaft;
then using a 14 mm socket and a hammer, gently tap
the snap ring into the groove on the shaft making
sure the gap in the snap ring is directed upward.
3. Pull the pinion stop over the snap ring to lock it in
place making sure the snap ring gap is installed
between 30° and 150° of the set screw centerline (0°).
SNO-589A
4. Apply red Loctite to the set screws; then install one
of the screws and tighten to 8-12 in.-lb. Install the
other screw and tighten to 31-35 in.-lb and tighten
the first screw again to 31-35 in.-lb.
5. Install the drive clutch. Tighten to 51 ft-lb.
ASSEMBLING PINION (8000)
1. With low-temperature grease applied to the threads
of the pinion shaft, slide the pinion gear, spring
retainer, pinion spring, and pinion stop (note
end-for-end orientation) onto the shaft in their origi-
nal positions.
2. Loosely secure the components from step 1 using the
washer and nut (threads coated with red Loctite
#271); then install the pinion gear wrench onto the
pinion gear and tighten the nut to 30 ft-lb.
XM394
NOTE: Make sure the pinion stop is able to be
pushed in and rotated freely when the nut is torqued.
3. Remove the wrench and install the drive clutch.
Tighten to 51 ft-lb.
Troubleshooting Electric
Start
Ignition Timing
NOTE: The ignition timing is not adjustable, but on
the 4000/8000 it can be checked and/or verified.
CHECKING
1. Connect a timing light to the MAG-side spark plug
lead.
2. Using a shielded safety stand, raise the rear of the
snowmobile off the floor and start the engine. Gradu-
ally increase the engine speed to 2000 RPM; with the
engine warm the pointer should align with the proper
timing mark on the flywheel.
BTDC - 16.5° - 0.072”
0746-516
Problem: Hot or Smoking Wires
Condition Remedy
1. System wired incor-
rectly
1. Check wiring against wiring
diagram
Problem: Starter Does Not Turn Over
Condition Remedy
1. Battery discharged
2. Connection loose
3. Grounding improper
4. Fuse blown - not
installed
1. Check/charge the battery
2. Check tightness of all con-
nections
3. Check ground connections
4. Check - replace fuse
 Loading...