115
FS220A
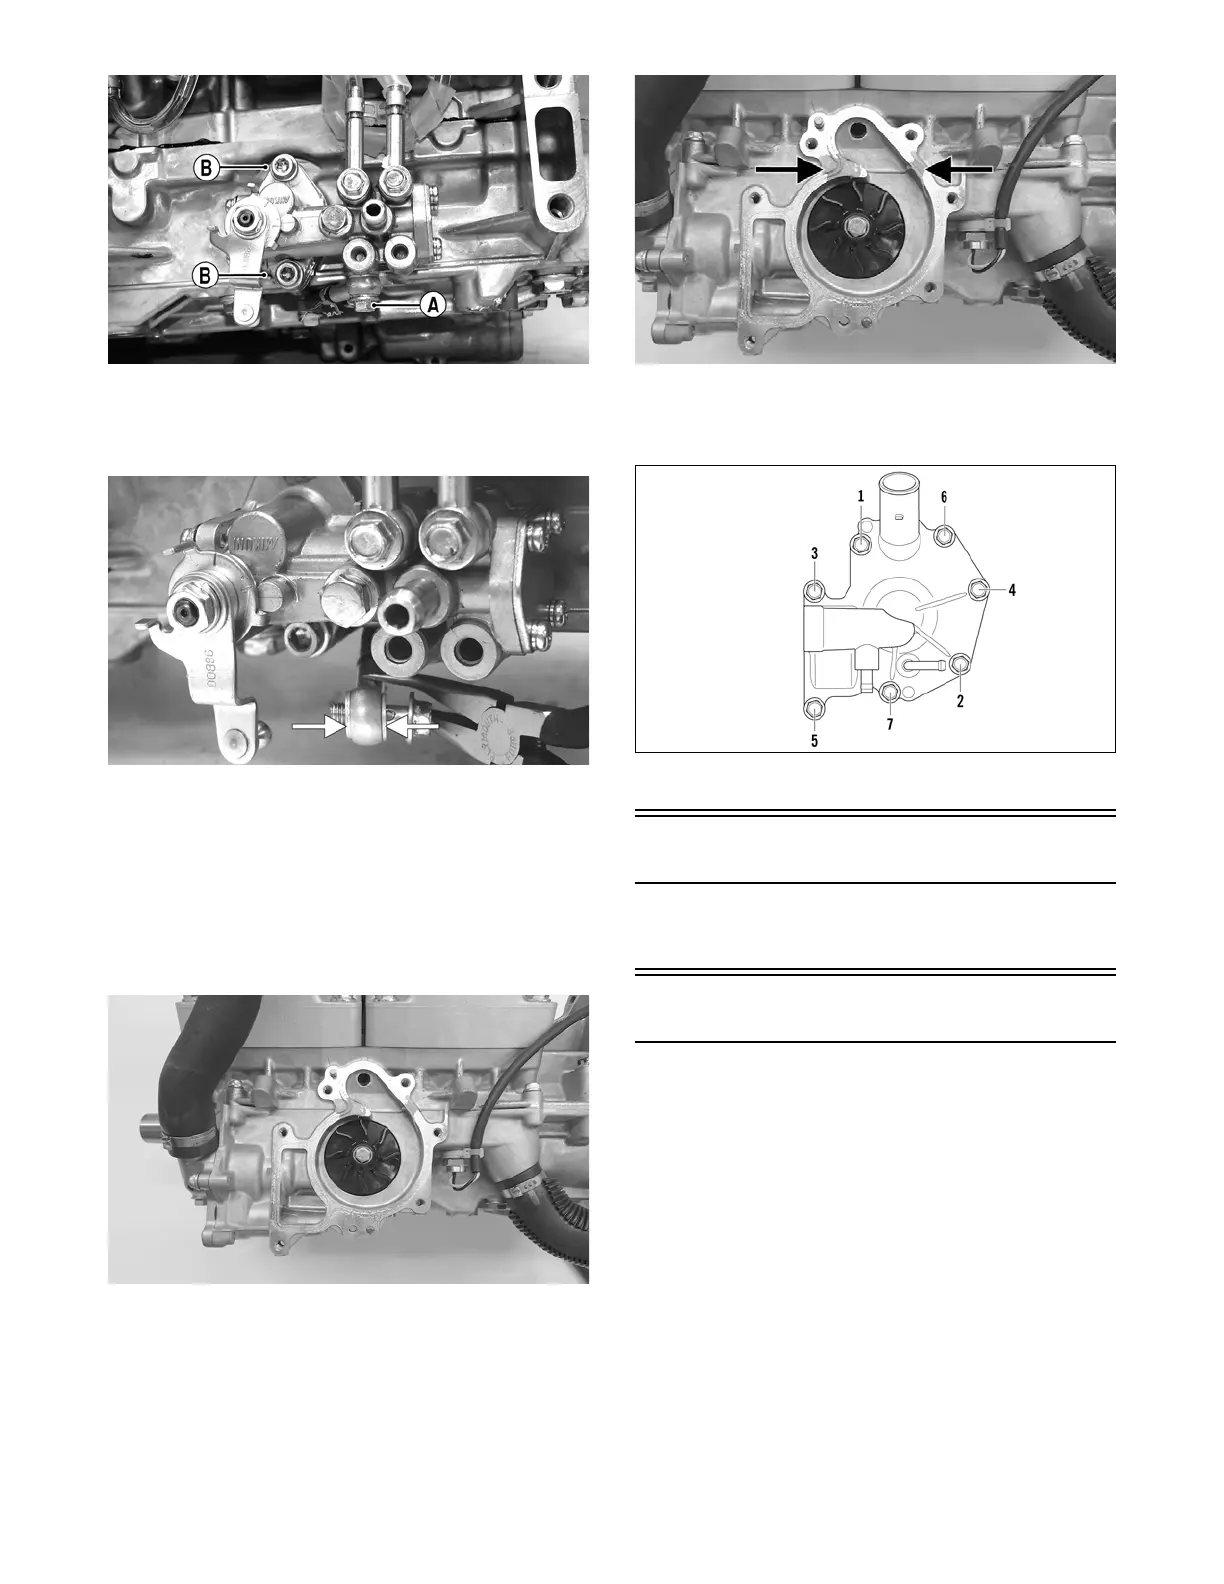
NOTE: When installing the lower check valve,
assure that the gaskets are installed on each side of
the valve.
FS235A
NOTE: After the oil pump has been secured, assure
that the oil hoses from the pump to the intake flanges
are routed properly.
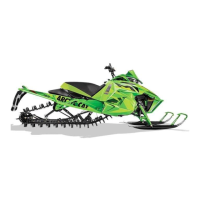
9. Place the impeller into position and secure with a cap
screw and washer. Be sure the rubber side of the
washer is directed towards the impeller. Apply
blue Loctite #243 to the threads of the cap screw and
tighten to 48 in.-lb.
XM112
10. Apply sealant to the crankcase seam; then install the
alignment pins into the crankcase (if removed).
XM112A
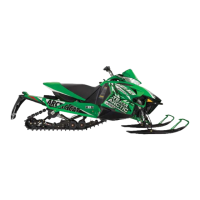
11. Position the O-ring into the water pump cover; then
install the cover. Install the cap screws; then using
the pattern shown, tighten to 96 in.-lb.
0742-257
12. Secure the hoses to the water pump cover.
Pressure Testing Engine
NOTE: To pressure test the engine, use Engine
Leak-Down Test Kit.
Liquid Cooling System
The liquid cooling system consists of heat exchangers,
water pump, coolant temperature sensor, and thermostat.
The system should be inspected for leaks or damage
whenever an overheating problem is experienced.
DRAINING COOLING SYSTEM
1. Remove the access panels; then disconnect the hood
harness and remove all screws securing the hood.
Remove the hood.
2. With the engine cool, remove the coolant cap; then
using a suitable coolant vacuum pump, remove as
much coolant as possible from the coolant tank.