Step 3. Scroll to next LLP Setting to view the Spas IP Address Assigned
as Displayed on the Topside Controller.
Scroll to the next LLP setting by pressing the FILTER button to display the
IP Address assigned to the Spa.
Note: .0 or .100 may not be a valid IP Address.
onSpa and Web Connect User Guide
onSpa and Web Connect User Guide Version 1 Revision Draft 1
Page 14 of 24 Issued Mar 2016
Steps to Access LLP to ensure your Spas IP Address is set to Dynamic (dy)
and your Spa has been assigned an IP Address
Step 3. Scroll to next LLP Setting to view the Spas IP
Address Assigned as Displayed on the Topside
Controller.
Scroll to the next LLP setting by pressing the FILTER button
to display the IP Address assigned to the Spa.
Note: .0 or .100 is not a valid IP Address.
Step 4. Scroll to the end of the LLP Settings to save/exit
the settings.
Scroll to the end of the LLP setting by pressing the FILTER
button until you reach the end of the LLP settings. The Spa
will then perform a reboot.
Step 5. Turn off the Electrical Power to the Spa
Turn of the power to your spa at the spas breaker.
Step 6. Turn on Electrical Power to the Spa
Turn on the power to your spa at the spas breaker.
Wait until the spa reboots fully.
Step 7. Confirm Spa has been assigned valid IP Address
Confirm Spa has been assigned a valid IP Address by
entering LLP setting and scrolling through the LLP settings
until the Spas IP address is displayed.
Note: .0 or .100 is not a valid IP Address.
Step 8. Scroll to the end of the LLP Settings to save/exit
the settings.
Scroll to the end of the LLP setting by pressing the FILTER
button until you reach the end of the LLP settings. The Spa
will then perform a reboot.
1.12 Low Level Programming (LLP) Overview
The following steps show how to access Low Level Programming (LLP) through your Spas Topside Controller to
ensure your Spas IP Address is set to Dynamic (dy) and your Spa has been assigned a valid IP Address.
Step 1. Access Low Level Programming through your Topside Controller
Press and hold down the FILTER button until LLP is displayed in the display
window (approx. 20 Seconds. The display with rst show Filter settings
Sett, continue to hold the button down until LLP is displayed.
Note: For a 5 pump spa (Epic) press and hold down PUMP 5 button.
Step 2. Scroll through LLP Settings until IP is Displayed
Scroll through the LLP settings by pressing then removing your nger
from the FILTER button until IP is displayed, IPst or IPdy will be displayed.
To change to IPdy press the Up Arrow button on the Topside Controller.
onSpa and Web Connect User Guide
Version 1 Revision Draft 1 onSpa and Web Connect User Guide
Issued Mar 2016
Page 13 of 24
1.11 Connect your Spa to the Home Network
You must first connect your spa to your home network, either using an EoP, WIFI
Extender or LAN Cable through your web device such as Smart Phone or tablet.
Refer Section 1.10 onSpa Quick Reference Charts (QRC)
• Section: 1.9.1 onSpa QRC Through Ethernet Over Power (EoP) Flowchart.
• Section 1.9.2 onSpa QRC Through WIFI Extender Flowchart.
• Section 1.9.3 onSpa QRC Through LAN Cable Flowchart.
1.12 LLP Overview
The following steps show how to access Low Level Programming (LLP) through your
Spas Topside Controller to ensure your Spas IP Address is set to Dynamic (dy) and your
Spa has been assigned a valid IP Address.
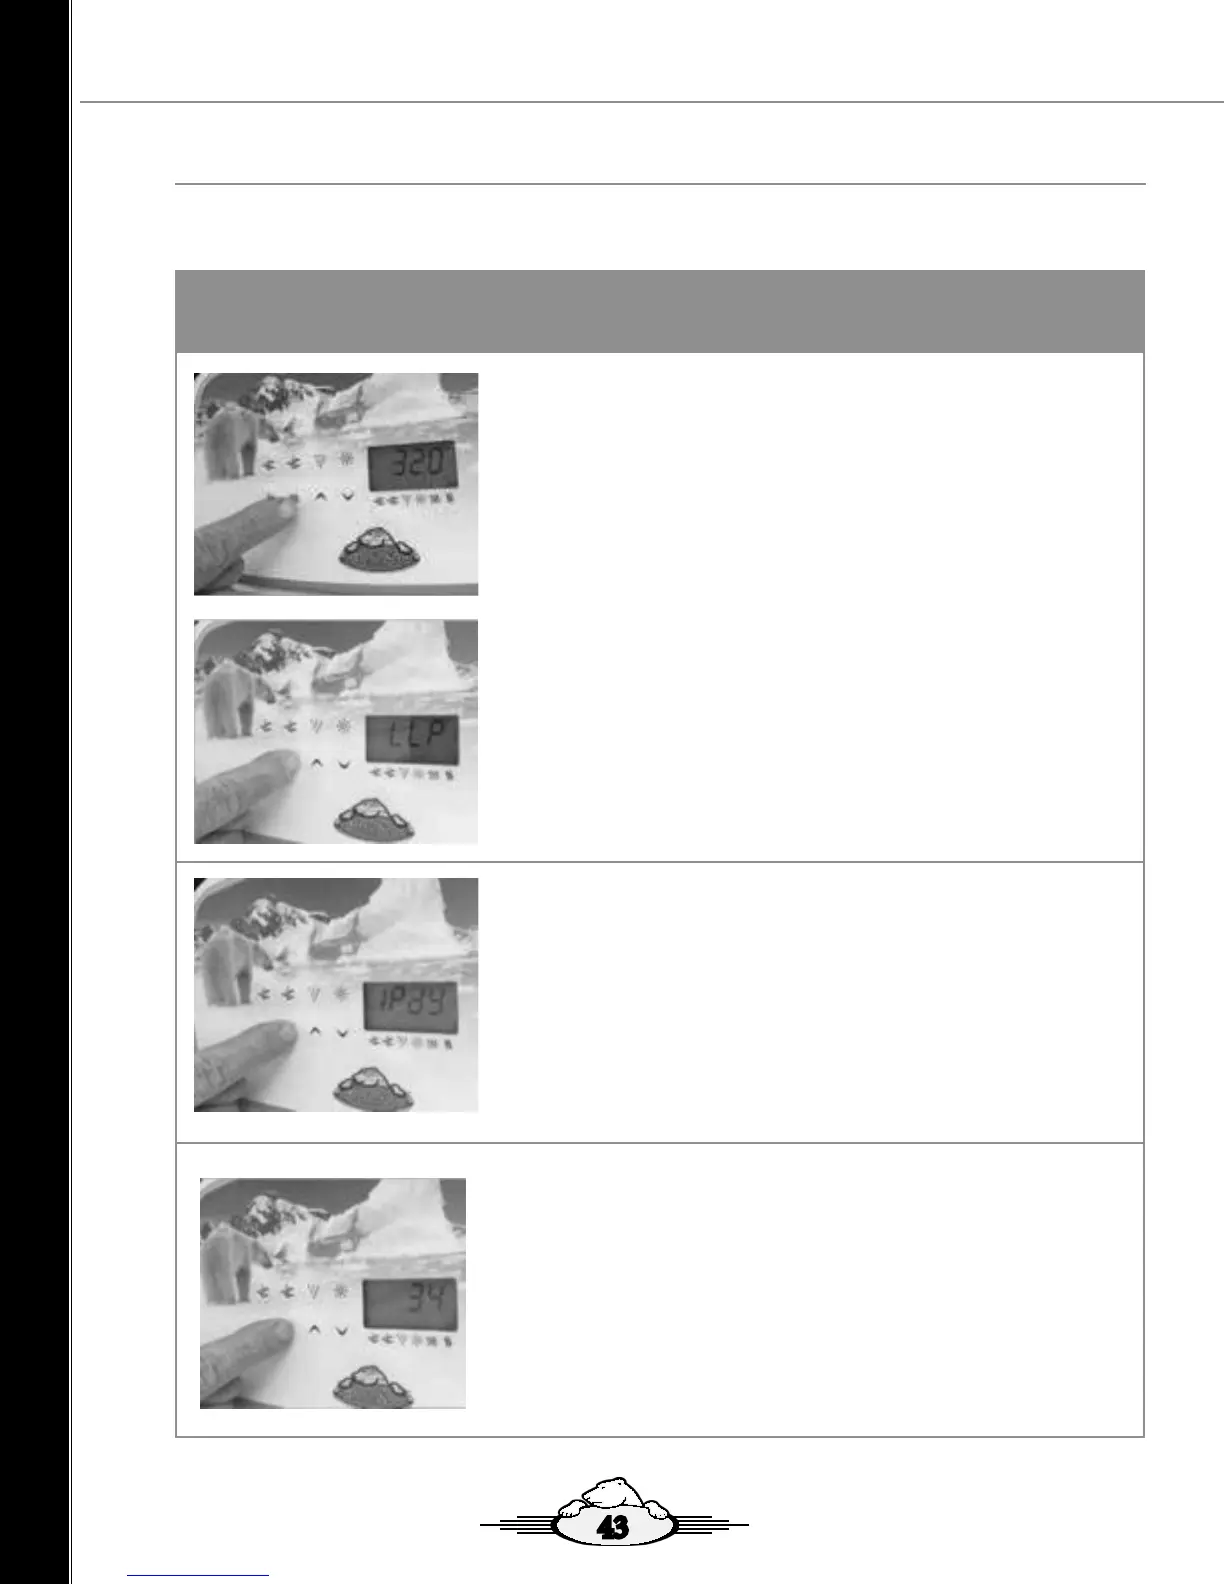
Steps to Access LLP to ensure your Spas IP Address is set to Dynamic (dy)
and your Spa has been assigned an IP Address
Step 1. Access Low Level Programming through your
Topside Controller
Press and hold down the FILTER button until LLP is
displayed in the display window (approx. 20 Seconds. The
display with first show Filter settings Sett, continue to hold
the button down until LLP is displayed.
Note: For a 5 pump spa (Epic) press and hold down
PUMP 5 button.
Step 2. Scroll through LLP Settings until IP is Displayed
Scroll through the LLP settings by pressing then removing
your finger from the FILTER button until IP is displayed, IPst
or IPdy will be displayed. To change to IPdy press the Up
Arrow button on the Topside Controller.
onSpa and Web Connect User Guide
Version 1 Revision Draft 1 onSpa and Web Connect User Guide
Issued Mar 2016
Page 13 of 24
1.11 Connect your Spa to the Home Network
You must first connect your spa to your home network, either using an EoP, WIFI
Extender or LAN Cable through your web device such as Smart Phone or tablet.
Refer Section 1.10 onSpa Quick Reference Charts (QRC)
• Section: 1.9.1 onSpa QRC Through Ethernet Over Power (EoP) Flowchart.
• Section 1.9.2 onSpa QRC Through WIFI Extender Flowchart.
• Section 1.9.3 onSpa QRC Through LAN Cable Flowchart.
1.12 LLP Overview
The following steps show how to access Low Level Programming (LLP) through your
Spas Topside Controller to ensure your Spas IP Address is set to Dynamic (dy) and your
Spa has been assigned a valid IP Address.
Steps to Access LLP to ensure your Spas IP Address is set to Dynamic (dy)
and your Spa has been assigned an IP Address
Step 1. Access Low Level Programming through your
Topside Controller
Press and hold down the FILTER button until LLP is
displayed in the display window (approx. 20 Seconds. The
display with first show Filter settings Sett, continue to hold
the button down until LLP is displayed.
Note: For a 5 pump spa (Epic) press and hold down
PUMP 5 button.
Step 2. Scroll through LLP Settings until IP is Displayed
Scroll through the LLP settings by pressing then removing
your finger from the FILTER button until IP is displayed, IPst
or IPdy will be displayed. To change to IPdy press the Up
Arrow button on the Topside Controller.
Steps to Access LLP to ensure your Spas IP Address is set to Dynamic (dy) and your Spa has been
assigned an IP Address
43
OnSpa and Web Connect - User Guide
 Loading...