3
Table of contents
1. Fitting / Stack & Reach 4
2. Tools Needed & Emergency Repair Kit 5
3. Frameset Inspection & Torque Chart 6
4. Troubleshooting / Tips & Specifications 7
5. Frameset SKU's & Descriptions 8-12
6. Seat Post Assembly 13-16
7. Derailleur Hanger Installation & Adjustments 17-18
8. Fork & Headset Assembly 19-21
9. Brakes Assembly & Installation 22-24
10. Frame Routing - Di2 25-29
11. Frame Routing - eTap 30-34
12. Frame Routing - Mechanical 35-39
13. Brake Lever Assembly & Installation 40-47
14. Cockpit Assembly 48-59
15. Stack & Angulation Adjustments 60
16. Bento Box Installation 61
17. Bottle Cage Installation 62
18. Toolbox Components & Door Installation 63-64
19. Disc & Wheels Installation 65-66
20. Computer Mount Installation 67
21. Threaded Insert Change 68
22. Bleeding Procedures & Additionnal Information 69-71
For the warranty to be valid, the bicycle
must be fully assembled by an authorized
Argon 18 dealer. High-end components,
such as carbon parts, require extra care
during assembly.
These components must be installed using
a torque wrench to ensure each bolt is at
the specified torque setting
to prevent damage.
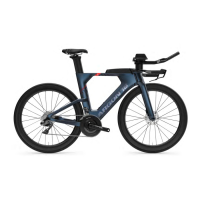
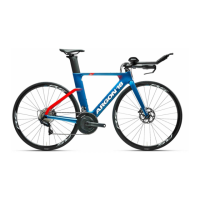
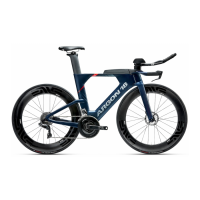
My E-119tri+Disc
Date of purchase:
Retailer:
Size:
Serial number: