Argus E25 MOD II - Operating Instructions
Tighten the socket set screw (4.16)
with a suitable level of torque.
Check whether the electrical signals
from the end-position limit switches
are present and correct. If necessary
repeat the above setting steps until
the signals are correct.
Make sure that all leads are connect-
ed according to the wiring diagram,
and check the connections for possi-
ble short circuits.
Re-install the unit or unit with valve in
the plant.
The torque to tighten the screw or screws
depends on their size.
See the table on Page 20 for the cor-
rect tightening torques.
For work on the unit you need the follow-
ing tools:
Torque wrench to DIN EN ISO 6789
Hexagon keys to
EN ISO 4762/ISO 272
Open-ended spanners to
EN ISO 4762/ISO 272
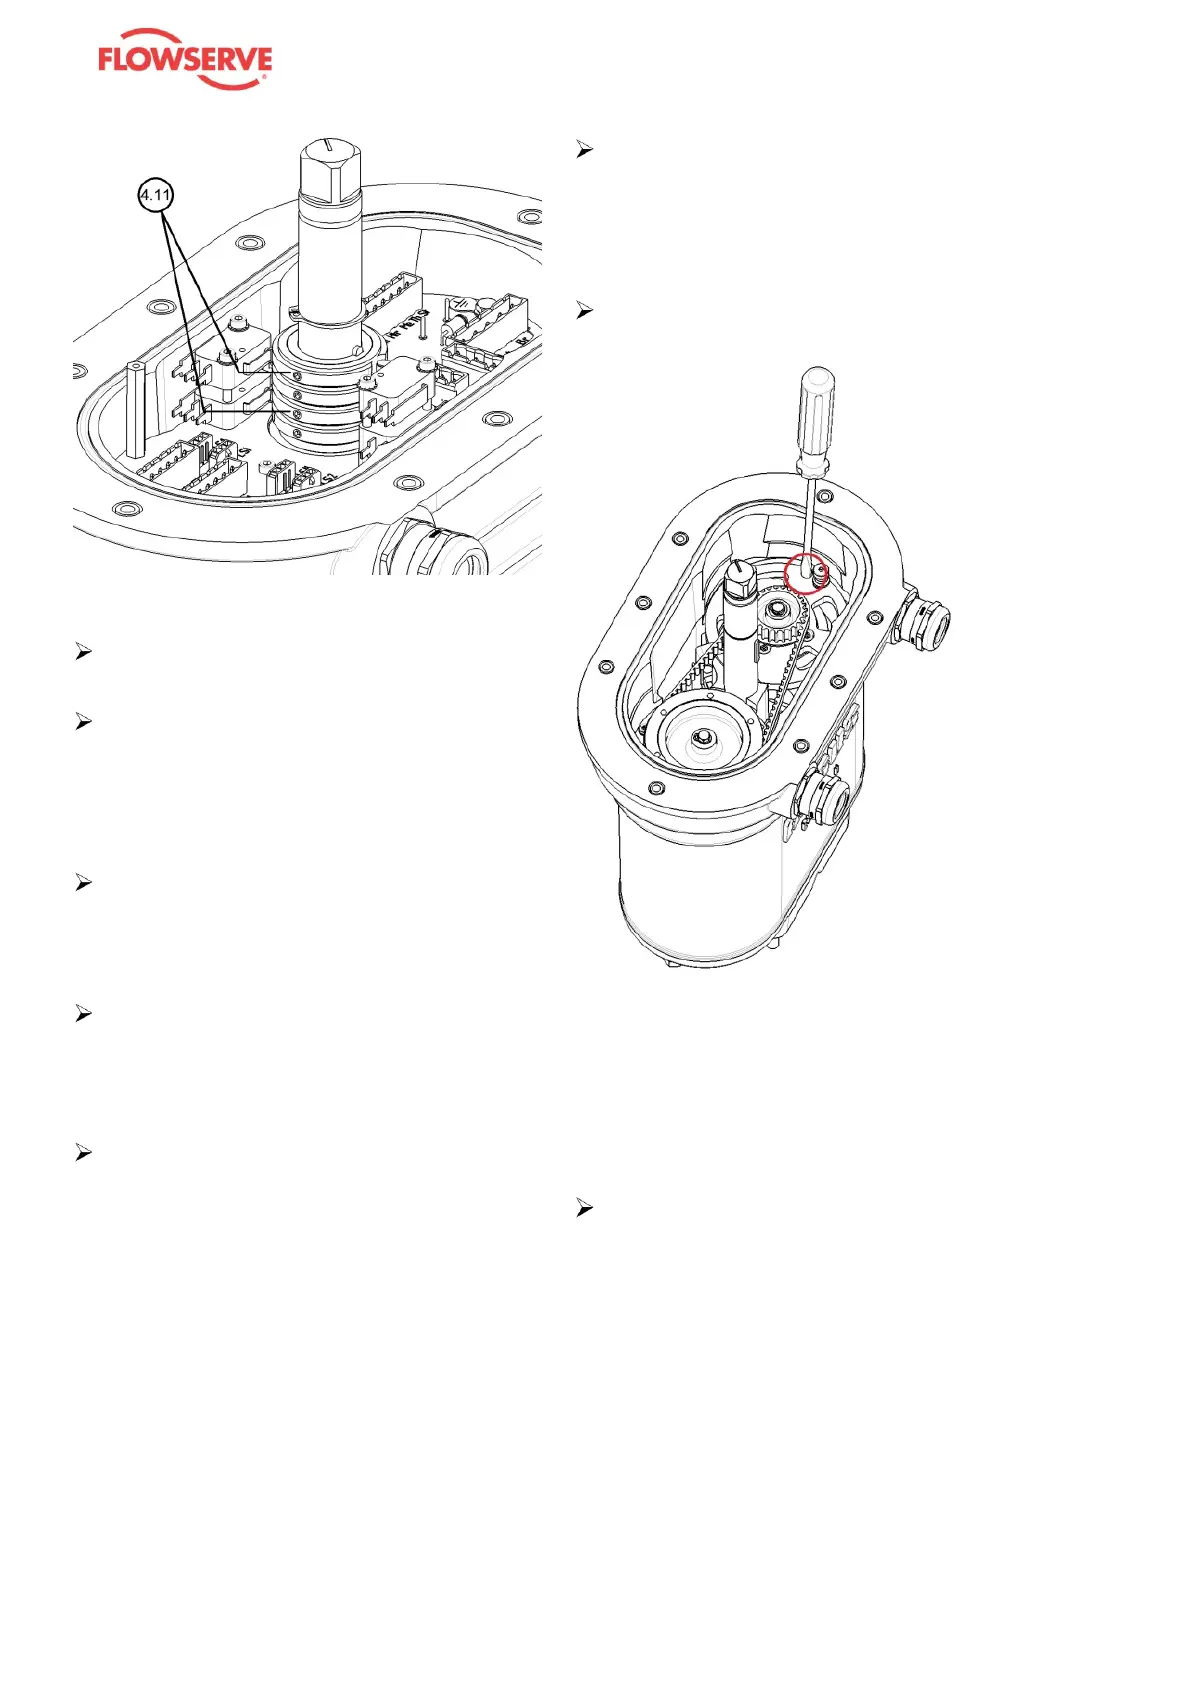
To change the timing belt, carry out
the work steps as described in the
section “Changing the limit switch
plate” and remove the limit switch
plate.
Place a screwdriver as shown in the
illustration:
Press the screwdriver in the direction
of the arrow to release the tension in
the timing belt.