installation &
operating instructions
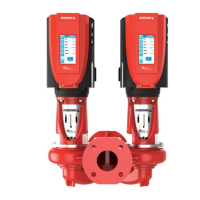
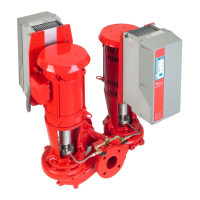
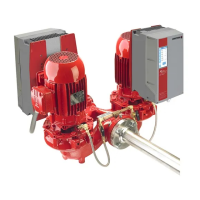
Design Envelope 4302 ivs and 4382 ivs vertical
in-line pumping unit with integrated controls
7
e Pipe work properly supported?
f Voltage supply ok?
g Overload protection ok?
h Is the system clean?
i Is the area around the pump clean?
j Pipe work properly supported?
warranty
Refer to Armstrong General Terms and Warranty sheet. Con-
tact your local Armstrong representative for full information.
armstrong dualarm hvac pump flapper
valve operating instructions
This dualArm hvac pumping unit is fi tted with internal valves
to allow isolation of one pump for service and to automati-
cally prevent recirculation of the fl ow when only one pump
is running.
Procedure for parallel or stand-by pumping
Discharge and suction valve stems should be locked in the
center position. This is indicated by both locking handles in
the vertical position and the center pin of the locking arms
(4) locked by the handles. This procedure allows the dis-
charge fl apper valves to pivot freely and locks the suction
valve fi rmly in the center position.
Procedure for isolation of one side
1 Stop the pump to be serviced.
2 Close and lock the suction and discharge valves: as per
instructions below.
3 Ensure seal fl ushline interconnection valve is closed and
drain the isolated casing.
4 Service isolated pump as required.
Procedure for starting the pump after servicing
1 Ensure serviced pump is fully re-assembled including all
seal fl ush lines and drain plugs.
2 Fill the dry casing with system fl uid by opening the seal
fl ushline interconnecting valve and the air vent fi tting.
3 Allow the pressure to equalize in the two casings, if neces-
sary, by opening seal fl ush line interconnected valve.
4 Unlock the discharge valve as per instructions below.
5 Unlock the suction valve as per instructions below.
6 Close the seal fl ushline interconnect valve and
restart pump.
note:
Keep hands and tools away from locked suction valve arm, as
the di erential pressure may cause the arm to rotate quickly
with force when unlocked.
Valve operation - refer to valve illustration on page 9 (3", 4"
& 6" valve) or page 7 (8" valve)
discharge valve
This valve performs the dual function of automatically seal-
ing the discharge of the inactive pump when one pump is
running and can manually be closed and locked to isolate one
pump for service.
Automatic fl apper operation
In the fl apper mode the two halves of the discharge valve are
free to pivot independently under normal operating condi-
tions. The locking handle (3) should be secured with the set
screw (11) in the vertical position with the center pin of the
locking arm (4) trapped by the locking handle (3).
Manual valve locking
The locking feature of this valve is to ensure a positive seal
(leak proof) of the discharge port on the pump to be serviced.
note:
Ensure the pump to be isolated is not operating before
attempting to release the locking mechanism. Failure to do
so may result in injury to the operator and/or damage to
the pump.
Locking
1 Loosen discharge side set screw (11) to release the
locking handle (3).
2 Rotate the discharge side locking handle (3) so that the
handle points toward the pump to be serviced and secure
in the horizontal position, using set screw (11). This releases
the discharge locking arm (4).
3 Rotate discharge valve shaft (16) towards the pump to be
isolated. The orientation of the shaft is indicated by the
center pin on the locking arm (4).
4 Raise the locking handle (3) so that the cam on the base
of the handle forces the pin of the locking arm (4) towards
the pump to be isolated. The locking handle (3) should be
raised to between 45 degrees and the vertical position.
5 Tighten set screw (11) to lock the locking handle (3)
in position.
This handle should not be rotated past the vertical position.
 Loading...