Aruba AP-85 Outdoor Access Point Series | Installation Guide AP-85 Series Installation | 25
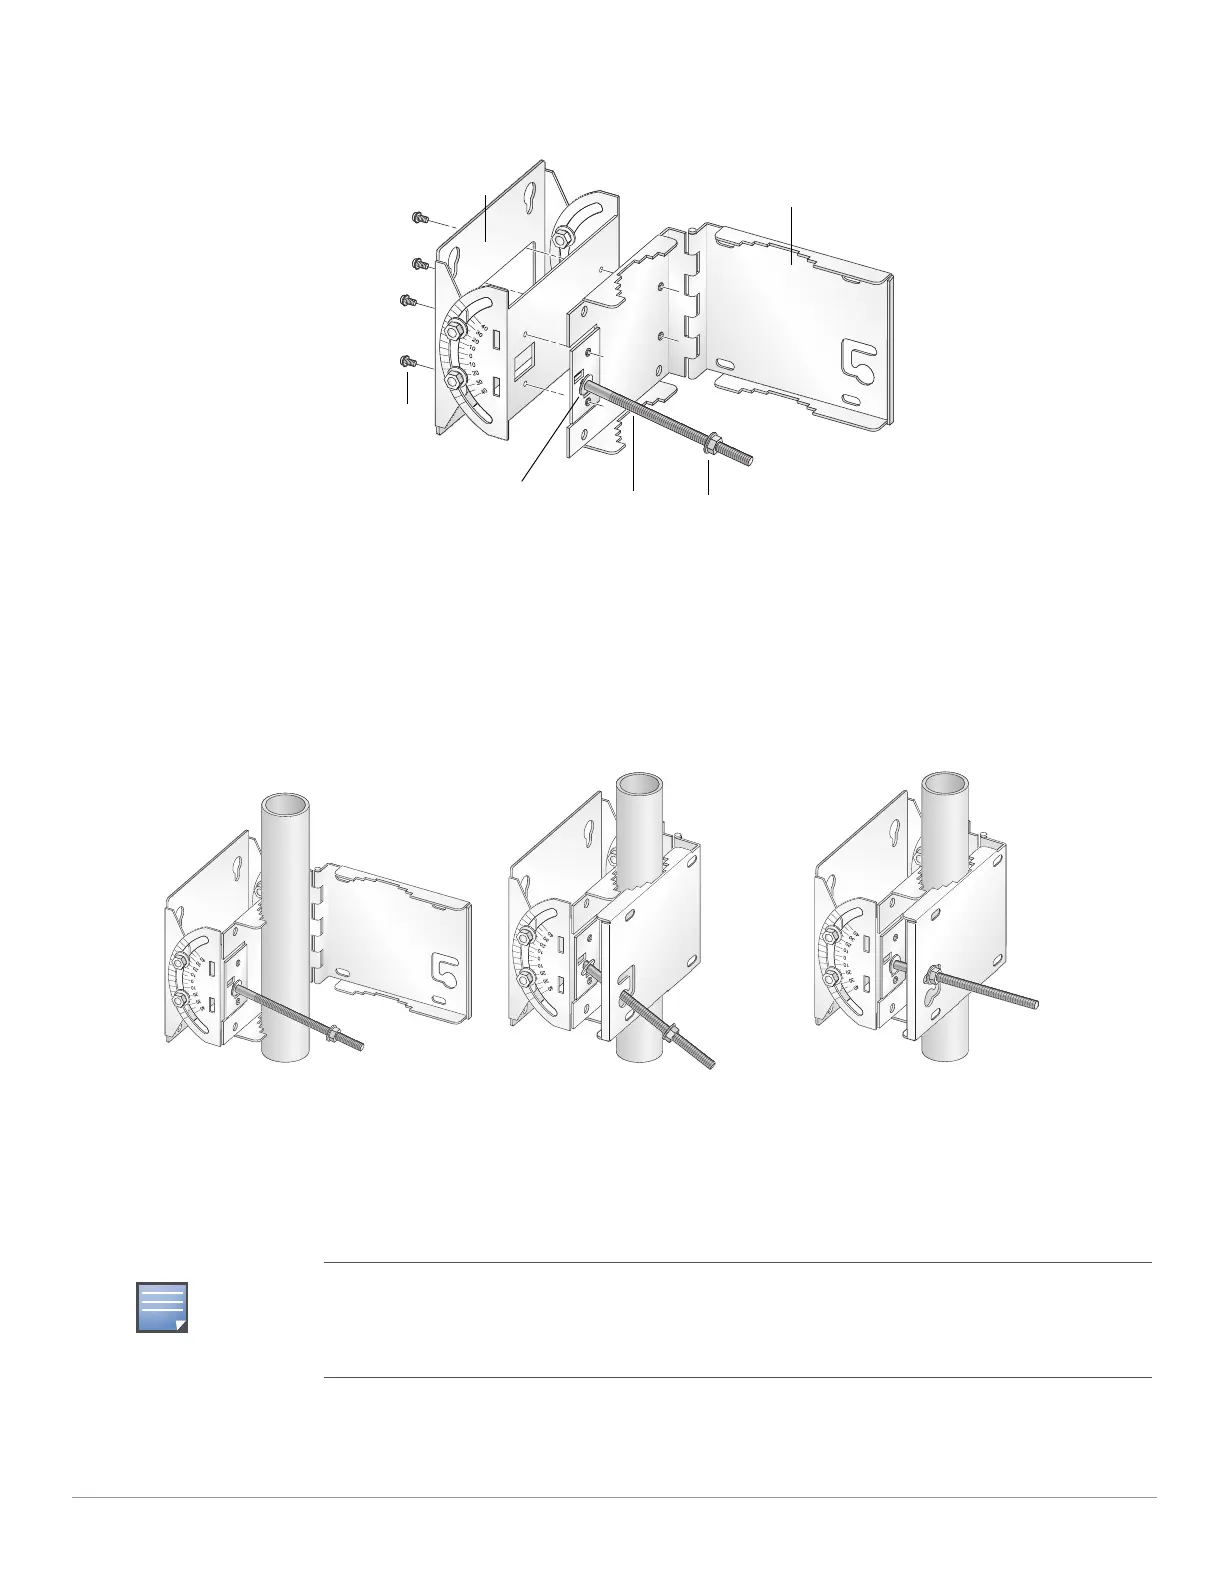
2. Secure the mounting plate to the mounting bracket using the four provided Phillips screws (see Figure 13).
Figure 13 Assembling the Pole Mounting Bracket
3. Attach the pole mounting bracket assembly to a 1.5-inch to 3.5-inch diameter pole and secure the bracket in place (see
Figure 14).
a. Wrap the pole mounting bracket around the pole.
b. Slip the end of the T-bolt with nut through the opening in the pole mounting bracket.
c. Maneuver the T-bolt to the top slot in the pole mounting bracket and tighten down the nut. Verify that the nut is tightly
secured and that the bracket cannot move. It must be secure to support the weight of the AP-85.
Figure 14 Attaching the Pole Mounting Bracket
4. Seat the AP-85 into the four keyholes on the mounting plate and tighten the four mounting bolts (M8 bolts) to secure the
AP-85 in place (see Figure 15 and Figure 16). The mounting plate should rest between the captive flat washer on each
mounting bolt and the rear of the AP-85.
The pole mounting bracket can be secured to a horizontal or vertical pole. The position of the
keyholes on the mounting plate allows you to mount the AP-85 on either pole type with the antenna
jacks at the top or the side. To mount the AP-85 with the antenna jacks at the side, rotate the unit 90
degrees before seating the unit on the mounting plate.
Nut (1x)T-Bolt (1x)
Phillips Screws (4x)
Mounting Bracket
Mounting Plate
Retaining Clip
 Loading...