19
MODIFICATION SPAN ADJUSTMENT (potentiometer P1)
Example : Valve adjustment with PMR at 6 bar
For a 8 bit range and a 0-6 bar valve, output pressure range should be 0 to 5 bar.
Apply digital input (1111 1111) and turn P1 potentiometer counterclockwise to get 5 bar
output pressure.
DIGITAL CONTROL
Digital control servo-valves are factory set for :
- pressure zero for null bit combination (0000 0000).
- maximum output pressure (PMR) for digital setting (1111 1111).
- minimum hysteresis.
- maximum proportional gain.
Customer adjustment can be done for offset and span.
In this case, would you please proceed in the following way :
WARNING : If you turn the P2 potentiometer clockwise, you could exceed the maximum pressure (PMR)
and a "latch-up" will occur. This causes the input pressure to be indicated at the output (port 2). In order to
avoid damaging the pressure sensor, the supply pressure used should always be less than the
maximum pressure defined above. To avoid latch-up, readjust the span (potentiometer P1) so that the
maximum set point does not exceed the PMR.
Max. pressure
of regulation
PMR
(bar)
0,100
0,500
1
3
6
10
12
16
20
Max. pressure
supply
PMA*
(bar)
2
2
2
8
12
12
14
18
25
* Max. pressure accept by the
sensor
MODIFICATION / OFFSET ADJUSTMENT (potentiometer P2)
Example 1 : For a digital input (0010 0000), output pressure should be 3 bar
Entry bit combination and turn P2 potentiometer clockwise to get 3 bar (see adjustment
precaution, below).
Example 2 : For a determined setting, output pressure should be 0 bar.
Entry determined bit combination and turn P2 potentiometer counterclockwise to get 0 bar.
Turn potentiometer
in clockwise direction
Turn potentiometer
in counterclockwise direction
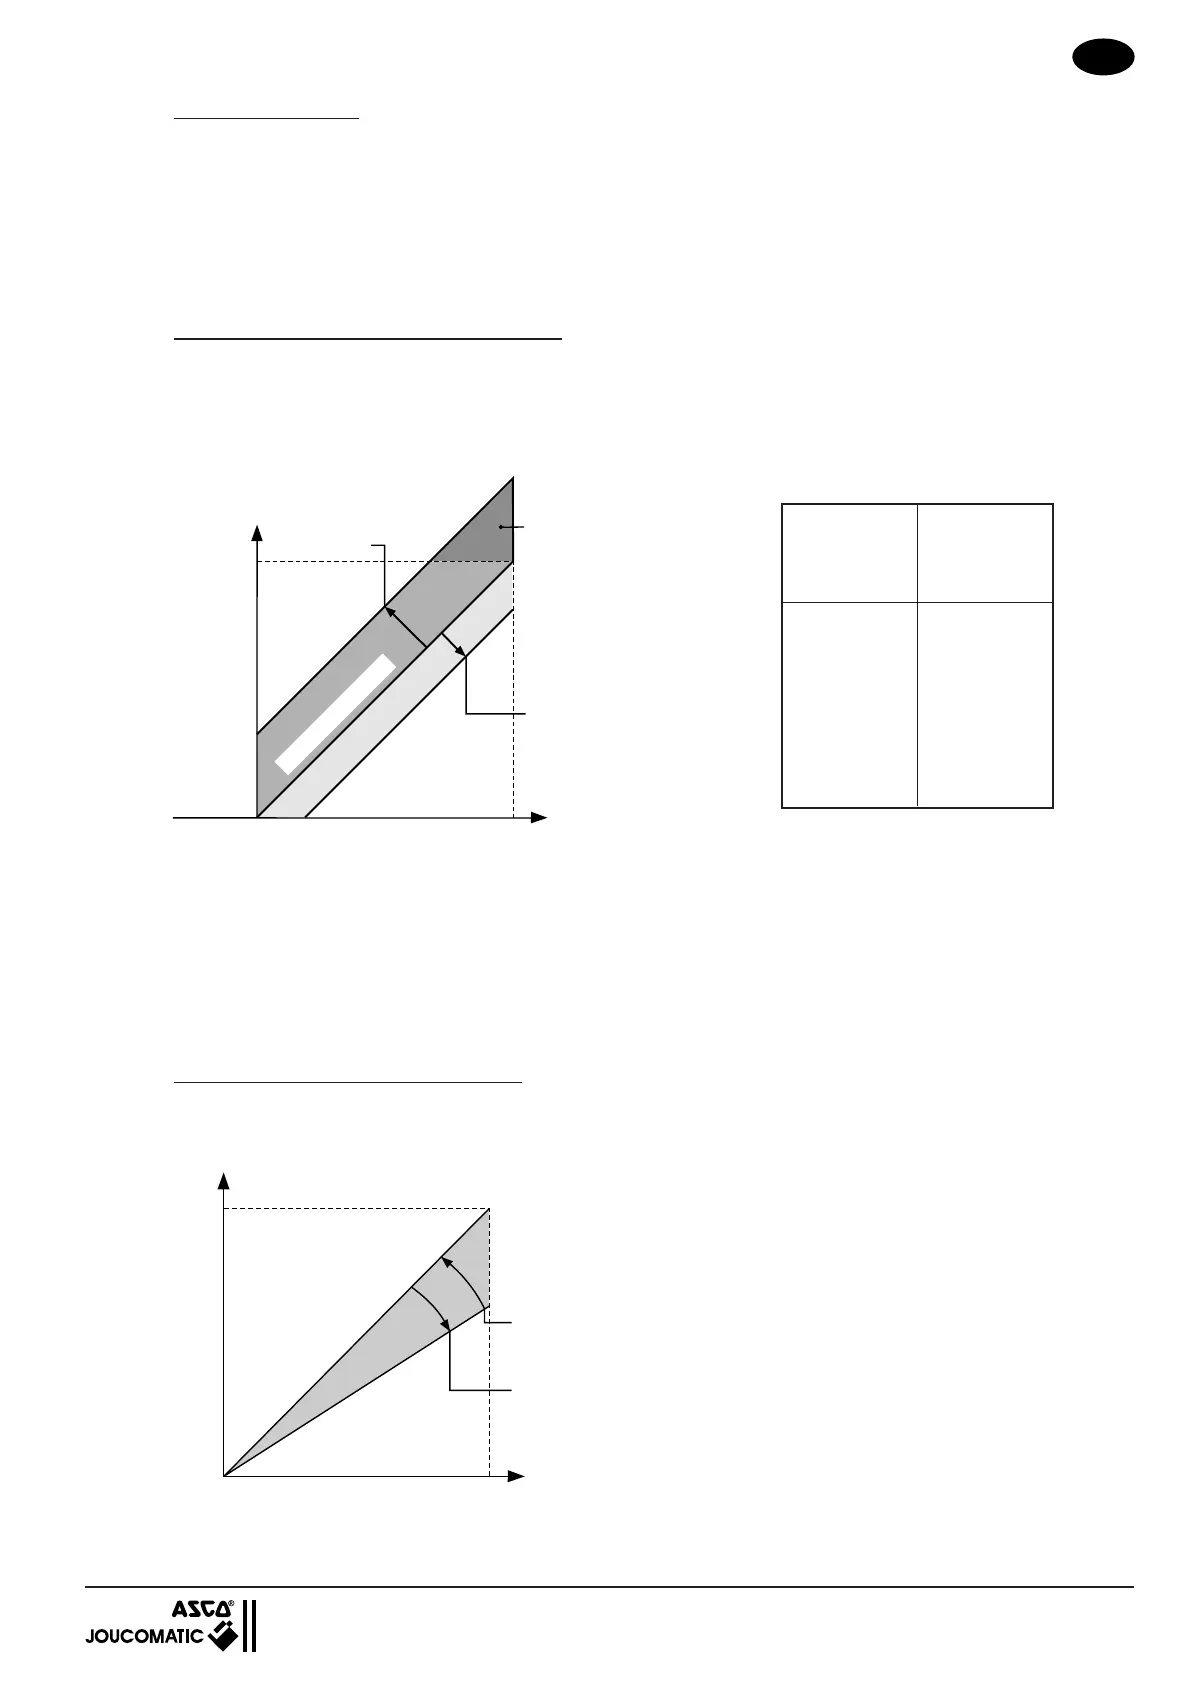
SPAN ADJUSTMENT
(potentiometer P1)
PMR
Factory adjustment 100%
0000 0000 1111 1111
For maximum input (1111 1111) the maximum span is approximately 100% PMR
You can only reduce the output pressure.
PMR
Factory adjustment
0000 0000 1111 1111
Turn
potentiometer
in clockwise
direction
Latch up zone
OFFSET ADJUSTMENT
(potentiometer P2)
Turn potentiometer in
counterclockwise direction
SHUT
OFF
 Loading...