Do you have a question about the ascon KX6 and is the answer not in the manual?
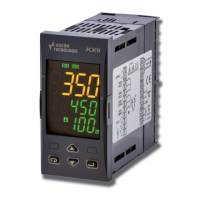
| Brand | ascon |
|---|---|
| Model | KX6 |
| Category | Controller |
| Language | English |
Details mounting requirements for permanent indoor installation, including accessibility, environmental conditions, and panel thickness.
Provides the overall physical dimensions of the controller unit.
Specifies the required dimensions for panel mounting installation.
Explains how to access and manage the controller's protective terminal covers for wiring.
Details the procedure for safely removing the controller module from its housing without disconnecting wiring.
Provides essential guidelines and safety precautions for proper electrical wiring practices.
Describes the various input types supported by the instrument, including TC and mA inputs.
Details the available output types, including servomotor and analogue outputs.
Provides details on the RS-485 serial interface type, protocol, baud rate, and addressing.
Specifies power supply voltage requirements, fuse protection, and connection notes.
Overview of the instrument's initial behavior and the importance of parameter configuration.
Describes the different modes the instrument can start in: Auto, Manual, and Stand-by.
Details how to enter and exit the instrument's configuration mode.
Explains how to use the keyboard buttons for navigating and modifying parameters.
Details the steps to restore the instrument to its factory default settings.
Explains how OEMs can store and load their own default parameter sets.
Provides a comprehensive guide to all instrument parameters.
Details the step-by-step process for promoting parameters for limited and operator access.
Explains how to modify parameters when in the Operator level.
Details the procedure to enter the Limited access level using a password.
Explains how to view parameters in Limited Access without allowing modification.
Describes the Automatic mode of operation and its keyboard functions.
Describes Manual mode for deactivating automatic control and setting valve position.
Describes Stand-by mode, where the instrument acts as an indicator.
Details indications for over-range and under-range conditions.
Provides a list of controller and potentiometer-related errors.
Defines proper usage and safety requirements for the instrument.
Outlines the warranty terms and conditions for the product.
Provides instructions for cleaning and maintaining the instrument.
Guidance on the proper disposal of the appliance.
Table listing parameters for main and auxiliary input configuration.
Table listing parameters for output configuration.
Table listing parameters for Alarm 1 configuration.
Table listing parameters for Alarm 2 configuration.
Table listing parameters for Loop Break Alarm configuration.
Table listing parameters for control configurations.
Table listing parameters for set point configuration.
Table listing parameters for operator HMI settings.
Table listing parameters for serial link configuration.
Table listing parameters for user calibration.