Shutdown and Cleaning
311139B 17
Shutdown and Cleaning
Pail Flushing
1. Turn power switch OFF. Lift suction tube and prime
tube from paint pail. Let them drain into paint for a
while.
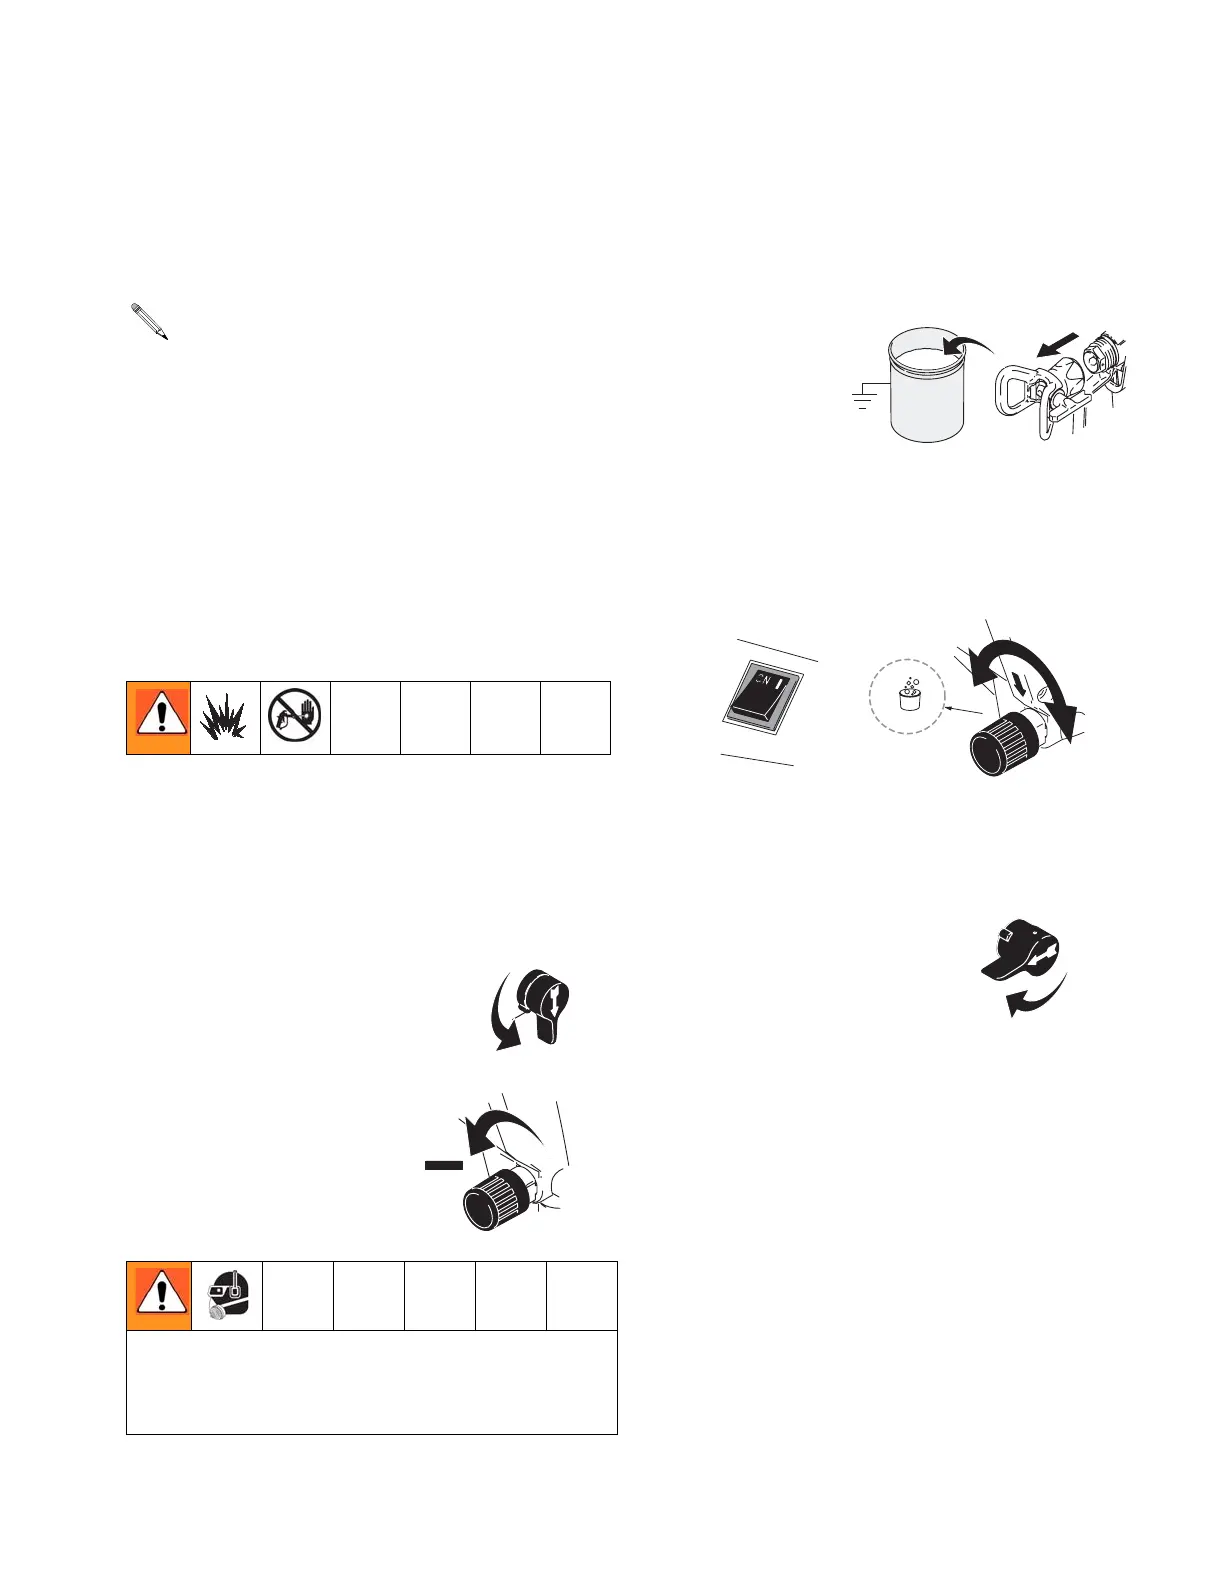
2. Place suction tube in pail filled with flushing fluid
and place prime tube in waste pail.
3. Turn Spray-Prime/Drain
Valve to PRIME.
4. Turn Pressure Control
knob to the left
(counter-clockwise) to
minimum pressure.
5. Trigger gun into waste pail to relieve pressure in
hose.
6. Remove tip and
guard assembly
from gun and
place in flushing
fluid.
7. Turn power switch ON. Slowly align arrow on
sprayer with Pail symbol on Pressure Control knob
until pump starts.
8. Flush until approximately 1/3 of the flushing fluid is
emptied from the pail.
9. Turn power switch OFF.
Turn Spray-Prime/Drain
valve to SPRAY.
10. To preserve paint in hose, trigger gun into paint pail
to expel the remaining paint.
11. Turn power switch ON. Continue to trigger gun until
you see flushing fluid starting to come out of gun
nozzle. Release trigger.
12. Move gun to waste pail and trigger it to flush pump,
hose and gun into waste pail. Continue until remain-
ing flushing fluid is gone from flushing fluid pail.
• For short term shutdown periods (overnight to
one week) refer to Short Term Storage, page
21.
• For flushing after spraying oil-based coatings,
use compatible oil-based flushing fluid or min-
eral spirits. Read Priming, Oil- or Water-based
Materials, page 10.
• For flushing after spraying water-based coat-
ings, use water. Read Priming, Oil- or
Water-based Materials, page 10 or Zip-Flush,
page 18.
• When flushing with solvents, ground gun. Read
Grounding and Electric Requirements page 5.
• To avoid fluid splashing back on your skin or into
your eyes, always aim gun at inside wall of pail.
35,0(
WLD
302!9
TIA