EasyManua.ls Logo

Assa Abloy Corbin Russwin DC8210 Series User Manual

Assa Abloy Corbin Russwin DC8210 Series
4 pages
To Next Page IconTo Next Page
Page #1 background imageLoading...
Page #1 background image
Universal Door Closers
with A3 Heavy Duty
Non-Hold Open Parallel Arm
A3 Arm
Heavy Duty Non-Hold Open
IMPORTANT:
An improperly installed or incorrectly adjusted door closer may cause
or and will void product warranty.
To avoid personal injury,
property
damage personal injury;
DO NOT DISASSEMBLE THIS DOOR CLOSER BODY.
Door closers must be securely fastened to a properly reinforced door and frame
with fasteners provided.
An auxiliary door stop, BY OTHERS, is required for this Installation.
TO DETERMINE
HAND OF
YOUR DOOR:
LEFT
HAND
DOOR
RIGHT
HAND
DOOR
Size of Door&Door Closer
Type
of
Installation
Interior
Exterior
In-swinging
Exterior
Out -swinging
Recommended
Closer Size
**Max.
Opening
Force
lbs/f
2 4
2 6
3 0
3 6
4 0
4 6
' "
' "
' "
' "
' "
' "
2 6
3 0
3 6
4 0
' "
' "
' "
' "
8
14
16
22
24
26
1
2
3
4
5
6
Parallel
Arm
RHR
LHR
80-9380-8002-152 Rev. 07/09
DC8210 Series
Multi-Sized1thru 6
BEFORE
INSTALLING:
ADA compliant closer: DC8210.
The Americans with Disabilities Act (ADA) requires that doors having door closers
have an opening force not to exceed 5 lbf.
The door closer's power size adjustment feature may require adjustment to its
lowest setting to comply with ADA opening force guidelines.
As Easy As
A
C
B
F
Installation Instructions
1
**NOTE: These forces are for standard templating with bearing type hinges and do not account for pressure differentials and draft.
Question and Answer IconNeed help?

Do you have a question about the Assa Abloy Corbin Russwin DC8210 Series and is the answer not in the manual?

Assa Abloy Corbin Russwin DC8210 Series Specifications

General IconGeneral
SeriesDC8210 Series
CategoryDoor Opening System
Opening ForceAdjustable
Closing SpeedAdjustable
Latch SpeedAdjustable
BrandCorbin Russwin
TypeDoor Closer
HandingNon-handed
ComplianceANSI/BHMA A156.4
ApplicationCommercial
MountingRegular Arm, Top Jamb, Parallel Arm
BackcheckAdjustable

Summary

Important Safety and Installation Warnings

Property Damage or Personal Injury Risk

Improper installation or adjustment can lead to property damage or personal injury.

Do Not Disassemble Closer Body

Never disassemble the door closer body to avoid personal injury.

Secure Fastening Requirement

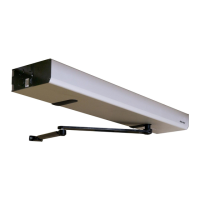
Door closers must be securely fastened to a properly reinforced door and frame.

Auxiliary Door Stop Requirement

An auxiliary door stop, supplied by others, is required for this installation.

Pre-Installation Checks and ADA Compliance

ADA Opening Force Guidelines

ADA requires doors with closers to have an opening force not exceeding 5 lbf.

Adjust Power Size for ADA Compliance

Adjust the door closer's power size to its lowest setting for ADA compliance.

Door and Jamb Template and Measurements

Mark Door and Jamb for Brackets

Use the provided template and dimensions to mark the door and jamb for bracket installation.

Mounting Screw Specifications

Details on screws required for arm and QUIK-INSTALL bracket mounting.

Installation Steps: Brackets and Arm Assembly

Mount QUIK-INSTALL Bracket

Install the QUIK-INSTALL bracket on the door frame using specified self-drilling screws.

Mount Closer Body to Bracket

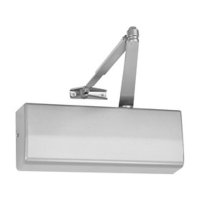
Secure the closer body onto the QUIK-INSTALL bracket using four mounting screws.

Mount Arm to Door Frame

Attach the parallel arm to the door frame using self-drilling screws.

Connect Arm to Closer Spindle

Connect the arm to the closer spindle, rotate approximately 135°, and secure with arm screw.

Adjusting Closer Operation and Finalizing Installation

Spring Power Adjustment

Adjust the spring power using the adjuster and chart based on door size.

Speed Valve Adjustments

Adjust closing, latching, and delayed action speeds using the respective valves.

Backcheck Intensity Adjustment

Adjust backcheck intensity for a soft cushioning action, not a sudden stop.

Installing Closer Cover

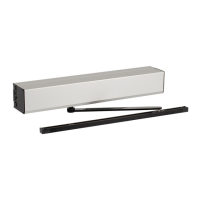
Slip the closer cover over the body and secure it with PBHMS screws.

Related product manuals