EasyManua.ls Logo

Assa Abloy SARGENT 1431 Series User Manual

Assa Abloy SARGENT 1431 Series
8 pages
To Next Page IconTo Next Page
Page #1 background imageLoading...
Page #1 background image
Installation Instructions based on Application and Arm type
Standard Mounting Application -
H arm
For Standard Application - the Door Closer is mounted
on the hinge side of door (see page 2)
Parallel Arm Application -
PH9 Arm
For Parallel Arm Application - the Door Closer is mounted
on the stop side of door (see page 4)
Top Jamb Application -
H, HZ & HZA Arm
For Top Jamb Application - the Door Closer is mounted on the
frame on the stop side of the door (see page 6)
LEFT
HAND DOOR
RIGHT
HAND DOOR
HINGE SIDE HINGE SIDE
STOP SIDESTOP SIDE
1
INSTRUCTIONS FOR
1431 Door Closer with Hold Open Arms
1431 SERIES ADJUSTABLE FROM SIZE 1 THRU 6
FOR INSTALLATION ASSISTANCE CALL SARGENT AT 1-800-727-5477 / www.sargentlock.com
Copyright © 2010, Sargent Manufacturing Company, an ASSA ABLOY Group company.
All rights reserved. Reproduction in whole or in part without the express written permission
of Sargent Manufacturing Company is prohibited.
A7140F
1
IMPORTANT NOTICE
PRE-DRILL 3/32” HOLES FOR SELF-TAPPING SCREWS
OR TAP #12-24 FOR MACHINE SCREWS
+
or

Other manuals for Assa Abloy SARGENT 1431 Series

Question and Answer IconNeed help?

Do you have a question about the Assa Abloy SARGENT 1431 Series and is the answer not in the manual?

Assa Abloy SARGENT 1431 Series Specifications

General IconGeneral
BrandAssa Abloy
ModelSARGENT 1431 Series
CategoryDoor Opening System
LanguageEnglish

Summary

Standard Mounting Application - H arm

Door and Frame Preparation

Details hole preparation and screw types for standard mounting.

Closer Body Installation

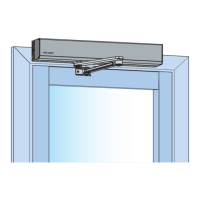
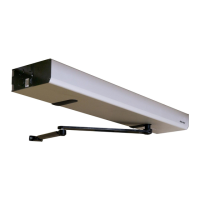
Instructions for attaching the door closer body to the door surface.

Foot and Rod Assembly Installation

Guides installation of the closer's foot and rod assembly onto the frame.

Main Arm Installation

Steps for attaching the main arm to the closer spindle with index mark alignment.

Hold Open Foot Attachment

Instructions for attaching the hold open foot to the frame.

Standard Mounting Accessories

Information on cover plates, mortise feet, and corner brackets for this application.

Parallel Arm Application - PH9 Arm

Door and Frame Preparation

Details hole preparation and screw types for parallel arm installation.

Closer Body and Foot Bracket Installation

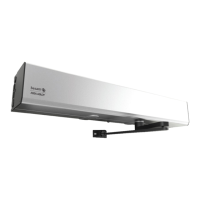
Guides installation of the closer body and foot bracket for parallel application.

Main Arm Installation

Steps for attaching the main arm to the closer spindle for parallel application.

Hold Open Foot Attachment

Instructions for attaching the hold open foot to the frame for parallel application.

Parallel Mounting Accessories

Information on drop brackets and cover plates for narrow door rails.

Top Jamb Application - H, HZ & HZA Arm

Top Jamb Installation Overview

Diagram and dimensions for top jamb mounting, including arm types.

Spring Adjustment

Guide to adjusting spring power using the adjusting nut based on door size.

Main Arm Installation

Steps for attaching the main arm to the closer spindle for top jamb application.

Hold Open Foot Attachment

Instructions for attaching the hold open foot to the frame for top jamb application.

Final Adjustment and Regulating Procedure

Adjusting Closing and Latching Speeds

How to use valves to adjust door closing and latching speeds.

Adjusting Backcheck and Delayed Action

Guidance on adjusting backcheck intensity and delayed action feature.

Hold Open Arm Adjustment

Instructions for adjusting the hold open nut to change holding position.

Closer Cover Installation

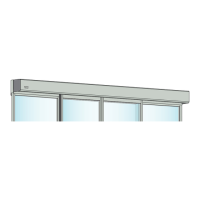
Steps for installing the protective cover onto the door closer.

Related product manuals