16 1-800-810-WIRE • www.sargentlock.com • A8190B
Copyright © 2016, Sargent Manufacturing Company, an ASSA ABLOY Group company. All rights reserved.
Reproductions in whole or in part without express written permission of Sargent Manufacturing Company is prohibited.
07/31/16
IN100 Mortise Lock
11
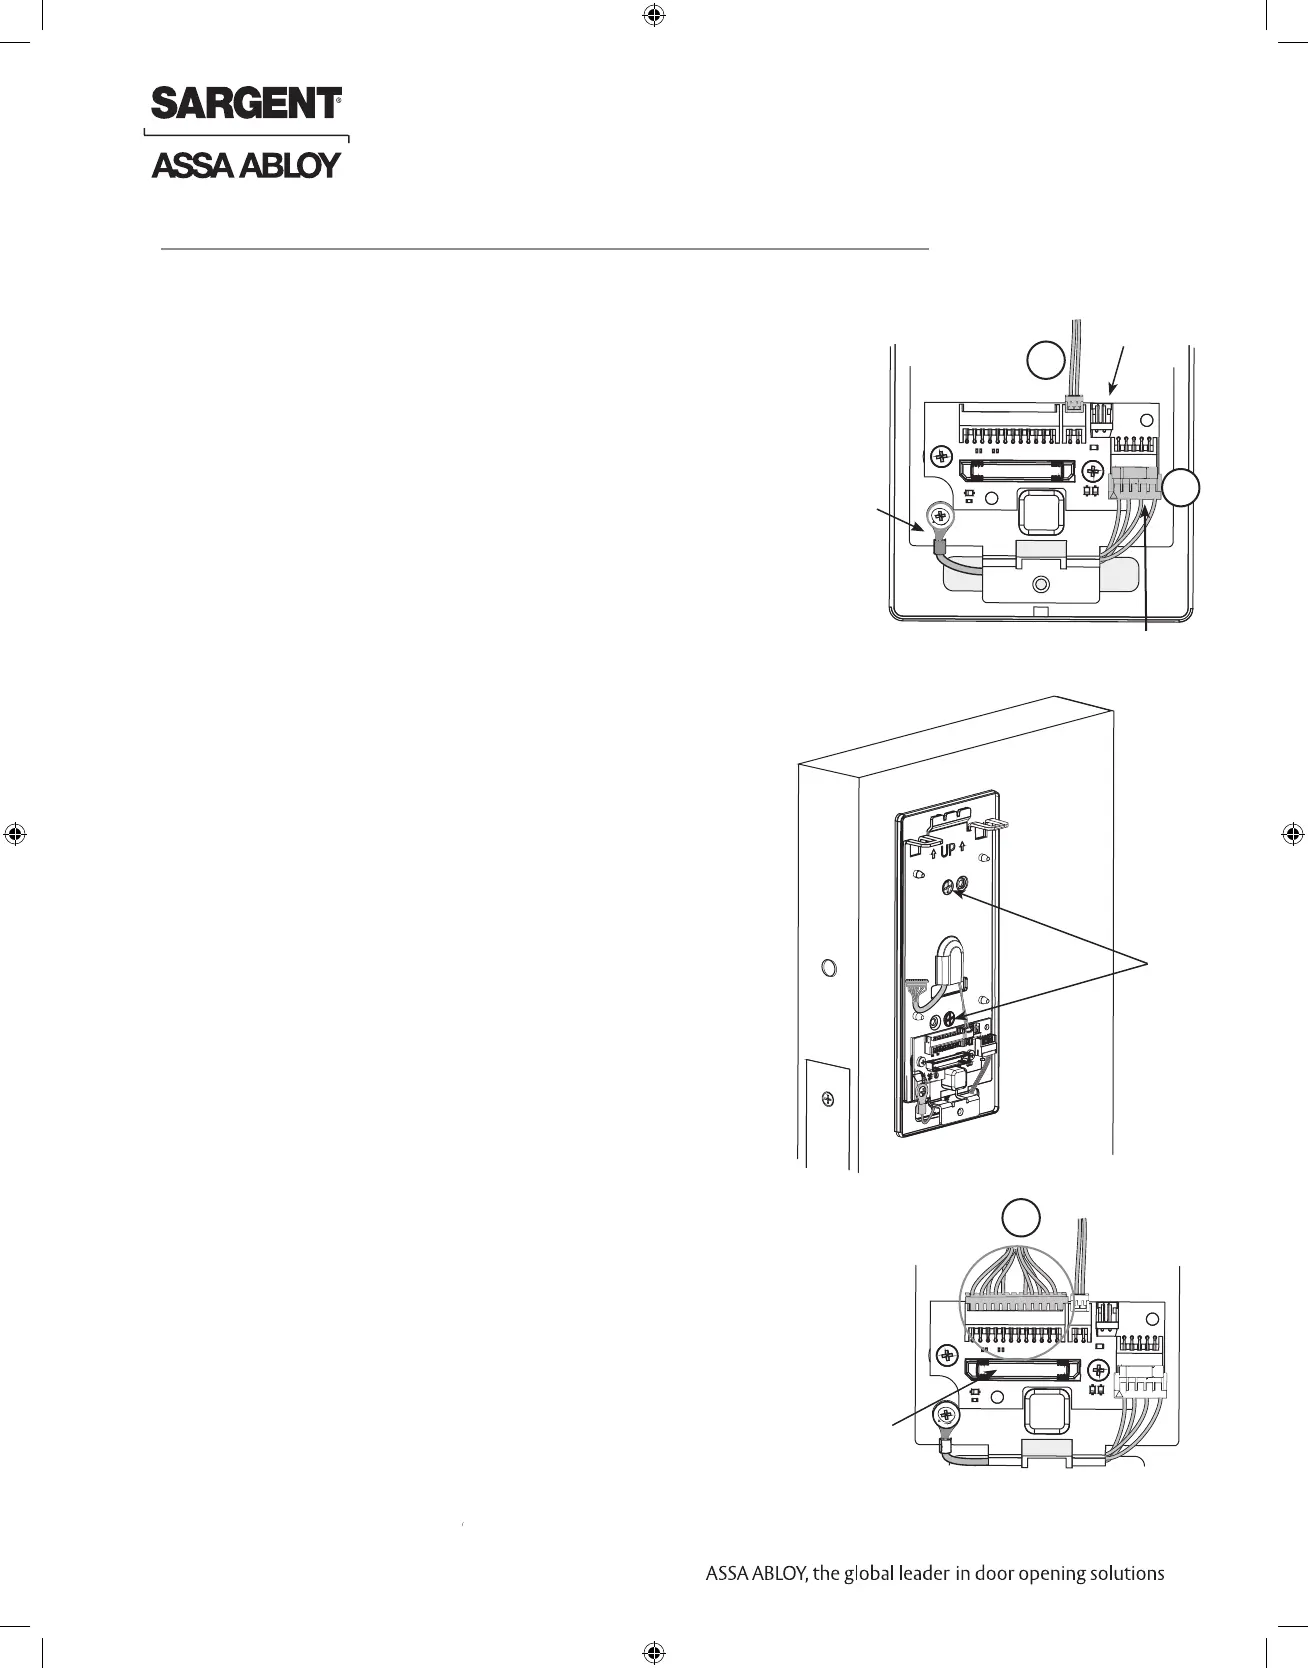
Outside Reader Installation (Continued)
Secure the following connectors to their respective terminals (Fig. 11D):
A. Secure the 4-pin DPS connector.
B. Secure the 10-pin lock body assembly connector.
CAUTION - Do not touch or allow debris to enter connector contacts.
IMPORTANT: Do not run wires through bottom hole in plate - it will
damage wires and the controller connector.
Route wires around flange, do not route wires through
the flange hole (Fig. 11D, F).
E. Secure the 24-pin card reader connector (Fig. 11F).
Ground
Lug
DPS (4-pin)
A
Lock
Body
(10-pin)
Fig. 11D
B
Reader
(24-pin)
Board-to-Board
Connector
Fig. 11F
D
D. Secure the mounting assembly while ensuring proper
alignment of outside reader and tighten the (2) through-bolts
on the inside of the door to secure the reader (Fig. 11E).
Secure Mounting Plate
Installation of Connectors
*NOTE: Optional 2-pin external 9-24VDC power connector.
9-24VDC
Power*
C. When all connections have been made, tuck excess cable
into wire hole on inside of door.
Fig. 11E
Fully
tighten
 Loading...