Chapter 2: Hardware Information
2-8
EnsuretounplugthepowersupplybeforeaddingorremovingDIMMsorothersystem
components. Failure to do so may cause severe damage to both the motherboard and the
components.
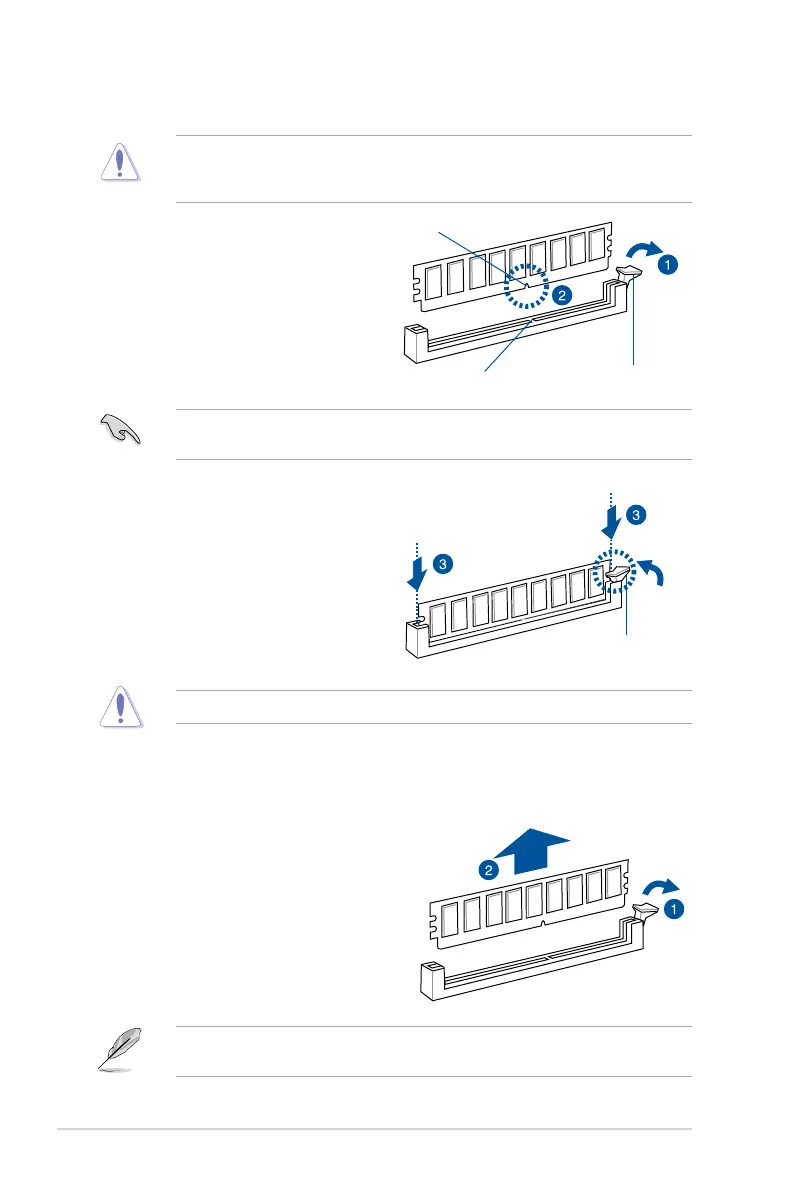
2.3.3 Installing a DIMM on a single clip DIMM socket
3. HoldtheDIMMbybothofitsends
theninserttheDIMMverticallyintothe
socket. Apply force to both ends of the
DIMMsimultaneouslyuntiltheretaining
clip snaps back into place and the
DIMMcannotbepushedinanyfurther
toensurepropersittingoftheDIMM.
Locked Retaining Clip
1. UnlockaDIMMsocketbypressingthe
retaining clip outward.
2. AlignaDIMMonthesocketsuchthat
thenotchontheDIMMmatchesthe
DIMMslotkeyonthesocket.
Unlocked retaining clip
DIMM notch
DIMM slot key
1. Press the retaining clip outward to
unlocktheDIMM.
2. RemovetheDIMMfromthesocket.
2.3.4 Removing a DIMM from a single clip DIMM socket
SupporttheDIMMlightlywithyourngerswhenpressingtheretainingclips.TheDIMM
mightgetdamagedwhenitipsoutwithextraforce.
AlwaysinserttheDIMMintothesocketverticallytopreventDIMMnotchdamage.
ADIMMiskeyedwithanotchsothatittsinonlyonedirection.DONOTforceaDIMMinto
asocketinthewrongdirectiontoavoiddamagingtheDIMM.



 To Next Page