QSG_F600.415.00_EN_01 / 2019-04-16
29 / 38
CONFIGURING THE ASSOCIATED MEASUREMENTS
3. Select a measurement type and press .
The parameters of the selected measurement type are
displayed.
4. Define the measurement cycle parameters.
See: Modifying a parameter.
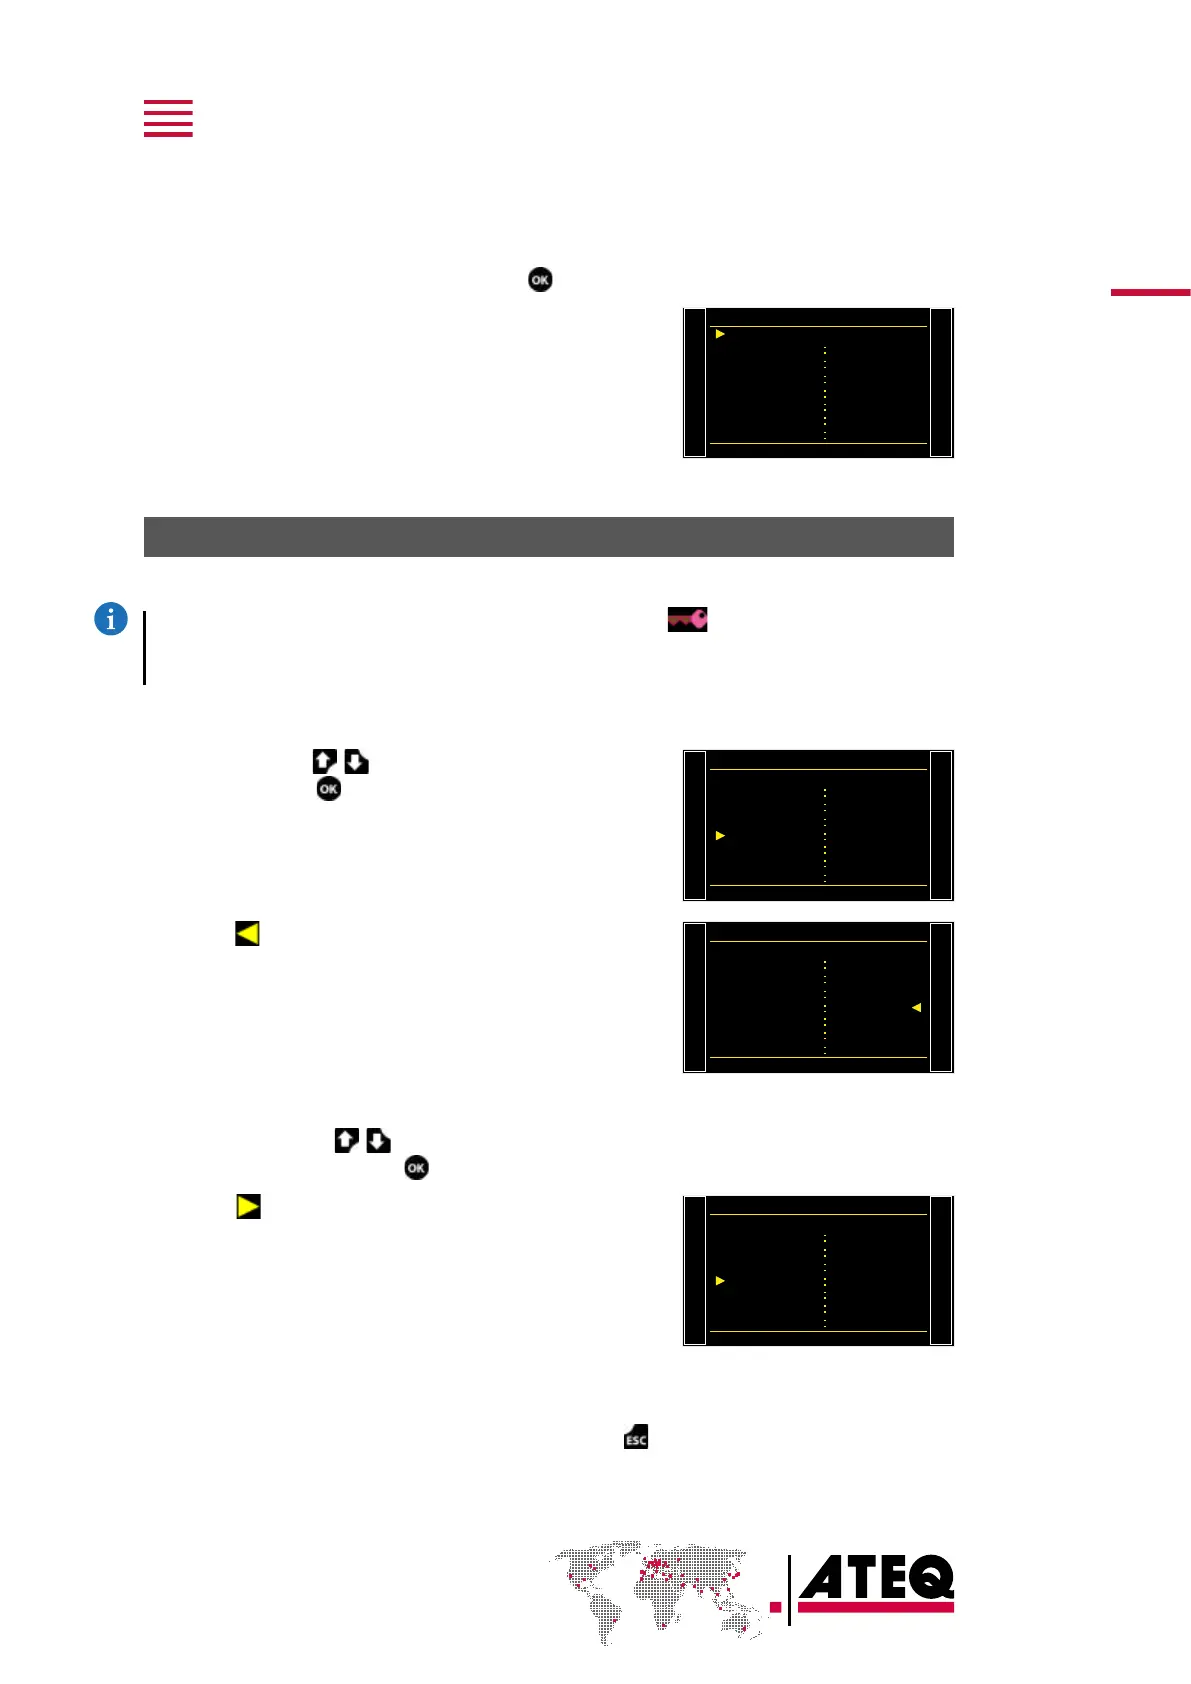
TYPE : LEAK TEST
COUPL. A 0.0 s
2.0 s
2.0 s
2.0 s
1.0 s
bar
5.00
FILL TIME
STAB TIME
TEST TIME
DUMP TIME
Press. UNIT
Max FILL
MODIFYING A PARAMETER
Use this procedure to complete the test program setup.
The protection of the parameters is configurable. If the icon is displayed at the bottom of
the screen, you must insert the USB unlocking device or enter a password before modifying
a parameter.
On thePARAMETERS screen of the program (see: Preparing a program):
1. Press up/down to select the parameter to
modify, and press .
TYPE : LEAK TEST
COUPL. A 0.0 s
2.0 s
2.0 s
2.0 s
1.0 s
bar
5.00
FILL TIME
STAB TIME
TEST TIME
DUMP TIME
Press. UNIT
Max FILL
An arrow is displayed on the right of the parameter
being modified.
TYPE : LEAK TEST
COUPL. A 0.0 s
2.0 s
2.0 s
2.0 s
1.0 s
bar
5.00
FILL TIME
STAB TIME
TEST TIME
DUMP TIME
Press. UNIT
Max FILL
2. Use the up/down keys to modify the
parameter value, and press to validate.
The arrow returns to the left of the modified parameter.
TYPE : LEAK TEST
COUPL. A 0.0 s
2.0 s
2.0 s
1.0 s
1.0 s
bar
5.00
FILL TIME
STAB TIME
TEST TIME
DUMP TIME
Press. UNIT
Max FILL
3. Repeat these steps until all parameters are set.
4. To return to the MAIN MENU screen, press Esc
as many times as necessary.