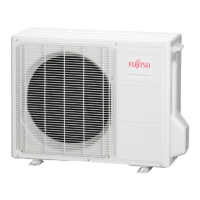
3.4.3 Filling the installation with gas
If an additional charge is requires, add the
additional charge before lling the hydraulic unit
with gas. Please refer to the para. "Additional
charge", page 27.
- Remove the access plugs (A) from the valve controls.
- First of all fully open the "Liquid" valve (small)
and then the "Gas" valve (large) using a hex key
(counterclockwise direction) without forcing
excessively against the stop.
- Remove the hose rapidly to the Manifold.
- Ret the 2 original caps (be sure they are clean) and
tighten them to the recommended tightening torque.
The sealing is performed in the caps only metal to metal.
The outdoor unit does not contain any additional
refrigerant, enabling the installation to be purged.
Flushing is strictly forbidden.
3.4.4 Final sealing test
The sealing test must be performed with a certied gas
detector (sensitivity 5g/year).
Once the refrigeration circuit has been gassed as
described above, check that all the refrigeration
connectors are gas-tight (6 connectors for models 5 & 6,
5 connectors for model 8 and 4 connectors for model
>10). If the arings have been made correctly, there
should be no leaks. Eventually, check the tightness of
the refrigerant valves caps.
" If there is a leak:
- Bring the gas into the outdoor unit (pump down).
The pressure should not drop below atmospheric
pressure (0 bar to read on Manifold) so as not to
contaminate the recovered gas with air or moisture.
- Remake the defective connection,
- Repeat the commissioning procedure.
Installation and operation manual "1734 - EN"
Heat pump air/water split 1 service alféa extensa +
- 26 -