- 19 -
Operating manual SUNTEST XLS / XLS+
!
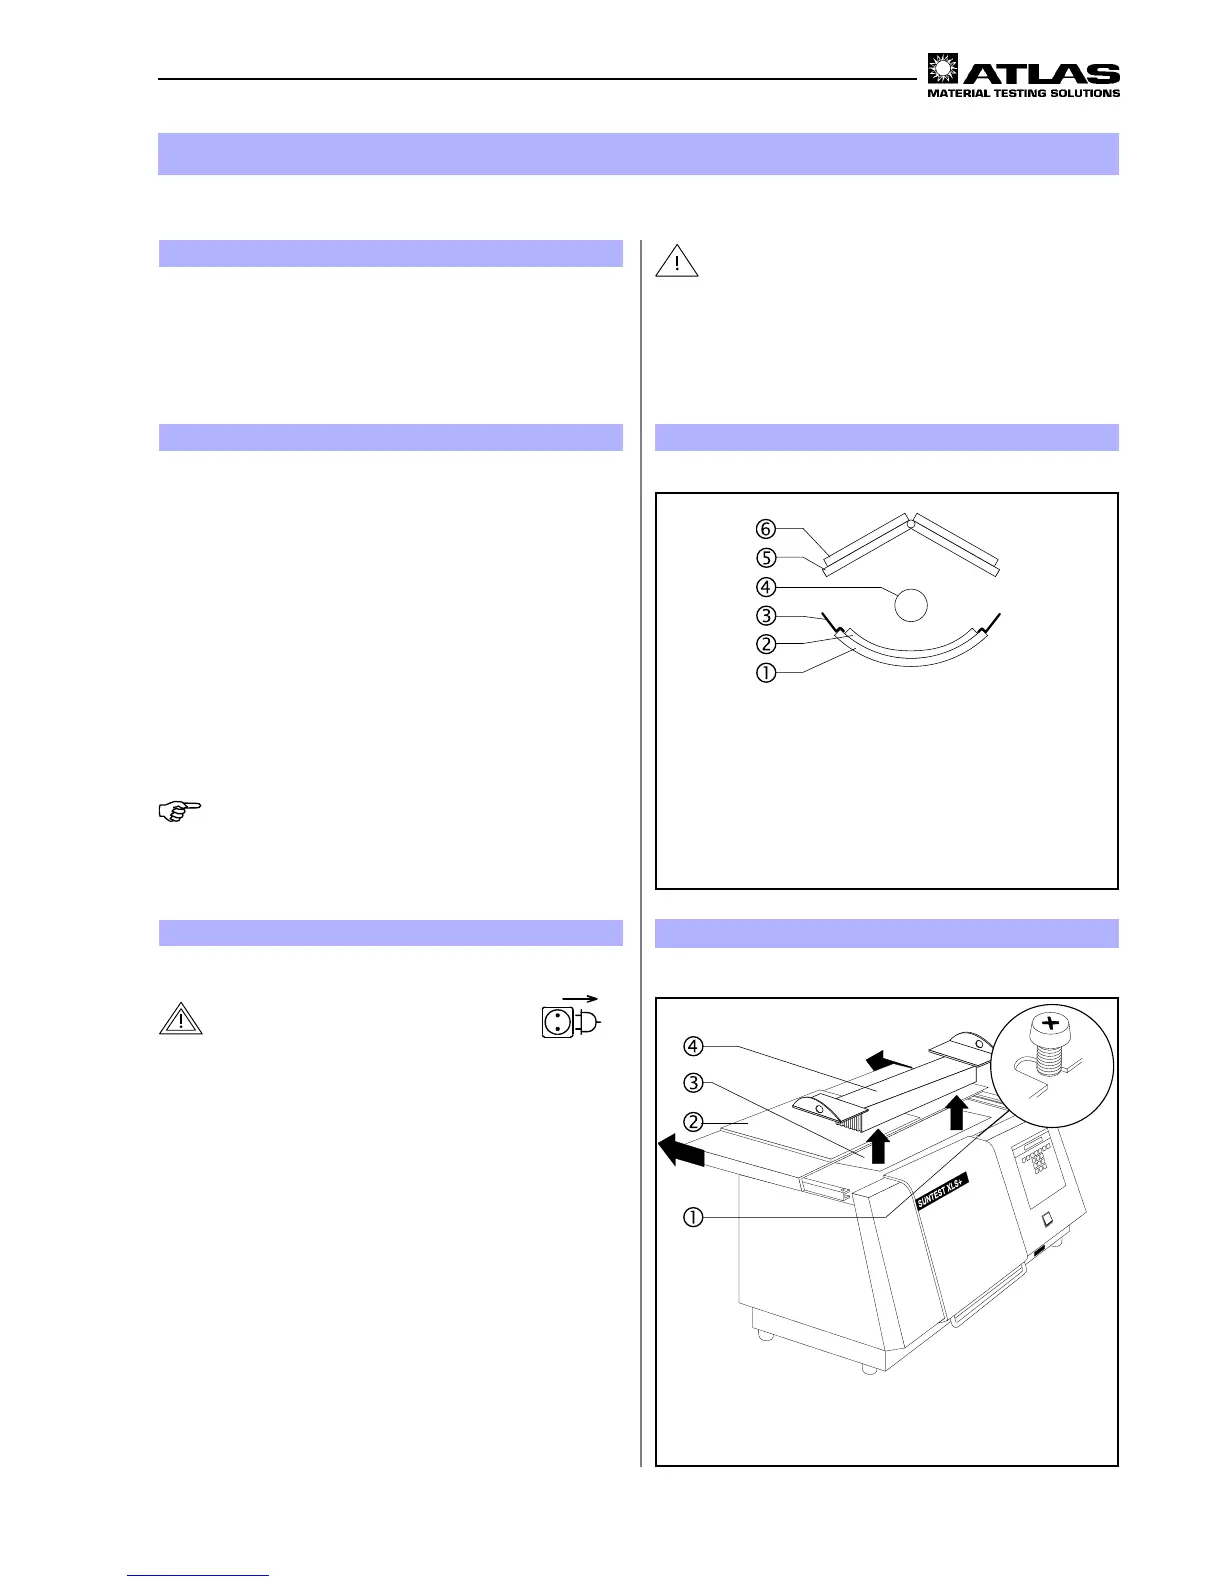
Optical filter "coated quartz dish"
"
Optional additional filter
#
Z-Rail
$
Xenon lamp
%
UV mirror (transparent)
&
Light mirror (mirror coating)
Figure 11
6.2.1 Components of the radiation system
The radiation system is packed separately. Please check
the components for damage before assembly. Damaged
parts should not be installed.
The radiation unit consists of:
!
Optical filter “coated quartz dish”
(optional: uncoated quartz dish),
"
Optional optical additional filters
(see chapter 5, “Accessories’),
#
the Z-Rail,
$
Xenon lamp,
%
UV mirror (transparent), pre-mounted, with
&
Light mirror (mirror coating).
NOTE!
When assembling the optical filter, put the quartz dish
(coated or optionally uncoated) and then the selected
optional additional filter in place.
6.2 Assemble the radiation system
Before the equipment can be commissioned, the sample
table and the radiation system must be assembled
CAUTION - Danger of burning:
For cooling the hot specimens and the specimen
supports, the fan continues to run even after the
equipment has been switched off.
Open the test chamber only after the fan is automati-
cally switched off.
6
Commissioning
Figure 12
6.2.2 Open the assembly compartment
WARNING - Pull out the power plug:
Coming in contact with live parts may result in a fatal
electrical shock.
When installing the radiation systems, set the ON (I)
/ OFF (O) switch to the “OFF (O)” position and pull
out the power plug. Secure the power plug from being
re-inserted.
1. Set the ON (I) / OFF (0) switch to the “OFF (0)” position.
Pull the plug out of the socket.
Secure it against re-insertion.
2. Loosen the safety screw
!
with a cross-slotted
screwdriver.
3. Push down the covering hood
"
towards the back till
the assembly compartment
#
is freely accessible
(arrow 1).
4. Remove the absorber
$
from the assembly compart-
ment
#
on the two retaining side plates and place
them on the housing cover (arrow 2). Do not dismant-
le the securing cable on the absorber.
1
2
1
2
!
Satety screw
"
Covering hood
#
Assembly compartment
$
Absorber

 Loading...