Sensors
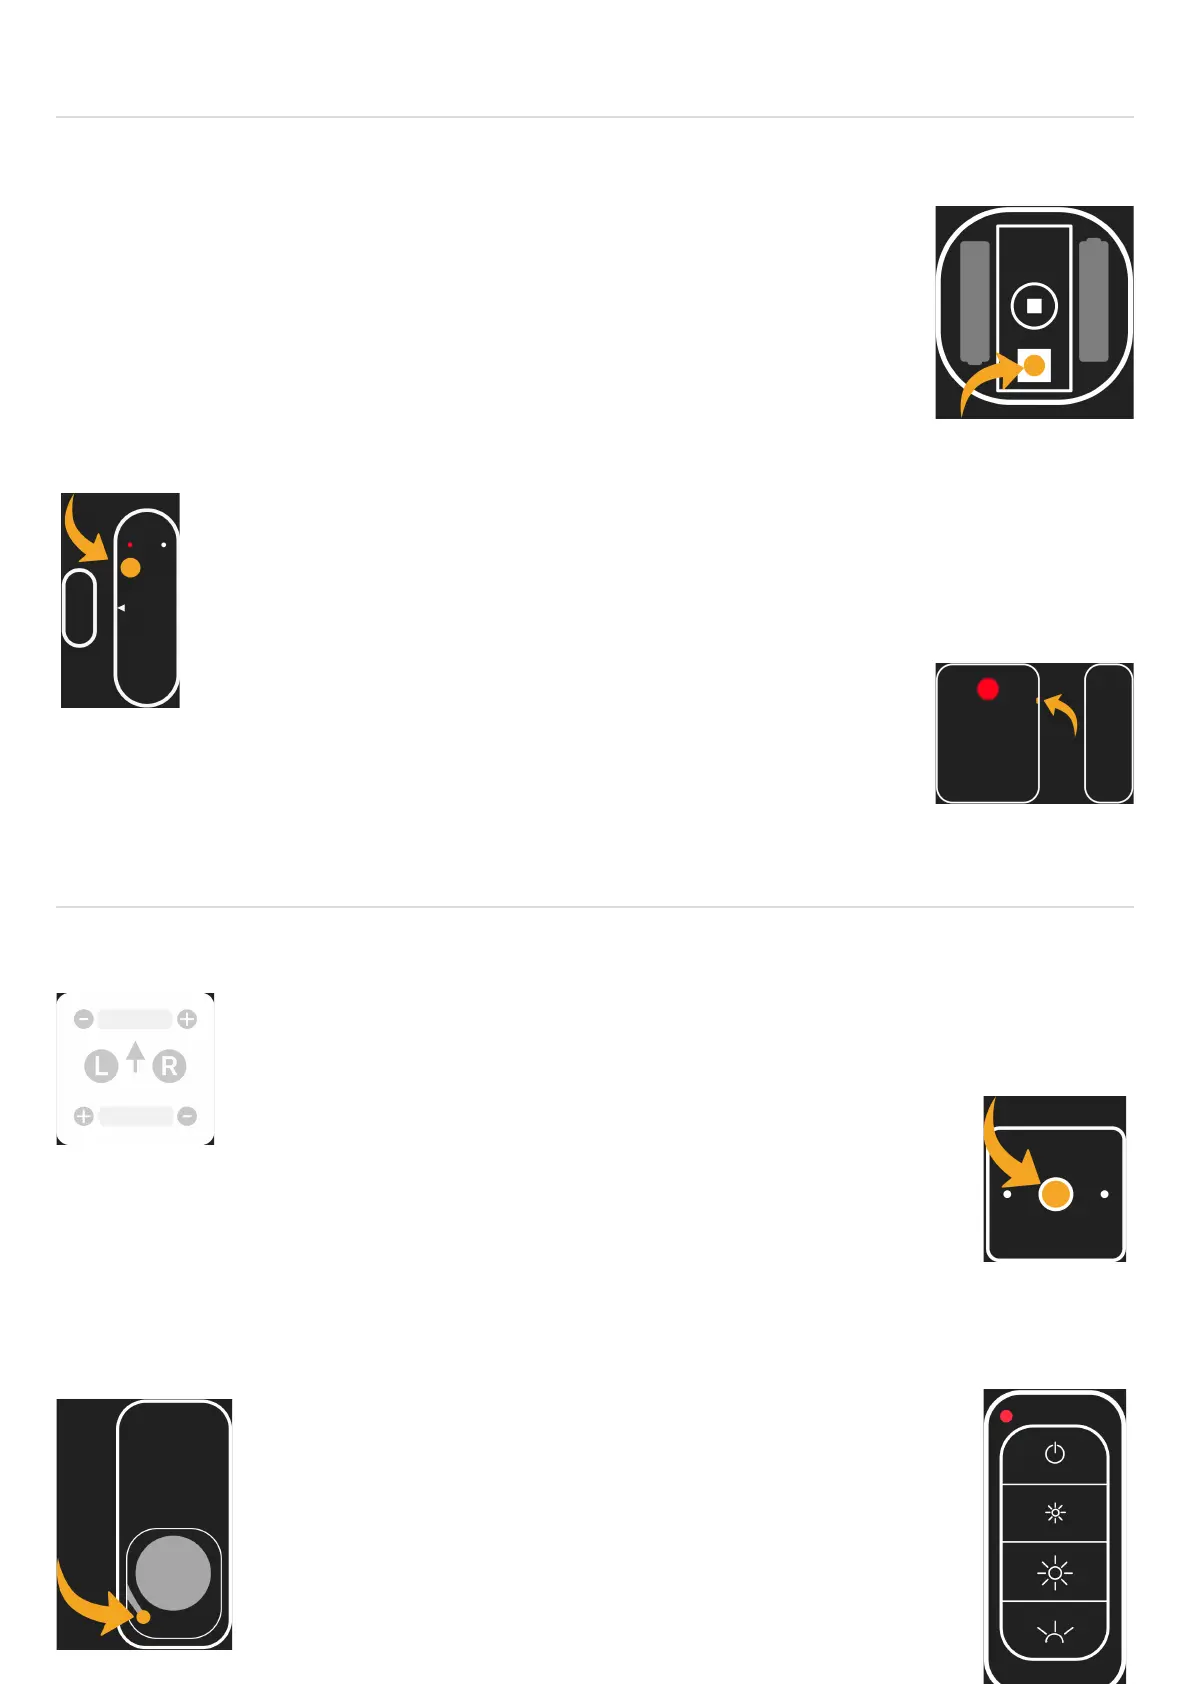
Motion Sensor
Pairing your Motion Sensor:
Press and hold down the power button for approximately 15 seconds. The red
light will begin flashing repeatedly every second.
(NB: The red light will flash once after 5 seconds, twice after 10 seconds and
then repeatedly after 15 seconds)
Door/Window Sensor
Pairing your Door / Window Sensor:
Press and hold down the power button for approximately 15 seconds. The red light will
begin flashing repeatedly every second.
(NB: The red light will flash once after 5 seconds, twice after 10 seconds and then
repeatedly after 15 seconds)
Pairing your V2 Door / Window Sensor:
Using a paper clip, or similar, press and hold down the reset button for
approximately 4 seconds. The red light will begin rapidly flashing.
Switches
Battery Dimmer
Pairing your Battery Dimmer:
Installation note: To make sure that your Battery Dimmer is installed correctly
remove the faceplate and check the arrow is pointing upwards.
Pairing Mode:
To put the Device into pairing mode hold the rotary knob for 6 seconds. When the
Dimmer has entered pairing mode the red LED will flash continuously. The red LED
will remain fully on for 4 seconds to signify it has successfully paired to your Hub.
Battery Remote
Pairing your Battery Remote:
Step 1: Remove the battery cover from the back of the Remote and
insert the battery.
Step 2: Press and hold the pairing buttons besides the battery for 3
seconds and then release.
Step 3: A periodic flash will confirm the Remote is searching for a
Hub. A constant red light indicates the Remote is successfully
paired.