10
GDO-12V1 Hiro
™
Installation Instructions
NOTE - For minimum sideroom installations, the door may have to
be taken down.
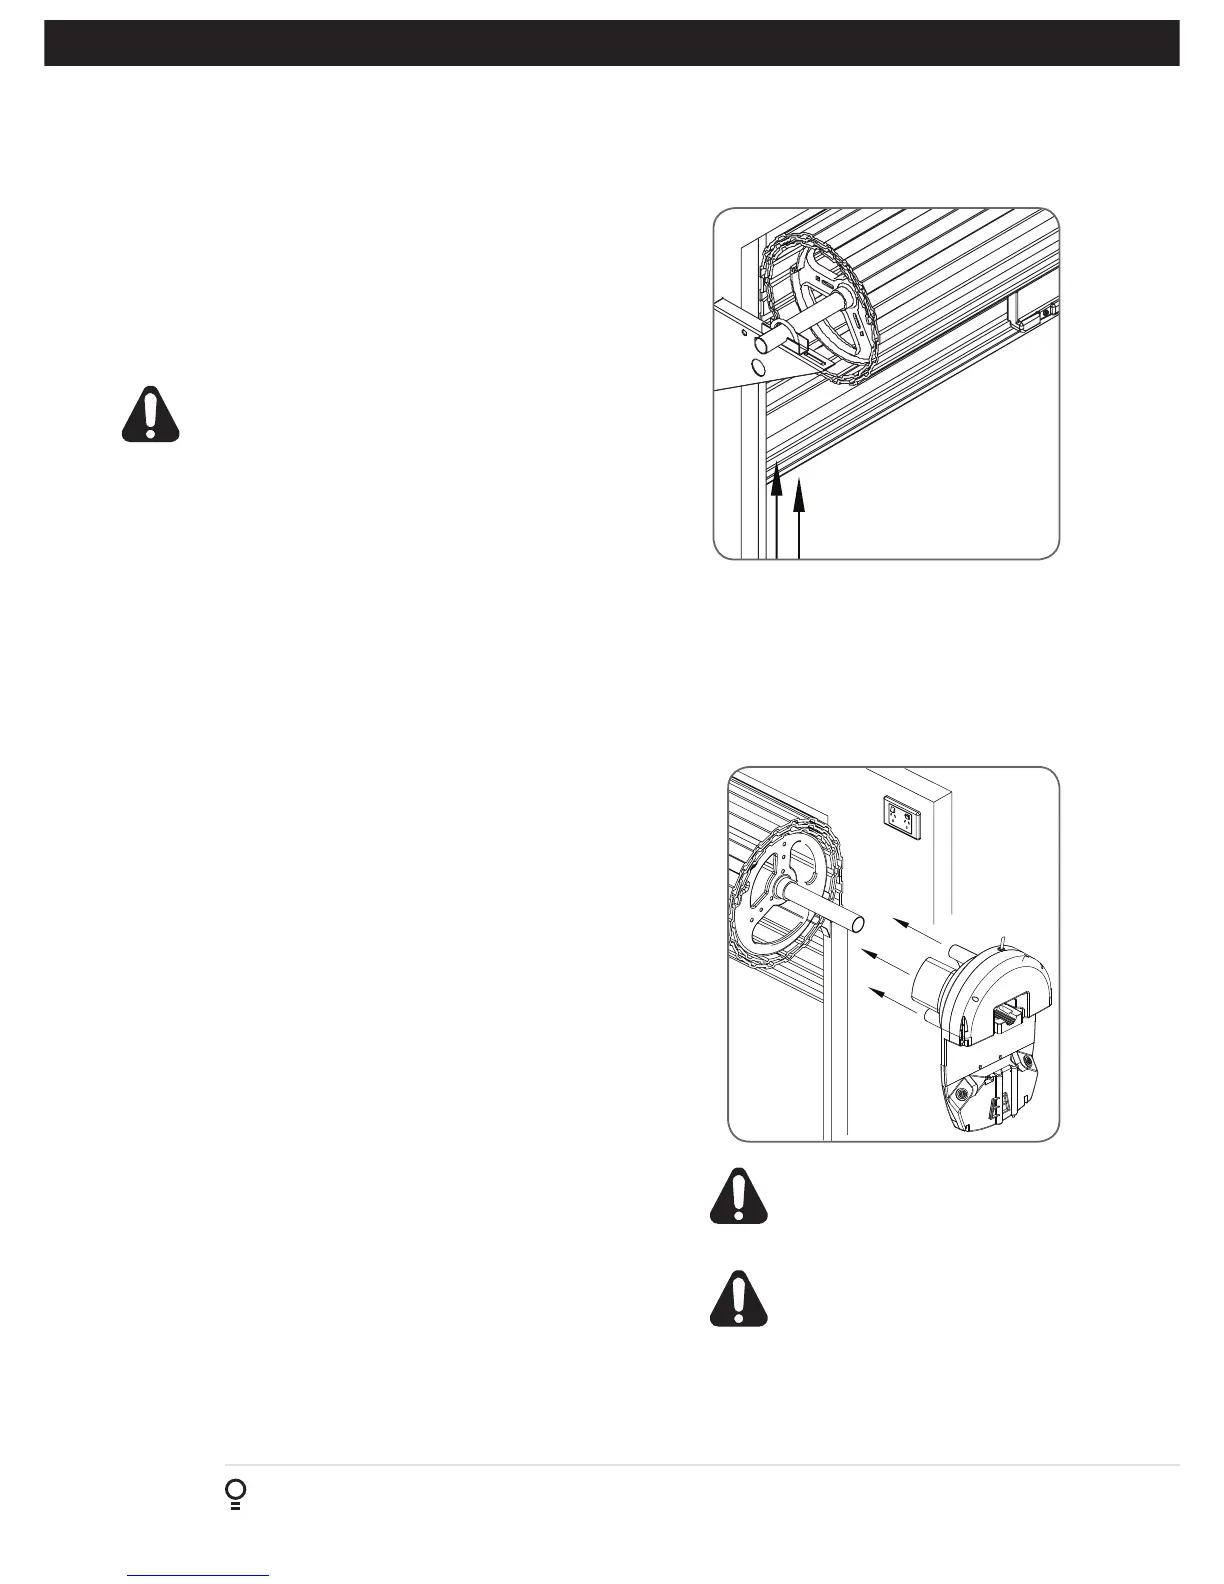
Fig 6.2
Tighten U bolts
6.2 Propping the Door
WARNING! The opener must not
be used with a door incorporating a
wicket door.
WARNING! The door and its springs
are under significant tension.
Adjustments should only be carried
out by experienced persons, as
this function can be dangerous if
not performed under strict safety
procedures.
Fig 6.3
6.3.1 Mounting The Opener
a. Check the drive gear rotates freely, by pulling the string handle
down (there will be a click) to disengage opener. Then move the
forks from side to side by hand
b. Slide the opener over the door axle and into the drum of the door
(Fig. 6.3).
c. Ensure the internal gear is pushed in as far as possible (without
interfering with the door curtain) and that the door drum’s wheel
spokes are completely between the opener’s drive forks.
d. Tighten the pipe clamp.
e. Remove the safety rope and door stand or prop.
f. Connect the power cort to a suitable powerpoint, but DO NOT
switch on.
g. Secure the power cord away from any moving object (e.g the door)
with the cable clip supplied.
h. With the opener still disengaged, pull the door up and down to
make sure it runs freely.
NOTE - If the manual release handle is more than 1.8 metres from floor
level when the opener is installed, extend the handle to a height less
than 1.8 metres.
6.2.1 Door prop preparation
a. At the end opposite to where the opener will be fitted, check that
the door axle is tightened to the bracket securely. (Fig. 6.2)
b. Open the door completely and tie safety ropes around the door
roll approximately 300 mm from each end. Do not tie the ropes too
tight as damage to the curtain may ensue.
c. At the end where the opener is to be fitted, support the door with
a safe and suitable lifter.
WARNING! Make sure the door is secure in the support,
is stable and will not move.
d. At the end where the opener will be fitted, use pen to mark the
position of the saddle on the door bracket and the position of the
door bracket on the wall to assist in reassembling.
e. Remove the bolts and saddle from the door bracket.
f. Raise the door off the door bracket and secure in the support.
6.3 Fitting the Opener
NOTE: Use torque of 60Nm
when tightening nuts.